Installation
6 3A7026A
Installation
1. Perform Pressure Relief Procedure.
2. Unplug unit and ensure the power switch
is set to off.
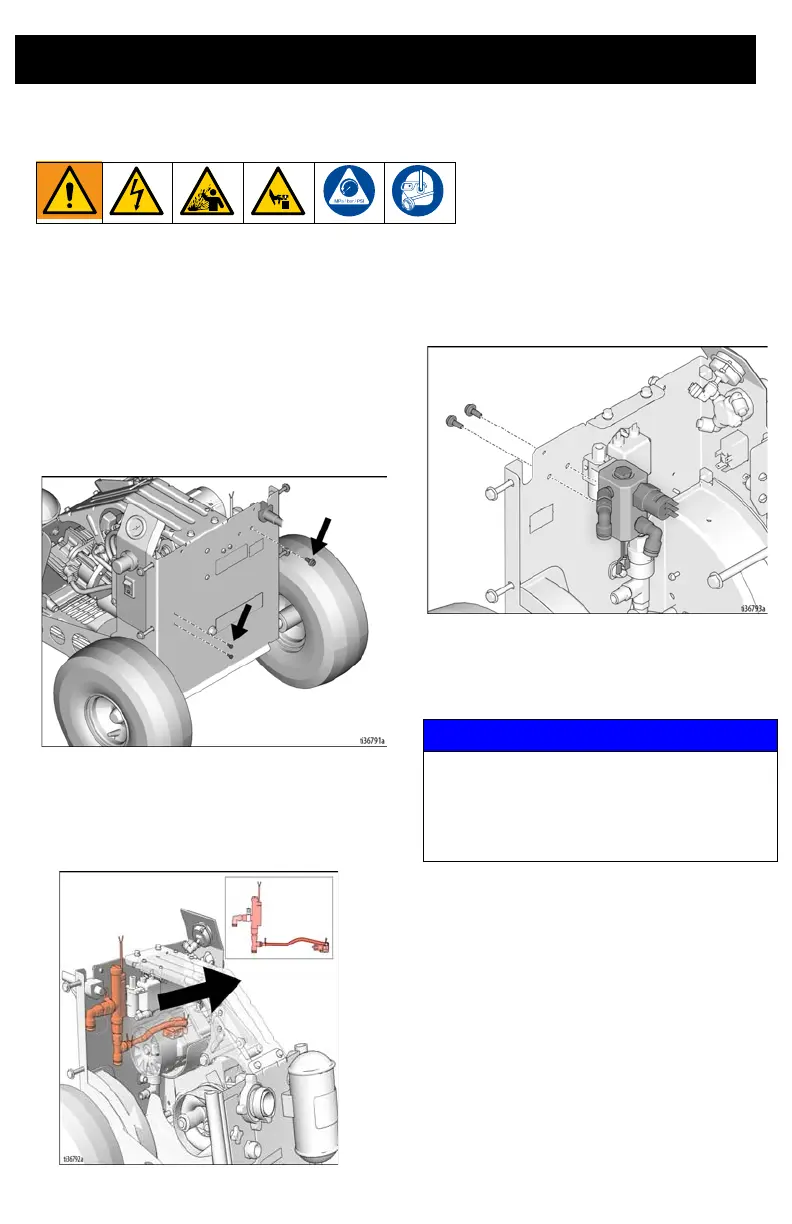
3. Remove the hopper, handle, toolbox,
and both shrouds to access the internal
components
4. Remove the screws and bolt shown
below from the back of the unit.
5. Unhook the flowswitch and pressure
switch from their wiring and tubing.
Remove them from the unit. Keep track
of the wires you disconnected, as they
will attach to the new assembly.
6. Fasten the new flowswitch assembly to
the unit using the provided bolts as
shown below. Torque each bolt to
27-32 in-lb (3.1-3.6 N•m)
7. Hook up the flowswitch assembly to the
air and electrical system, following the
provided diagrams.
8. Secure wiring away from moving parts
using the provided zip ties.
9. Assemble the shrouds, toolbox, handle,
and hopper back onto the unit..
NOTICE
For 230 volt units, you MUST install a diode
(PN 25N853) in line with the flowswitch, as
shown in the 230V Wiring Diagram.
Failure to install the diode could damage
the electrical system.