Press Scene 1 button . . .
Page 10
LUTRON
○○○○○○○○○○○○○○○○○
STEP 4: Setting Up System Communications
This section shows how to set up communications between
Wallstations and the Control Units they should operate.
Do not
set up communications . . .
Why
do you set up communications?
Assign each GRAFIK Eye Control Unit in your project a unique
system address (AI through A8).
To assign an address:
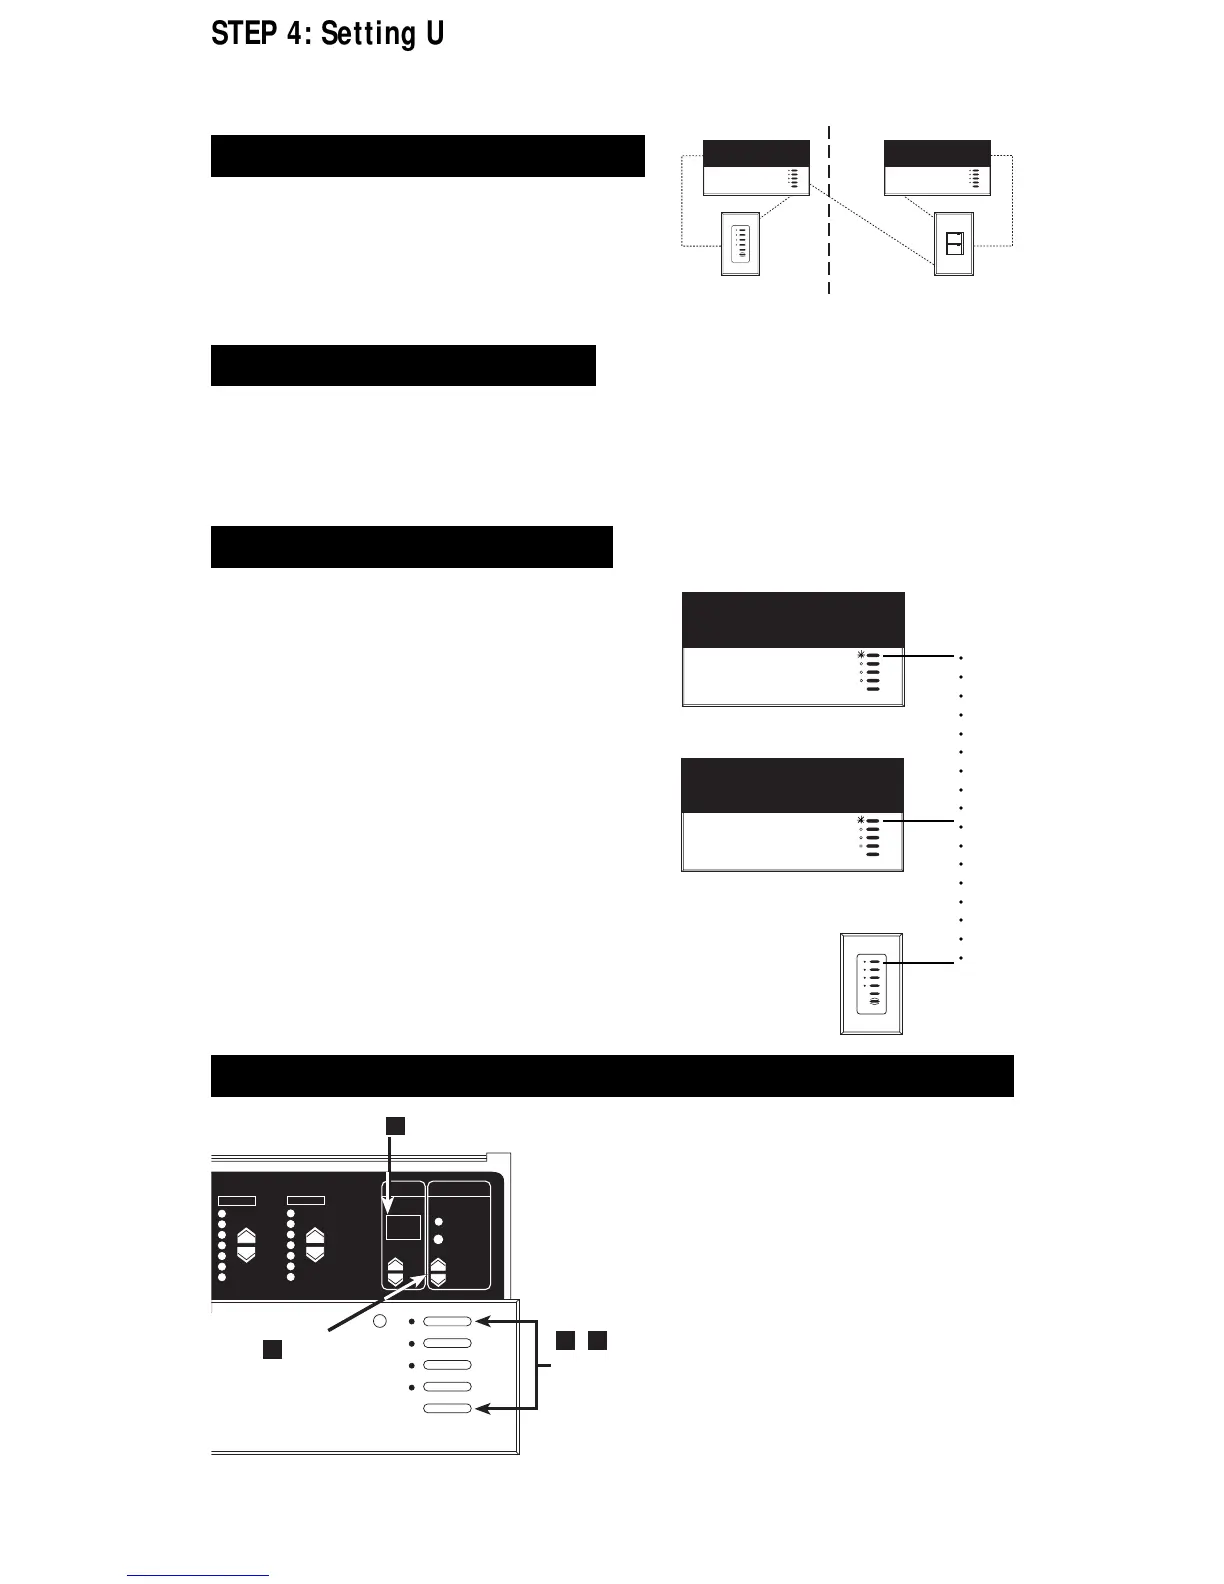
1. Enter setup mode. Press and hold Scene 1 and OFF
buttons about 3 seconds, until scene LEDs cycle.
2. Select A- (the address display). Press FADE
5 once, A-
appears in the FADE window.
3. Assign a unique address. Press MASTER
5 once, the
next “free” (unassigned) address automatically appears in
the FADE window. This will be the Control Unit’s address. (If
you are working on the first Control Unit in the project, AI
will appear.)
4. Exit setup mode. Press and hold Scene 1 and OFF
buttons about 3 seconds, until the LEDs stop cycling.
5. Repeat steps 1 through 4 for each GRAFIK Eye Control
Unit.
■ If you have only one Control Unit and . . .
— you have up to three of the following Wallstations: NTGRX-4S,
-4B, -4S-IR, -4S-DW, or EGRX-4S, -
4S-IR, in any combination.
Close this manual and relax — your project will work as specified
without any further wiring or setup!
Do
set up communications . . .
This diagram shows how Wallstations “talk” to Control Units
in a typical residential project:
■ The NTGRX-2B-SL in the hallway turns lights on and off
in the master bedroom and great room. To do this, the
-2B-SL “talks” to the Control Units in both of these
rooms.
■ The NTGRX-4S Scene Selection Control in the master
bedroom allows you to choose four different lighting
scenes. To do this, the -4S “talks” to the master bedroom’s
Control Unit (but
not
to the Great Room’s Control Unit).
First check Class 2/PELV wiring.
Before you set up communications, make sure your Class 2/PELV system
interconnections are working.
■ Select Scene 1 (press the top button) on one of the
Control Units.
■ Is Scene 1 selected on all other Control Units and NTGRX-4S
controls?
YES: Class 2/PELV wiring is OK. Proceed.
NO: Class 2/PELV wiring has a miswire. Check for loose
connections, shorted or crossed links. Refer to Appendix A
for details on Class 2/PELV wiring.
OR
GRAFIK Eye Control Unit has been addressed to other than
A- (factory default). See below for more information on
addressing Control Units.
Assign addresses to GRAFIK Eye Control Units
FADE TEMPORARY
MASTER
ZONES
ZONE 5 ZONE 6
M S
A
2
3
1
4
,
P
SELECT A-
ASSIGN A
UNIQUE
ADDRESS
ENTER (EXIT)
SETUP MODE
. . . all other Scene 1 LEDs light!
MASTER BEDROOM GREAT ROOM
HALLWAY
-4S -2B-SL
■ If you have more than one Control Unit or . . .
■ You have Wallstations other than the NTGRX-4S, -4B, -4S-IR, -
4S-DW, or EGRX-4S, -4S-IR.
LUTRON LUTRON
LUTRON
IMPORTANT!

 Loading...