Page 8
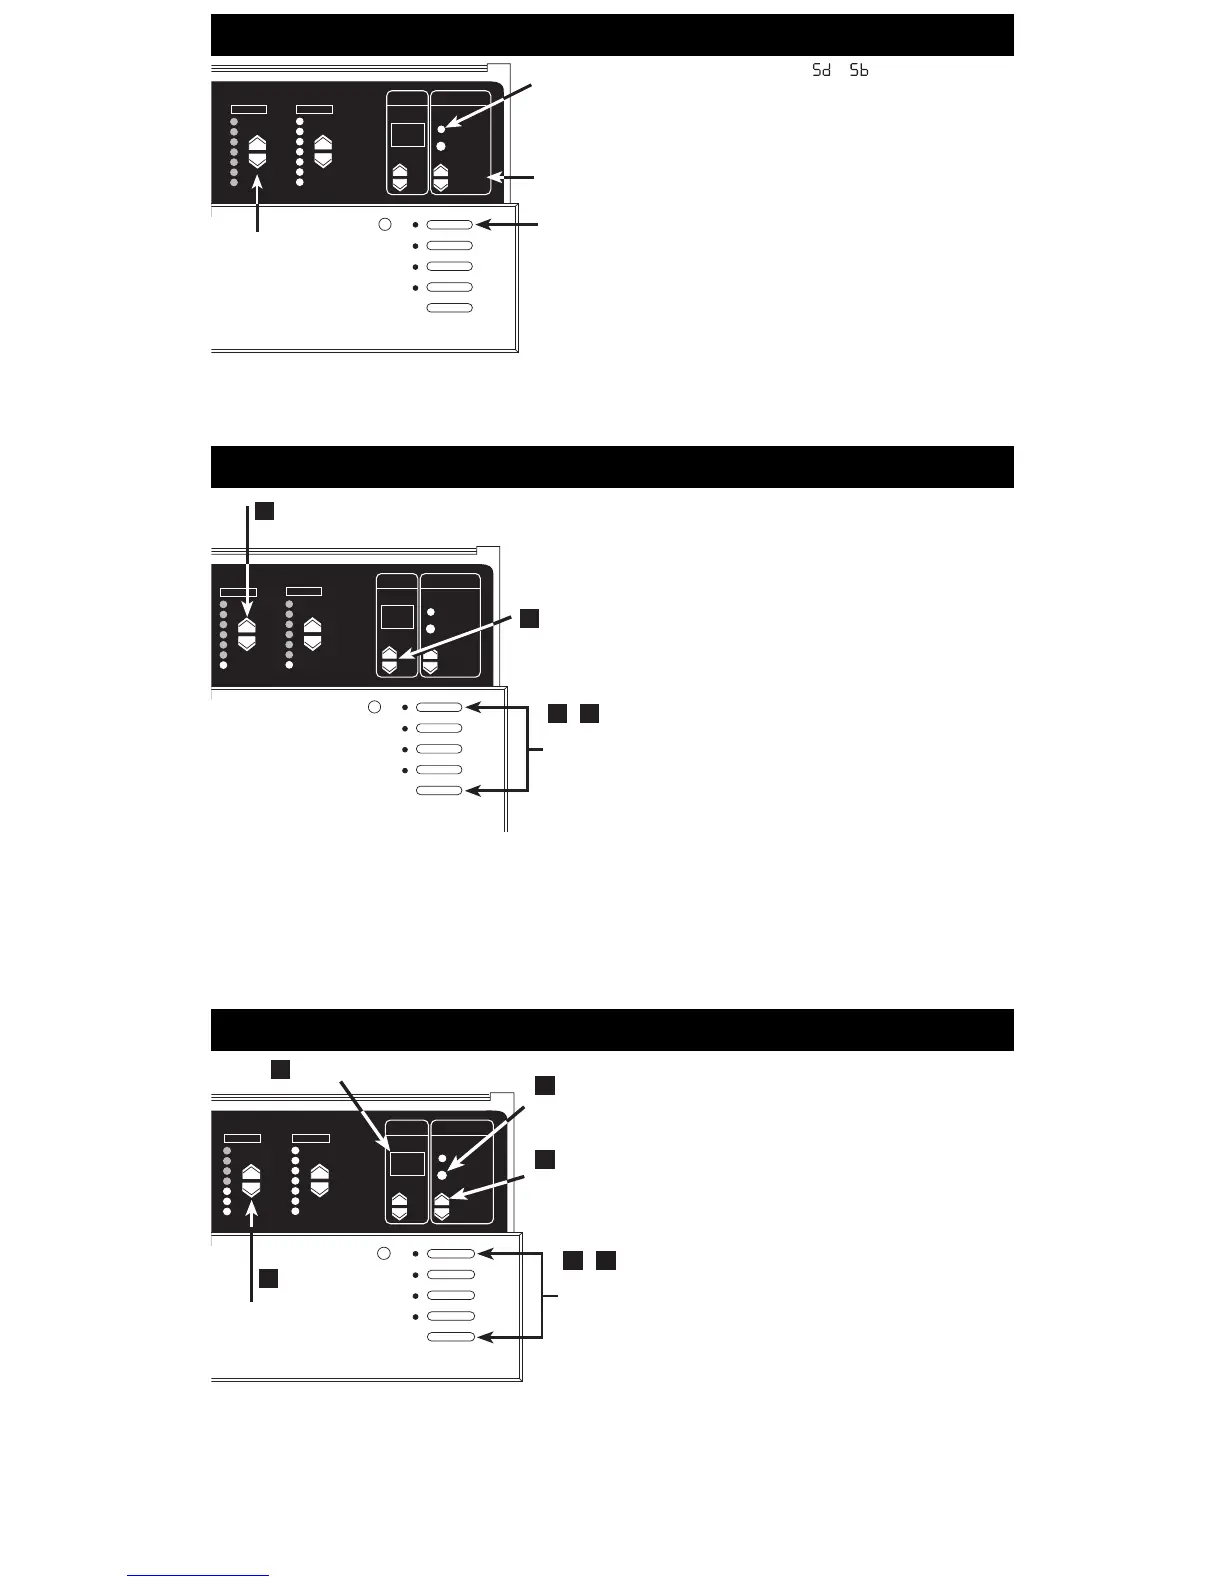
How to adjust light levels temporarily
How to set low-end trim—OPTIONAL
If necessary, adjust the low-end trim to achieve uniform low-
intensity dimming and to eliminate flicker (especially with neon/
cold-cathode and fluorescent loads).
1. Enter setup mode. Press and hold Scene 1 and OFF
buttons for about 3 seconds, until scene LEDs start cycling.
2. Select LE (for low end) by pressing FADE
6 once. All
zones go to their lowest possible dim levels and only their
bottom LED is lit*.
3. Adjust zone’s lights for low-end trim. Use ZONE 6
and 5 to dim the zone’s lights as much as possible without
causing flicker. This setting becomes the “optimum lowest
level” to which the zone will dim before going off. Repeat this
process for any other zones that require low-end trim.
4. Exit setup mode. Press and hold Scene 1 and OFF buttons
until scene LEDs stop cycling.
Note: The ZONE LED bargraph does not change while you
make low-end trim adjustments. The bargraph remains
set to its lowest level in this mode.
Advanced Scene Programming Options—OPTIONAL
Control Unit must be in either or mode. See page 9 for
more information regarding Save Options.
To adjust an entire scene:
Press the appropriate scene button.
Press MASTER
5 or 6 to raise or lower the intensity of all
zones.
To adjust a zone:
If the TEMPORARY LED is not already lit, press the
TEMPORARY ZONES button. The TEMPORARY LED above the
TEMPORARY ZONES button will light.
Press ZONE
5 or 6 to adjust any zone’s intensity.
Note: These adjustments are temporary and remain only until a
new scene selection occurs—the GRAFIK Eye Control
Unit does not store them as permanent scene settings.
* Except zones set for non-dim. For these, all zone LEDs are lit, and you
cannot adjust the low-end trim.
ZONE 1 ZONE 2
M S
Sc
2
3
4
1
FADE TEMPORARY
MASTER
ZONES
5
6
,
SELECT FLASHING Sc/I
SET SCENE’S
FADE-IN TIME
SELECT
SCENE
ENTER (EXIT)
SETUP MODE
ADJUST ZONE
INTENSITY
FADE TEMPORARY
MASTER
ZONES
ZONE 5 ZONE 6
M S
LE
3
2
1
4
,
ADJUST ZONE’S LIGHT FOR LOW-END TRIM
SELECT LE
ENTER (EXIT)
SETUP MODE
FADE TEMPORARY
MASTER
ZONES
ZONE 5 ZONE 6
M S
TEMPORARY
LED
MASTER
RAISE/
LOWER
SCENE
BUTTONS
ZONE INTENSITY
RAISE/LOWER
BUTTONS
Programming Scenes 5 through 16.
1. Enter setup mode. Press and hold Scene 1 and OFF
buttons about 3 seconds until scene LEDs start cycling.
2. Select Sc (the code for scene setup) by pressing FADE
twice. Sc and I (for Scene 1) will alternately flash in the FADE
window.
3. Select scene. Press MASTER
5 or 6 to select the
scene to be programmed.
4. Adjust ZONE-intensity.
3100 - Press ZONE
5 or 6 to adjust zone’s
intensity.
3500 - Press ZONE
5 or 6 to display exact
percentage light output. Press again to adjust
light levels in 1% increments.
5. Set scene’s FADE-in time. Press and hold the
TEMPORARY ZONES button. The current FADE-in time is
displayed. Adjust using the FADE
5 and 6 while still
holding the TEMPORARY ZONES button.
6. Exit setup mode. Press and hold Scene 1 and OFF buttons
until LEDs stop cycling.

 Loading...