STEP 3: Setting Up GRAFIK Eye Control Units
Page 6
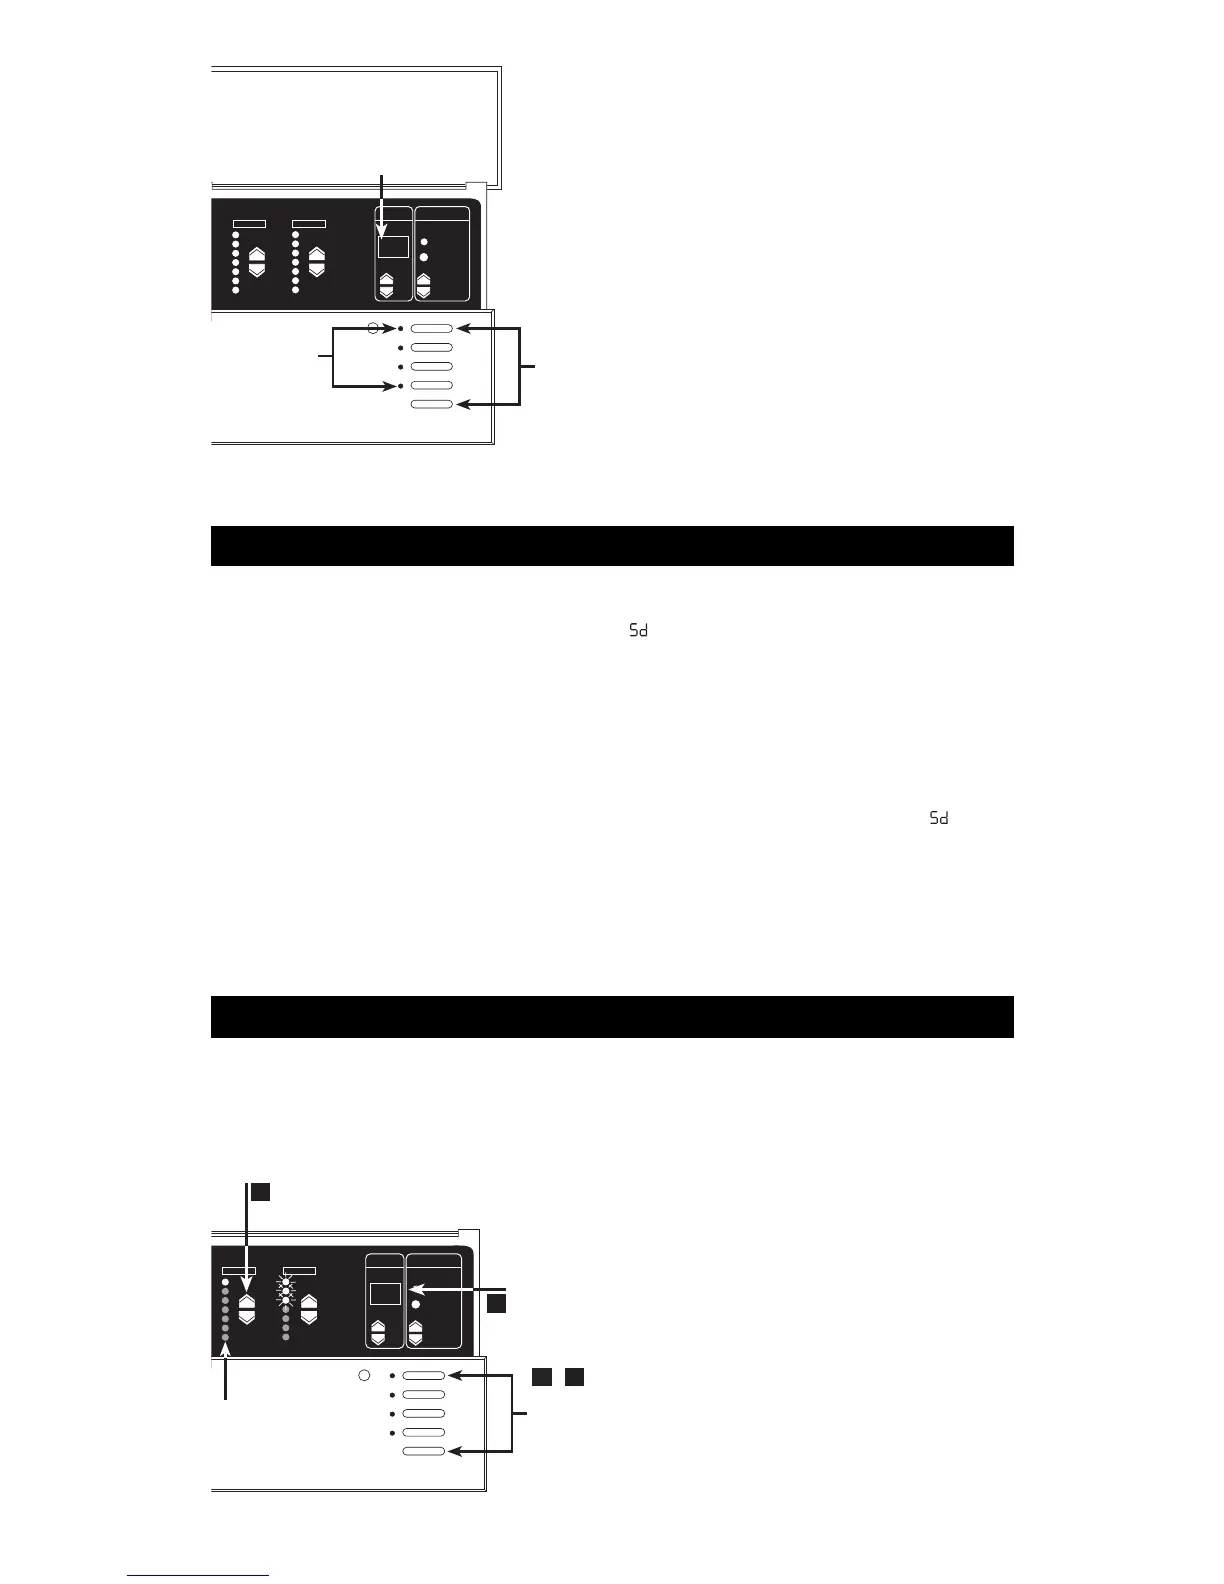
To enter setup mode: Press and hold the Scene 1 and OFF
button for about three seconds, until the scene LEDs start cycling.
To exit setup mode: Exit setup mode the same way you entered
it. Press and hold the Scene 1 and OFF button for about 3
seconds, until scene LEDs stop cycling. The Control Unit is out of
setup mode; back in normal operating mode.
In setup mode, the FADE window displays the setup codes. To
scroll through the menu of setup codes, press the FADE
5 or
5 buttons.
Identifying the load type for each zone
1. Enter setup mode. Press and hold Scene 1 and OFF buttons for
about 3 seconds, until scene LEDs cycle.
2. Check for LS in FADE window. (LS is the first code to appear
when you enter setup mode. For the LS mode, ZONE LEDs turn on
from top to bottom.)
3. Set each zone’s load type. Press ZONE
5 and 5 until
ZONE LEDs match the load type connected to each zone. Refer to
chart on next page.
4. Exit setup mode. Press and hold Scene 1 and OFF buttons for
about 3 seconds, until scene LEDs stop cycling.
In the 6-Zone Control Unit shown here:
■ Zone 5 is set for incandescent or magnetic low-voltage.
■ Zone 6 is set for neon/cold cathode.
This section shows how to set up a GRAFIK Eye Control Unit,
including:
■ Identifying the load type for each zone of lighting
connected to the Control Unit.
■ Setting up the scenes to create the desired lighting
effects, and make sure the Control Unit is working
correctly.
To set up the GRAFIK Eye Control Unit, enter the “setup
mode” and use the menu of setup codes that appear in the
FADE window. Step-by-step instructions for using the setup
codes are on the following pages.
How to enter and exit setup mode
The following is a list of the setup codes and their descriptions:
Code Stands for Description
Save Options Select from several save options (p.
9)
Sc Scene Set unaffected zones and set any of
the 16 scenes (p. 9)
A- Address Identify Control Units when setting
up system communications (p. 10)
LS* Load Select Identify load type (p. 7)
LE Low End Set low end trim (p. 8)
*When you enter setup mode, this code appears first.
■ If you press FADE 5, you will see A-, Sc, then .
■ If you press FADE 6, you will see LE.
Lutron ships GRAFIK Eye Control Units with all zones set for
incandescent/halogen (tungsten) lighting. If your project has non-
incandescent loads, change all non-incandescent zones to the
correct load type.
FADE TEMPORARY
MASTER
ZONES
ZONE 5 ZONE 6
M S
LS
3
2
1 4
,
SET EACH ZONE’S LOAD TYPE
CHECK FOR LS
ENTER (EXIT)
SETUP MODE
ZONE LEDs
FADE TEMPORARY
MASTER
ZONES
ZONE 5 ZONE 6
M S
LS
TO ENTER (EXIT)
SETUP MODE:
PRESS AND HOLD FOR
ABOUT 3 SECONDS
UNTIL LEDs CYCLE
(STOP CYCLING)
LEDs
SCROLL THROUGH SETUP CODES

 Loading...