54
WASHING MACHINE Series GWH / GWM / GWN
INSTALLATION, CONNECTIONS, AND ADJUSTMENTS
Step Action
1
Connect to the clamp on the side of the disconnector switch protected by the rear cover of the electrical panel.
Note: Use the cable gland mounted on the rear panel.
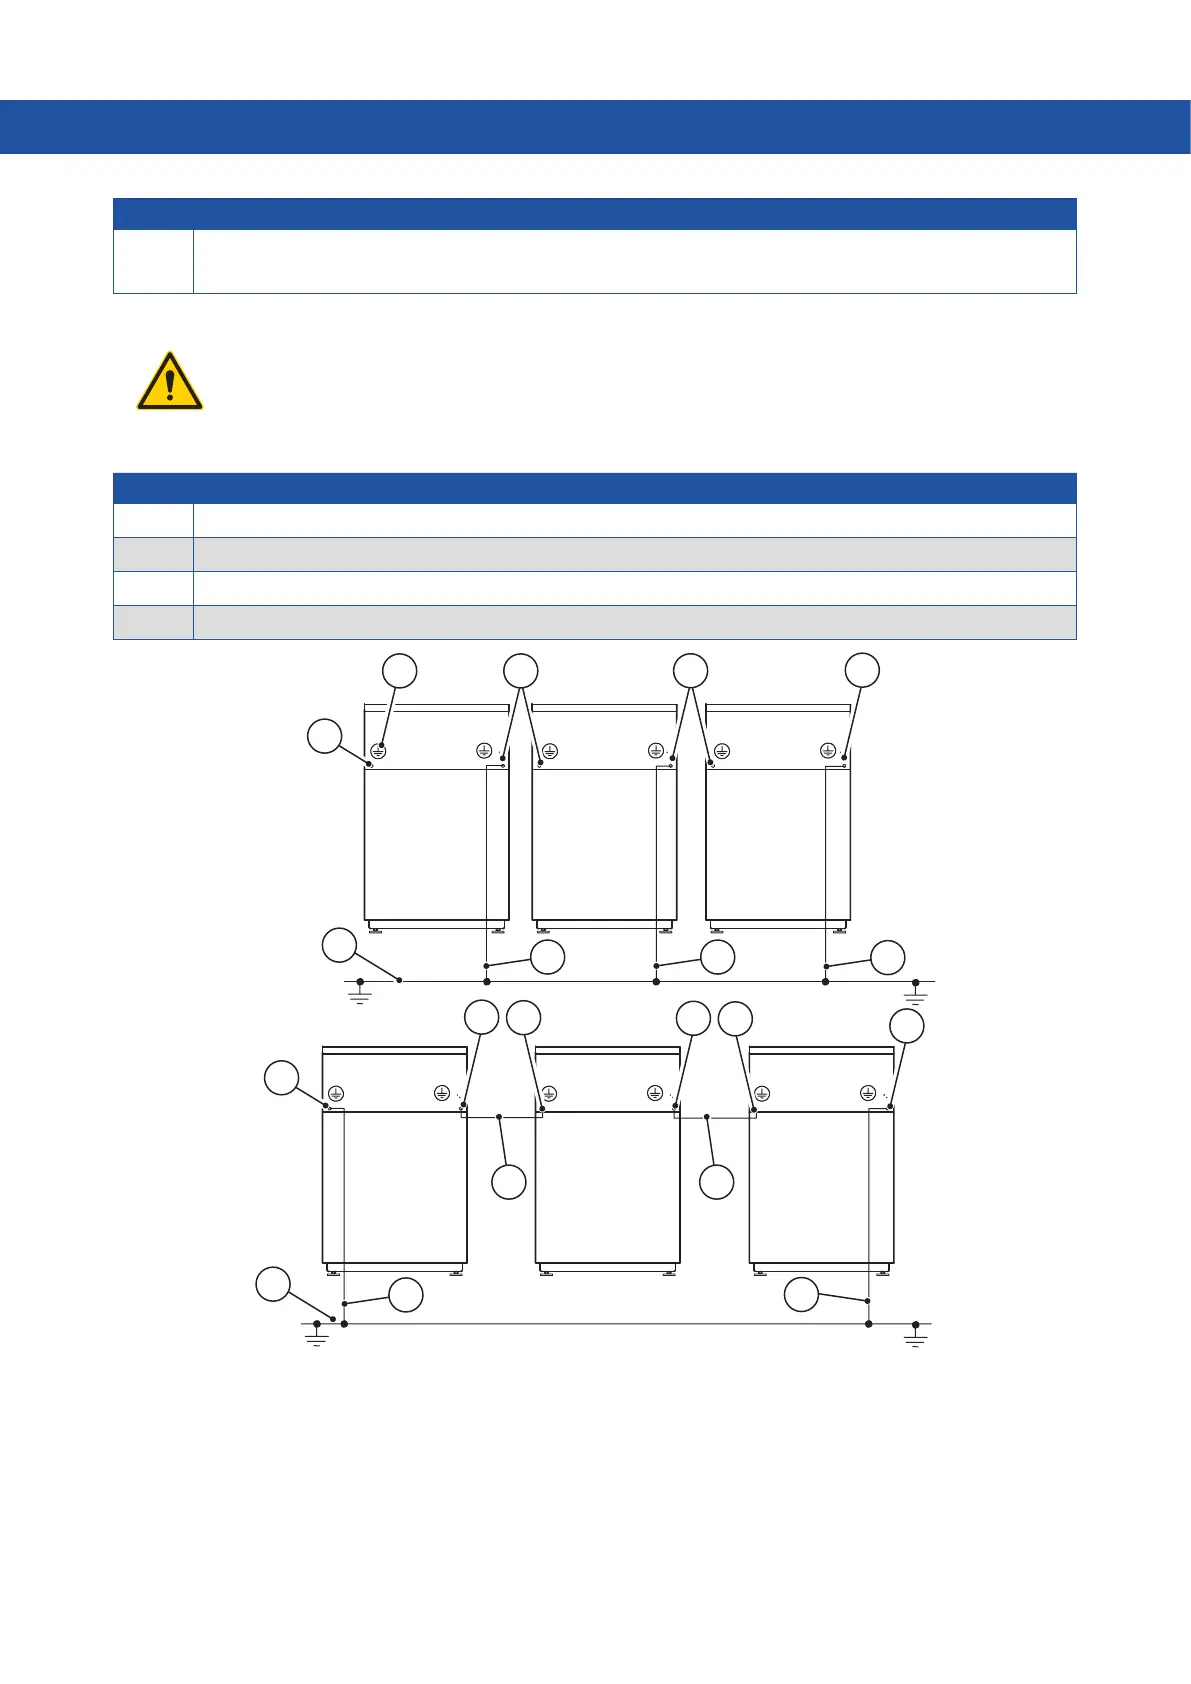
WARNING!
Should multiple appliances be installed in the same room, ensure that a protective equipotential
connection is made between all appliances, using the outer protective clamp on the rear of the
washing machine. Then connect to the earthing connection through an earthing protective circuit
alternative to the earth wire provided with the socket.
Pos. Element
1 Laundry protective earthing
2 Washing machine outer protective clamp
3 Protective conductor - connection of the machines
4 Equipotential earthing symbol
1
1
2
2
2
2
2
2
2
2
2
2
3 3
3
3
3 3
3
4
If in the installation room multiple single-phase appliances are parallelly connected, these appliances must be connected as
shown in the picture below.
The frequency inverter and motor power supply phase, which is connected to the clamp inside the appliance, must be alternately
connected to the mains L1 phase for the first appliance, and to the L2 second phase for the second appliance, etc. The fourth appliance
must be connected to the L1 first phase. This ensures a uniform load of the electrical mains.
 Loading...