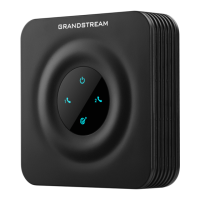
Configuring The HT802 Through Voice Prompts
As mentioned previously, The HT802 has a built-in voice prompt menu for simple device configuration.
Please refer to “Understanding HT802 Interactive Voice Prompt Response Menu” for more information
about IVR and how to access its menu.
DHCP MODE
Select voice menu option 01 to allow the HT802 to use DHCP.
STATIC IP MODE
Select voice menu option 01 to allow the HT802 to enable the STATIC IP mode, then use option 02, 03,
04, 05 to set up IP address, Subnet Mask, Gateway and DNS server respectively.
FIRMWARE SERVER IP ADDRESS
Select voice menu option 13 to configure the IP address of the firmware server.
CONFIGURATION SERVER IP ADDRESS
Select voice menu option 14 to configure the IP address of the configuration server.
UPGRADE PROTOCOL
Select the menu option 15 to choose firmware and configuration upgrade protocol between TFTP, HTTP
and HTTPS.
FIRMWARE UPGRADE MODE
Select voice menu option 17 to choose firmware upgrade mode among the following three options:
“Always check, check when pre/suffix changes, and never upgrade”.
Register a SIP Account
The HT802 supports 2 FXS ports which can be configured with 2 SIP accounts. Please refer to the following
steps in order to register your accounts via web user interface.
1. Access your HT802 web UI by entering its IP address in your favorite browser.
2. Enter your admin password (default: admin) and press Login to access your settings.
3. Go to FXS Port (1 or 2) pages.
4. In FXS Port tab, set the following:
a. Account Active to Yes.
b. Primary SIP Server field with your SIP server IP address or FQDN.
c. Failover SIP Server with your Failover SIP Server IP address or FQDN. Leave empty if not
available.
d. Prefer Primary SIP Server to No or Yes depending on your configuration. Set to No if no Failover
SIP Server is defined. If “Yes”, account will register to Primary SIP Server when failover
registration expires.
e. Outbound Proxy: Set your Outbound Proxy IP Address or FQDN. Leave empty if not available.

 Loading...


