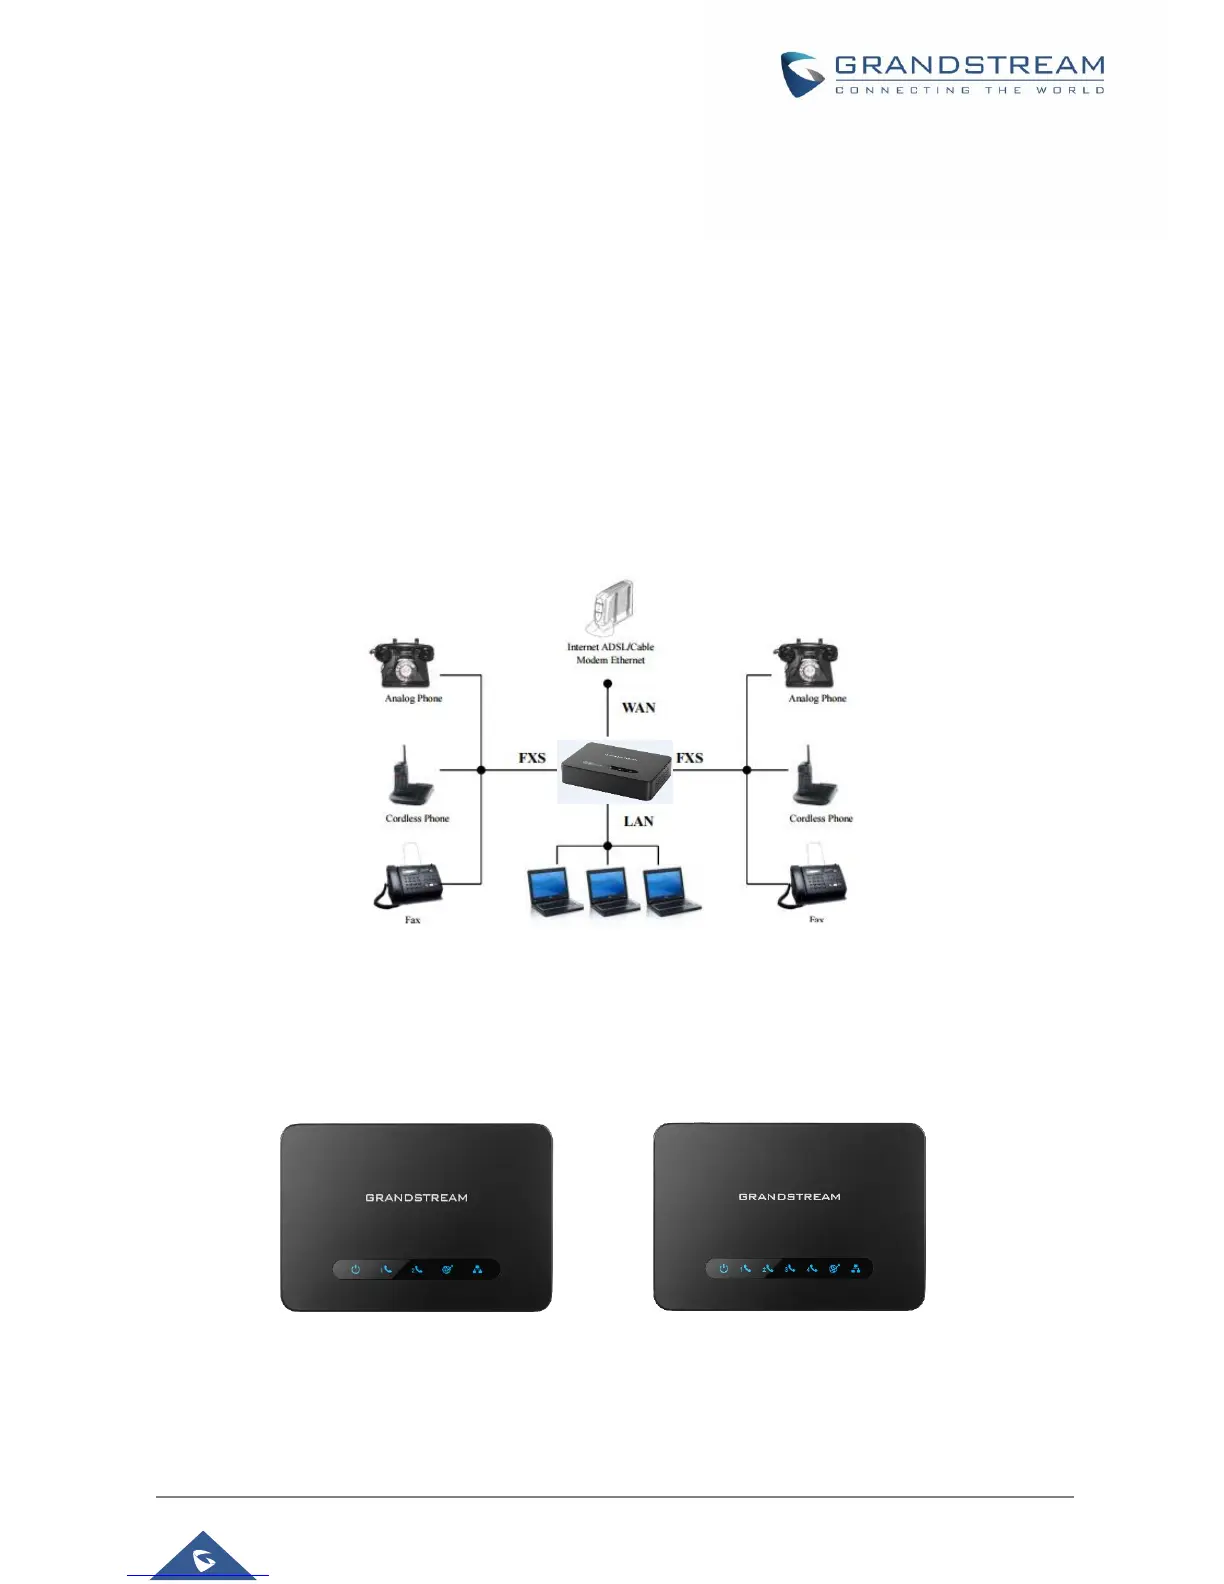
Scenario 2: Connecting the HT812/HT814 using LAN Port
When connecting the HT812/HT814 using the LAN port, they will act as a router and DHCP serving
addresses, the devices connected with HT812/HT814 LAN will pull DHCP addresses from your
HT812/HT814.
1. Insert a standard RJ11 telephone cable into the p hone ports and connect the other end of the
telephone cable to a standard touch-tone analog telephone.
2. Connect a computer or switch to the LAN port of the HT812/HT814 using an Ethernet Cable.
3. Insert the power adapter into the HT812/HT814 and connect it to a wall outlet and make sure to
respect the technical specifications of the power adapter used.
4. Power, LAN and Phone LEDs will be solidly lit when the HT812/HT814 is ready for use.
Note: Please make sure to enable NAT Router under Web GUI -> Basic Settings -> Device Mode.
Figure 5: Connecting the HT812/HT814
HT812/HT814 LEDs Pattern
There are four (4) LED types that help you manage the status of your HT812/HT814.
 Loading...