4. Data Replay : How to Replay Recorded Data
Once the recording is complete, the recorded file is saved in the “TEST” folder of
the internal memory (SD1) set in “2. Setting” .
File name is automatically assigned, in the GBD-format (Year,Month,Day –
Time.GBD).
Time indicates the start time for the recorded data.
Example:150525-080254.GBD(following screen)
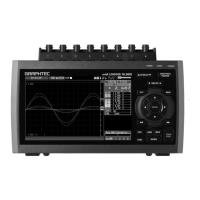
GL240 has many additional features. Please refer to the following pages for details.
1. Selecting a file to replay
(1) Push the [REVIEW] key.
(2) Select data to be reviewed, move the cursor to the [OK] button and
[ENTER] key.
(1) Scroll bar
(2) Level display area
(3) Quick settings
(4) Time display
(5) Cursor
2. Replay screen
Push the [QUIT] key to end the data replay operation.
A confirmation message is displayed. Push the [ENTER] key.
Data replay ends, and the GL240 goes into the Free Running mode.
15
5. Cursor
2. Level display area
3. Quick settings
4. Time display
1.Scroll bar
: Displays the position within the whole data and the
display width.
: Displays the levels of A and B cursors and the
difference between the A and B values.
: Use the keys to search the previous or next
level. (Note: Make search settings in the menu.)
: Displays the sampling interval and the time of the
cursor.
: Displays the cursor. (Note: Push the CURSOR key
to switch between A and B cursors.)
Move the cursor using the keys or the
keys.
Desired level values and time can be checked by
moving the cursor.