GB - 30
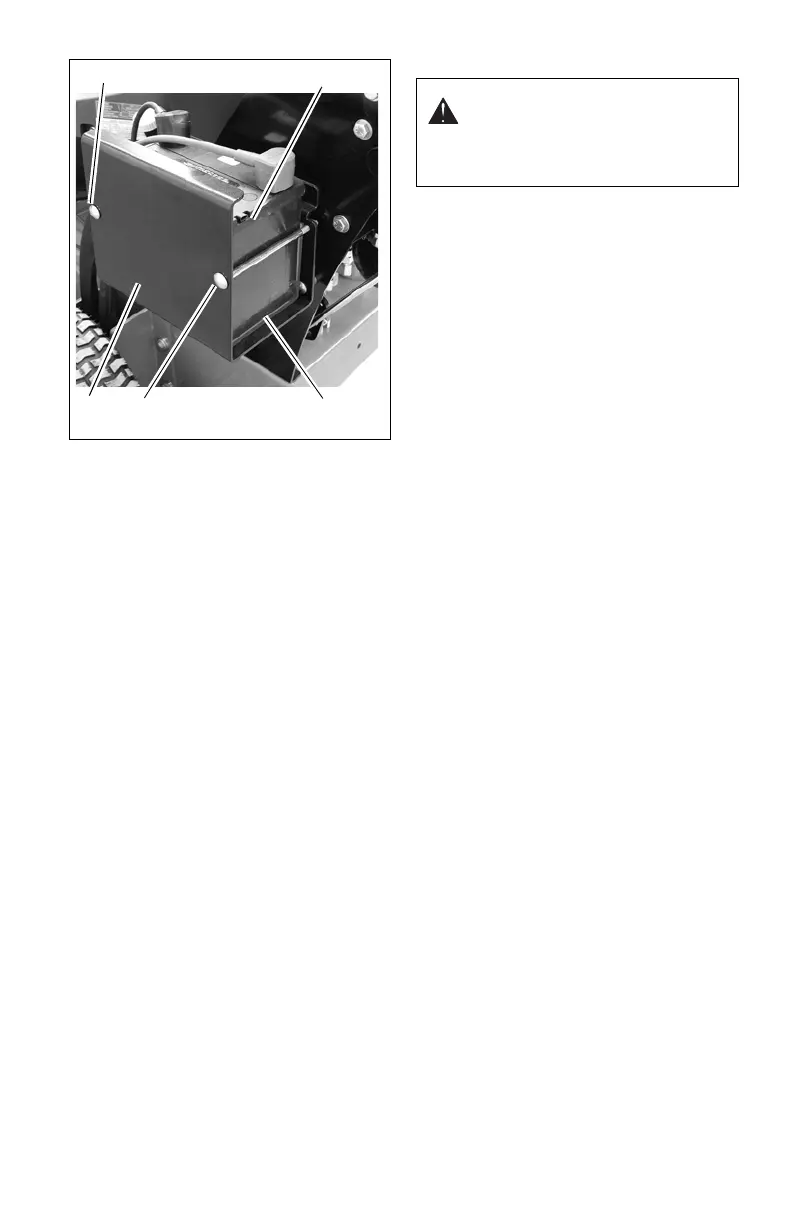
Installing Battery
1. Place isolator pad (I) in battery tray (H).
Ensure that isolator pad is on the bottom
and sides of battery tray.
2. Install battery (G) in battery tray (H) with
positive terminal in rear.
3. Install rear long carriage bolt (F) and nut.
Do not overtighten.
4. Tighten nut on long carriage bolt (E) to
secure battery (G) in battery tray (H). Do
not overtighten.
5. Apply dielectric grease to terminals to
prevent corrosion.
6. Connect the positive (+) battery cable
(D) and install cover (C).
7. Connect negative (-) battery cable (B)
and install cover (A).
Cleaning Battery and Terminals
1. Park unit safely. See Using the Parking
Brake on page 13.
2. Disconnect and remove battery.
3. Wash battery with solution of four
tablespoons of baking soda to one
gallon of water. Be careful not to get the
soda solution into the cells.
4. Rinse the battery with plain water and
dry.
5. Clean terminals and battery cable ends
with wire brush until bright.
6. Apply general purpose grease or
silicone spray to terminal to prevent
corrosion.
7. Install battery.
Charging the Battery
Follow First Aid directions for contact with
battery fluid.
• External Contact: Flush with water.
• Eyes: Flush with water for at least 15
minutes and get medical attention
immediately!
• Internal Contact: Drink large
quantities of water. Follow with Milk of
Magnesia, beaten egg or vegetable
oil. Get medical attention immediately!
• In case of internal contact, DO NOT
induce vomiting!
IMPORTANT: DO NOT fast charge. Charging
at a higher rate will damage or destroy
battery. ALWAYS follow information provided
on battery and battery charger. Contact
battery manufacturer and battery charger
manufacturer for detailed instructions.
1. Remove battery from unit (see
Removing Battery on page 29).
2. Place battery on bench or other well-
ventilated area.
3. Connect positive (+) lead of charger to
positive (+) terminal, and negative (–)
lead to negative (–) terminal.
4. Charge battery according to the
instructions from battery charger
manufacturer and battery manufacturer.
5. Install battery on unit (see Installing
Battery on page 30).
Jump-Starting
Gravely does not recommend jump-starting
your unit. Jump-starting can damage engine
and electrical system components. See the
Engine Manual for more detailed information.
Replacing Fuses (988147, 148)
IMPORTANT: Avoid damage! When
replacing fuses – use only 20-amp fuses or
you may damage the circuit.
The unit is equipped with one 20-amp fuse to
protect the charging circuit. The fuse is
located under the control panel area to the
left of the relays (see figure 40).
1. Remove defective fuse from socket.
2. Check metal clip in fuse window and
discard fuse if clip is broken.
3. Install new fuse into socket.
WARNING: FROZEN
BATTERIES CAN EXPLODE and
result in death or serious injury.
DO NOT charge a frozen battery.
Let battery thaw before charging.