GMV5 D.C INVERTER MULTI VRF SERVICE MANUAL
313
web-based remote monitoring and control system, and then connect RS485-1 interface R+
and R- of this Modbus gateway to the optoelectric converter interface R+ and R- or BMS
through communication lines. (see
①
)
Step 2: connect RS485-1 interface R+ and R- of Modbus gateway 1 to the second Modbus gateway
(Modbus gateway 2) RS485-1 interface R+ and R- through communication lines. (see
②
)
Step 3: follow the same way as in Step 2 to connect other Modbus gateways in series. (see
③
)
2) Connection between the Modbus gateway and the air conditioning system
Step1: confirm the master units to be connected to each Modbus gateway. Serial connection should
be applied as described in Section 5.2.2.(2) Communication lines between the Modbus
gateway and the air conditioning system. (see
④
)
Step 2: connect the Modbus gateway‗s CAN interface G1 and G2 to the interface G1 and G2 at the
terminal board of the corresponding master unit. (see
⑤
)
Step 3: when two Modbus gateways (gateway 2 and gateway 3) are required for one CAN2 network,
connect one gateway's (gateway 2) CAN interface G1 and G2 to the interface G1 and G2 at
the terminal board of the master unit, and then connect the other gateway's (gateway 3)
interface G1 and G2 to the interface G1 and G2 of the former gateway (gateway 2). (see
⑥
and
⑦
)
※
CAN2 network: Please refer to the system network diagram.
(4) Hardware Debug
(1) DIP Switch
NOTE:
The DIP switches shall be set prior to operation of the gateway.
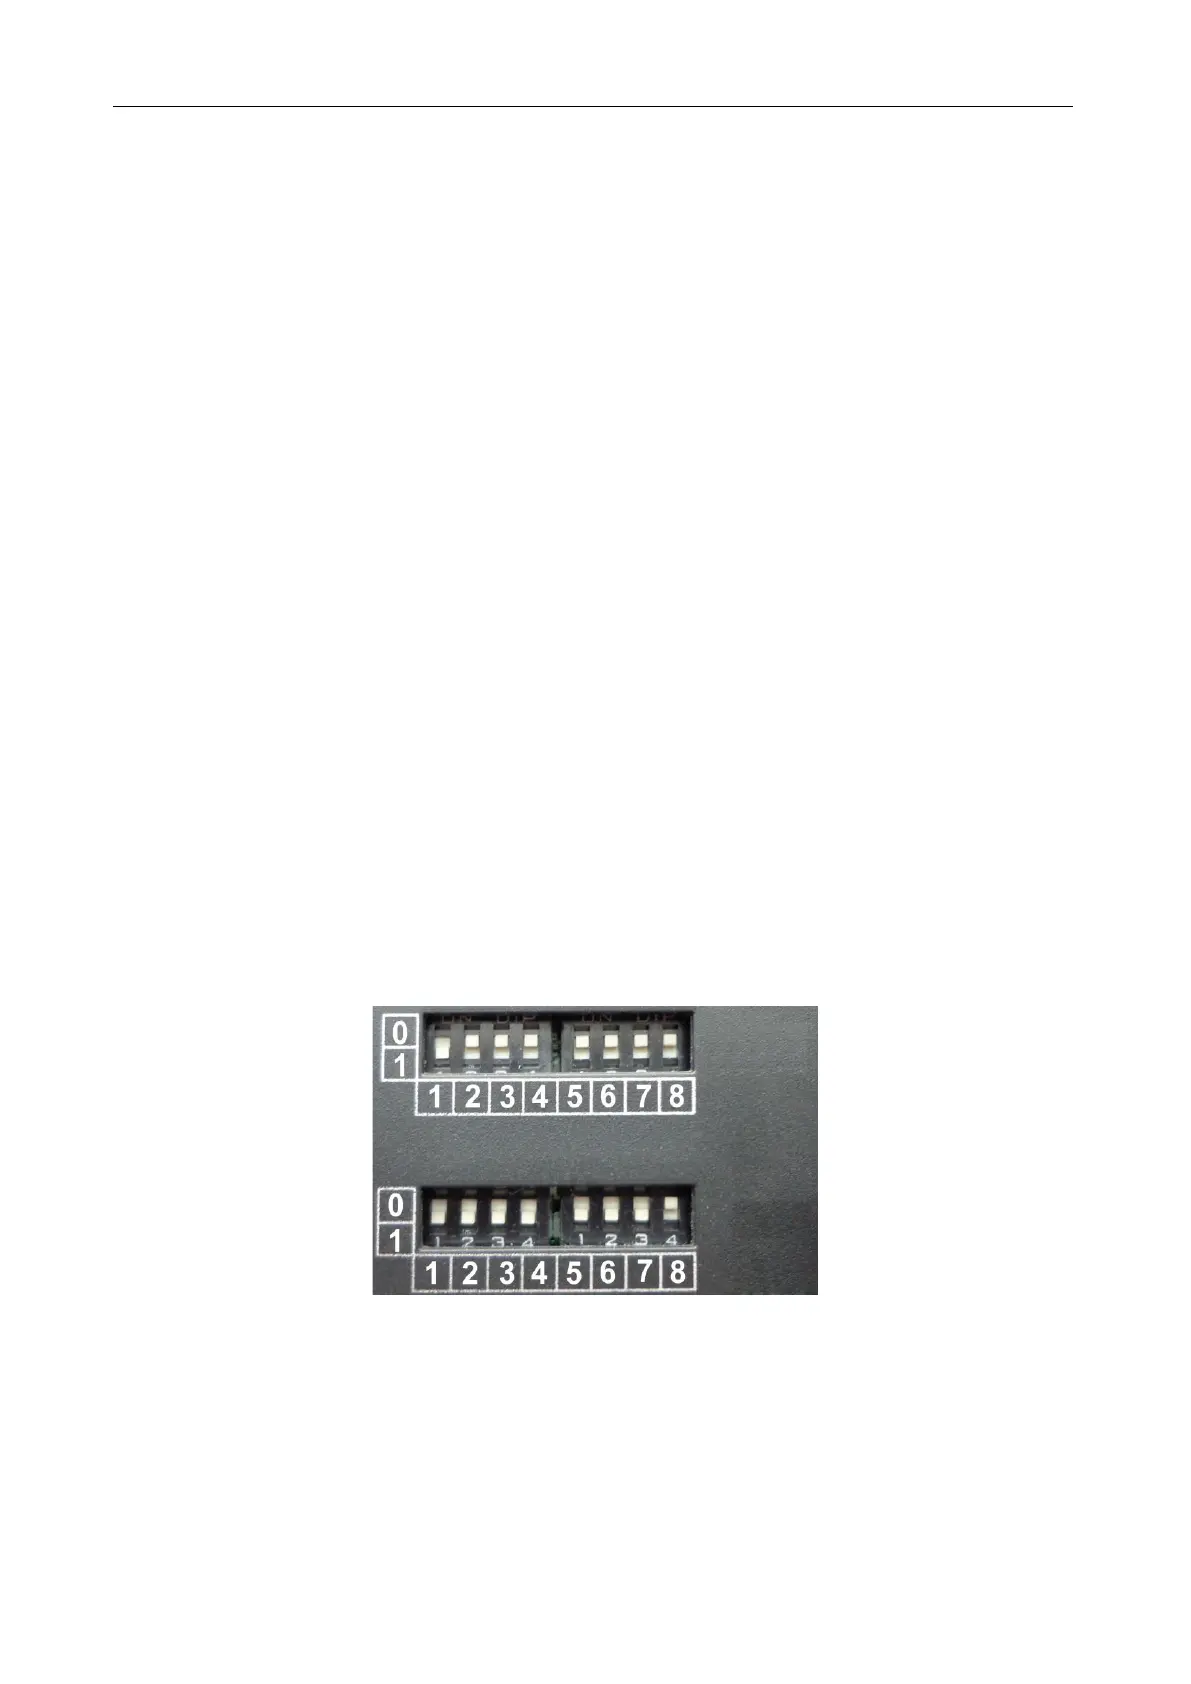
This Modbus gateway includes two kinds of DIP switches, address DIP switch and function DIP
switch.
1) Structural Drawing of the DIP Switches
 Loading...