Multi Variable Air Conditioners Ducted Type Indoor Unit
9
NOTES!
① Before operation, please prepare all pipelines (connection pipe, drainage hose) and wires
(connection wire for wired controller, connection wire for indoor unit).
② When drilling holes on ceiling (air return outlet or air outlet), you can need to reinforce the
ceiling to prevent vibration. For details, please consult user or builder.
③ If the strength of the ceiling is not good, please install a beam bracket, and then put the unit
on the beam bracket.
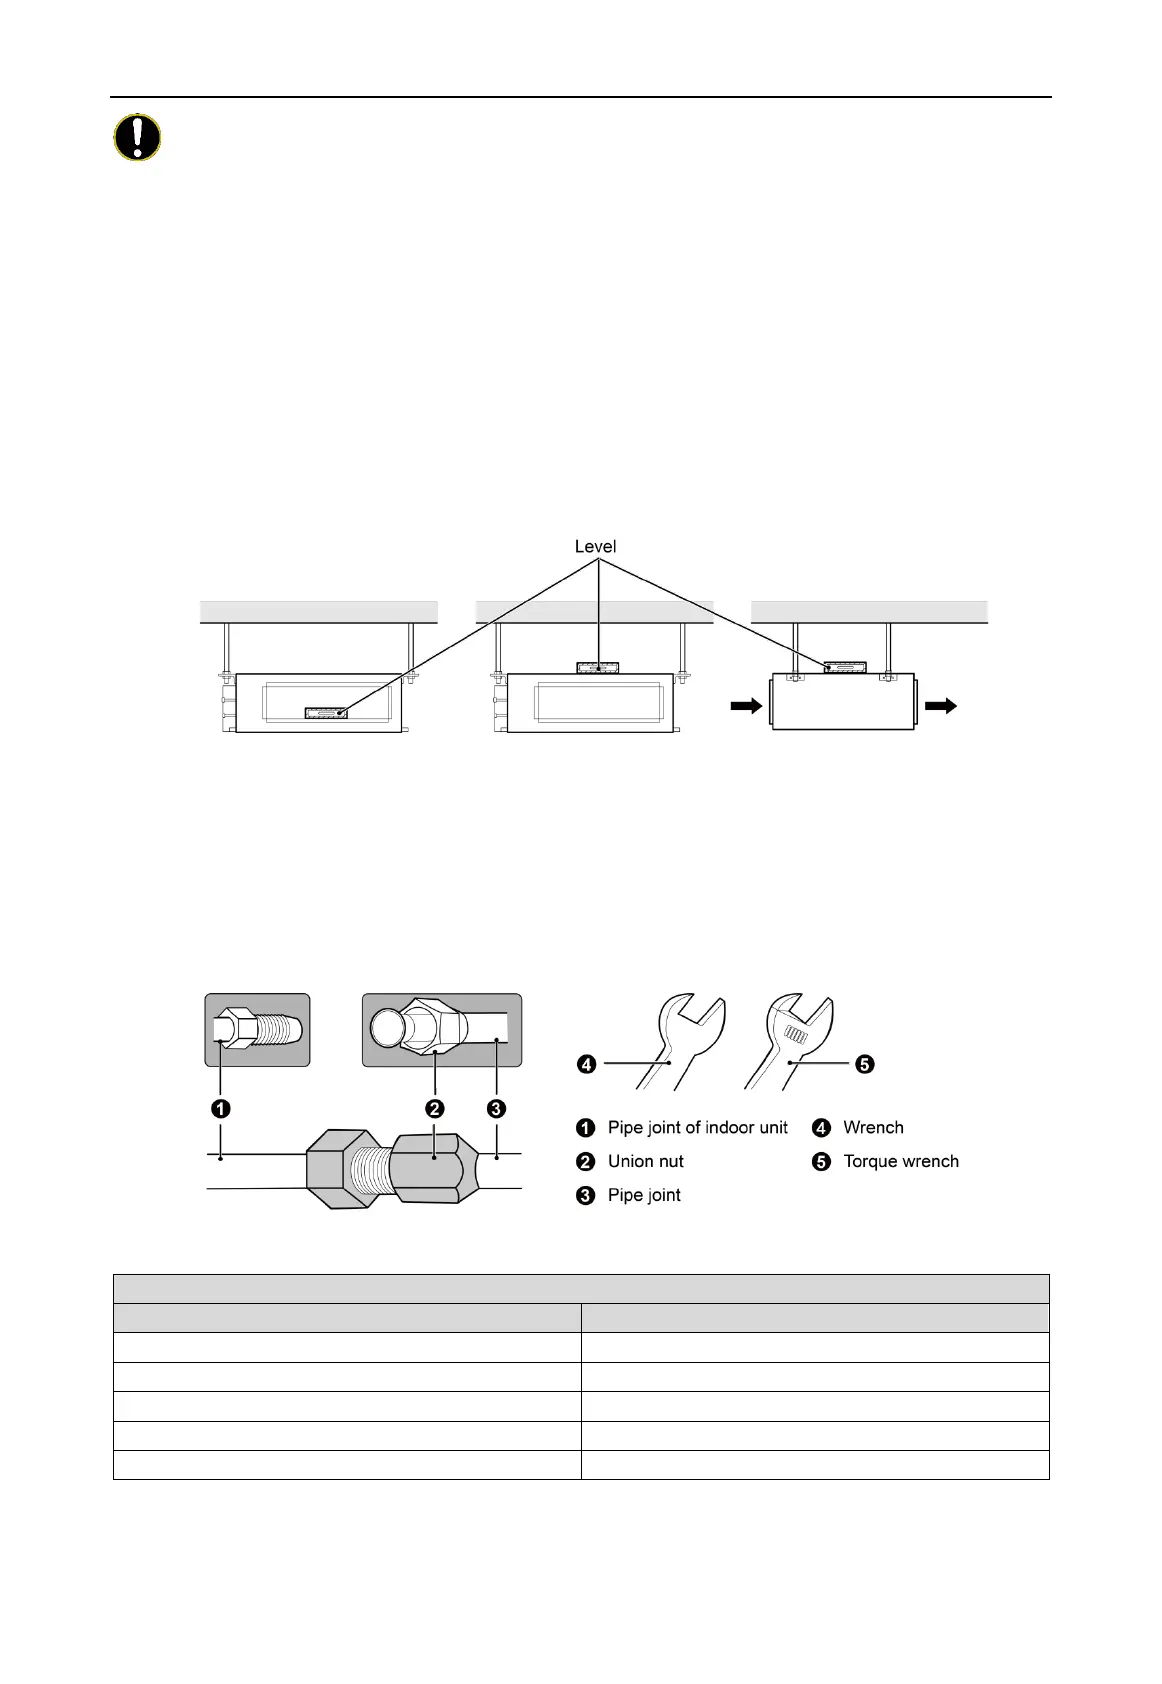
(3) Adjust the unit to the right position
(4) Check the level of the unit
After the indoor unit is installed, remember to check the horizontal status of the whole unit. It
should be horizontal from front to back and slant 1% from left to right, following the drainage direction.
Fig.4.1.6
(5) Remove the washer locating plate and then tighten the nut on it
4.2 Refrigerant Pipe Connection
(1) Aim the flaring port of copper pipe at the center of screwed joint and then tighten the flaring
nut with hand as shown in Fig.4.2.
(2) Tighten the flaring nut with torque wrench.
Fig.4.2
Torque for tightening nut
(3) Use pipe bend when bending the pipe and the bending angle should not be too small.
(4) Wrap the connection pipe and joint with sponge and then tie them firmly with tape.
 Loading...