QUIET button
Note:
● Time setting range: 0.5-24 hours.
● Time interval between two operations can’t exceed 5s. Otherwise, remote controller will exit the setting status automatically.
hour. When holding " " or " " button, 2s later, the time will change quickly until to
Cancel TIMER OFF: Press "TIMER" button again under TIMER OFF status.
● At OFF status, press this button once can set TIMER ON. Please refer to TIMER off for detailed operation.
Cancel TIMER ON: Press "TIMER" button again under TIMER ON status.
TIMER button
15
●
At ON status, press this button once can set TIMER OFF. The character of HOUR
TIMER
ON. After each pressing of " " or " " button, time will increase or
decrease half an
▲
▲
▲
▲
▲
▲
Function introduction for combination buttons
Child lock function
Press "▲" and " " simultaneously to turn on or turn off child lock function. When
on remote controller. If you operate
the remote controller, the " " icon will blink three times without sending signal to the unit.
▲
child lock function is on, " " icon is displayed
Temperature display switchover function
Under OFF status, press " " and "MODE" buttons simultaneously to switch temperature display between
ć
and
.
▲
1.
After putting through the power, press "ON/OFF" button on remote controller to turn on the air conditioner.
2.
Press "MODE" button to select your required mode: AUTO, COOL, DRY, FAN, HEAT.
3.
Press "▲" or " " button to set your required temperature. (Temperature can’t be adjusted under auto mode).
4.
Press "FAN" button to set your required fan speed: auto, low speed, medium speed, high speed, turbo speed.
Operation guide
▲
Replacement of batteries in remote controller
● During operation, point the remote control signal sender at the receiving
window on indoor unit.
● The distance between signal sender and receiving window should be no
more than 8m, and there should be no obstacles between them.
● Signal may be interfered easily in the room where there is fluorescent lamp
or wireless telephone; remote controller should be close to indoor unit during
operation.
● Replace new batteries of the same model when replacement is required.
● When you don’t use remote controller for a long time, please take out the
batteries.
● If the display on remote controller is fuzzy or there’s no display, please
replace batteries.
NOTICE
5.
Press " " button to select fan blowing angle.
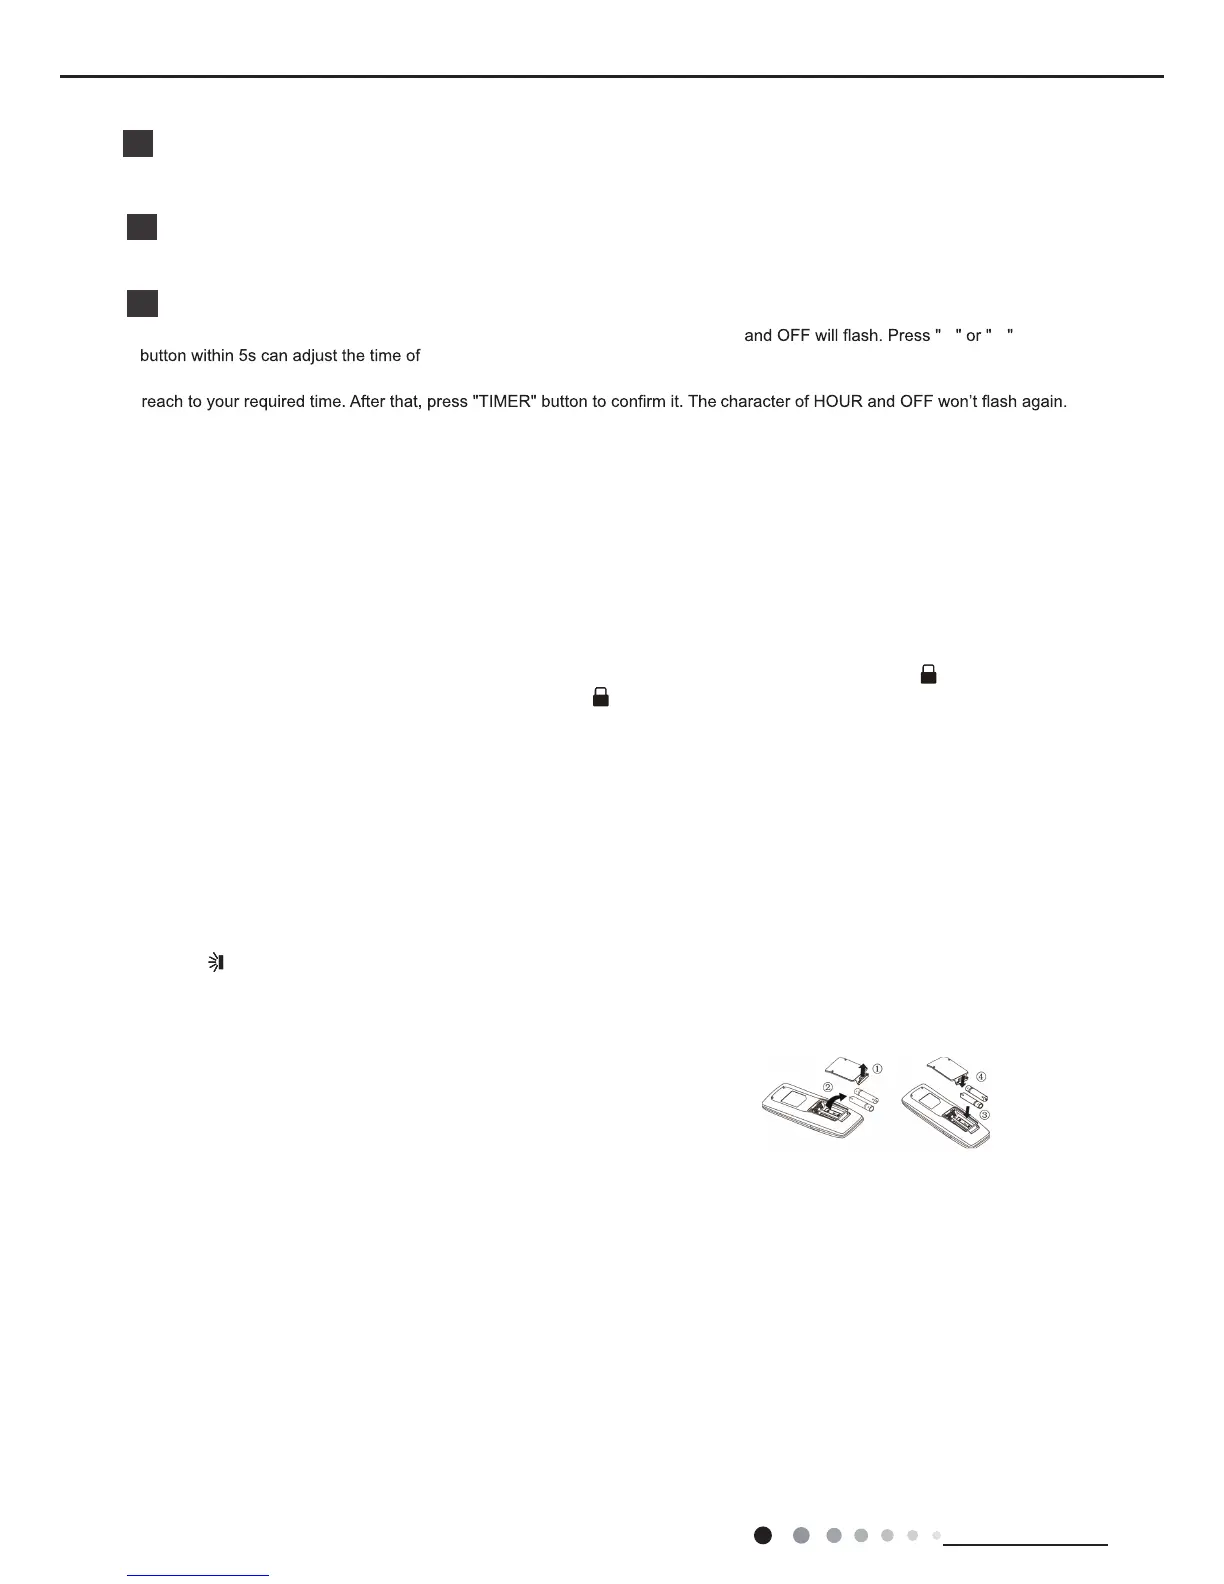
1. Lift the cover along the direction of arrow (as shown in Fig 1 ①).
2. Take out the original batteries (as shown in Fig 1 ②).
3. Place two 7# (AAA 1.5V) dry batteries, and make sure the position of “+”
polar and “-” polar is correct (as shown in Fig 2
③).
4. Reinstall the cover (as shown in Fig 2 ④).
Fig.1 Fig.2
 Loading...