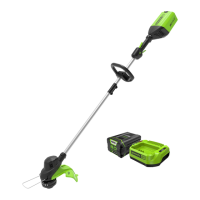
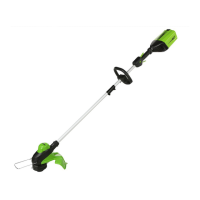
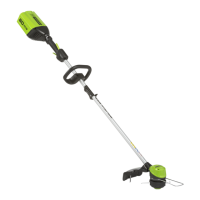
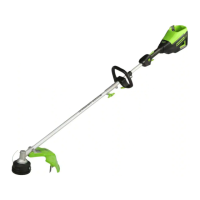
This document describes the Greenworks STE405 string trimmer, a cordless, battery-powered tool designed for cutting grass, light weeds, and similar vegetation at or around ground level. The cutting plane must be approximately parallel to the ground surface. It is not intended for cutting or chopping hedges, shrubs, bushes, flowers, or compost.
This machine requires two fully charged Greenworks 24V battery packs to operate. Using only one battery pack will prevent the machine from starting. It is crucial to ensure both batteries are 100% charged. If batteries have different charge states, the run-time will be limited by the battery with the lowest charge. Similarly, if using two batteries with different amp-hours (Ah), the machine will run until the lower Ah battery is depleted. Only Greenworks 24V battery packs should be used.
Technical Specifications:
- Type: Cordless, battery powered
- Motor: 2x24 V (48V POWERALL system)
- No-load speed: 6300/5500 ±10% RPM
- Cutting line diameter: 0.080" (2.0 mm)
- Cutting path diameter: Adjustable between 13 in. (330mm) and 15 in. (381mm)
- Feed Type: Bump Feed
- Weight (without battery pack): 6.9 lbs (3.15 kg)
- Compatible Battery Models: BAG709 and other BAG series
- Compatible Charger Models: CAG812/CAG817 and other CAG series
Recommended Ambient Temperature Range:
- String trimmer storage temperature: 32°F (0°C) - 113°F (45°C)
- String trimmer operation temperature: 32°F (0°C) - 113°F (45°C)
- Battery charging temperature: 39°F (4°C) - 104°F (40°C)
- Charger operation temperature: 39°F (4°C) - 104°F (40°C)
- Battery storage temperature: 32°F (0°C) - 113°F (45°C)
- Battery discharging temperature: 32°F (0°C) - 113°F (45°C)
Usage Features:
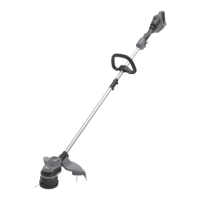
The string trimmer features a rear handle, trigger, lock-out switch, speed switch, upper shaft, auxiliary handle, coupler, lower shaft, trimmer head, cut-off blade, and guard.
Starting and Stopping:
To start the machine, push the lock-out switch (4) and pull the trigger (3). The speed can be adjusted using the speed switch (5) to position 1 for low speed or position 2 for high speed. To stop, simply release the trigger.
Adjusting Cutting Line Length:
While operating, the cutting line will wear shorter. To adjust, bump the trimmer head against the ground while it's running. The line will automatically release, and the cut-off blade will trim excess length.
Adjusting Cutting Diameter:
The machine is factory-set to a 13 in. (330mm) cutting diameter, which can be adjusted to 15 in. (381mm). A 13 in. diameter offers greater runtime, while 15 in. provides a larger cutting area. To adjust, remove the battery pack, remove the screws from the cut-off blade (11), turn the blade 180°, and retighten the screws.
Line Cut-Off Blade:
The trimmer is equipped with a line cut-off blade (11) on the guard, which continuously trims the line for a consistent and efficient cut diameter. Advance the line when the engine runs faster than normal or trimming efficiency diminishes.
Operation Tips:
- Maintain clearance between your body and the machine.
- Always operate with the guard in place.
- Hold the machine firmly with both hands while the string head is spinning.
- Cut tall grass from the top down.
- Tilt the machine towards the area to be cut (B) and use the tip of the cutting line.
- Move the machine from right to left to prevent thrown debris from hitting the operator.
- Avoid cutting in the danger area (C).
- Do not force the trimmer head into uncut grass.
- Be aware that wire and picket fences, stone and brick walls, curbs, and wood can cause cutting line wear and breakage.
Troubleshooting:
- Machine does not start:
- No electrical contact between machine and battery pack: Remove and reinstall battery pack, check contact.
- Battery pack depleted: Charge battery pack.
- Lock-out button and trigger not pushed simultaneously: Pull and hold lock-out button, then pull trigger.
- Machine stops when cutting:
- Guard not attached: Attach guard.
- Heavy cutting line used: Use only 0.080" (2.0 mm) nylon cutting line.
- Grass winds around motor shaft/trimmer head: Stop machine, remove battery pack, remove grass.
- Motor overloaded: Remove trimmer head from grass; motor will recover once load is removed. When cutting, move trimmer head in and out of grass, removing no more than 8" per pass.
- Battery pack or machine too hot: Cool battery pack in shade/indoors. Cool machine for 10 minutes, remove battery to aid cooling.
- Battery pack disconnected: Install battery pack again.
- Battery pack depleted: Charge battery pack.
- Line does not advance:
- Lines welded together: Lubricate with silicone spray.
- Not enough line on spool: Install more line.
- Lines worn too short: Advance line by bumping trimmer head.
- Lines tangled on spool: Remove and rewind lines.
- Line keeps breaking:
- Machine used incorrectly: Cut with line tip, avoid hard objects. Advance line regularly.
- Cut tall grass at ground level: Cut from top down. Remove no more than 8" per pass.
- Line does not cut well:
- Cut-off blade dull: Sharpen or replace blade.
- Vibration increases:
- Line worn on one side/not advanced: Ensure line is normal on both sides, advance line.
Maintenance Features:
- General Information: Ensure all nuts, bolts, and screws are tight. Regularly check handle tightness. Use only identical manufacturer's replacement parts and accessories.
- Before Maintenance: Stop the machine, remove the battery pack, allow the motor to cool, store in a cool/dry place, and wear appropriate protective gear (clothing, gloves, safety glasses).
- Cleaning: Clean with a moist cloth and neutral detergent after use. Do not use aggressive detergents or solvents. Keep the trimmer head free of grass, leaves, or grease. Keep air vents clean to prevent overheating. Do not spray water on the motor or electrical components.
- Removing Excess Line: Push the tabs (19) on the sides of the trimmer head and pull off the spool cover (22). Remove any remaining line.
- Installing Cutting Line: Do not put more than 15 feet of line at a time. Remove old line. Align spool cover slots with trimmer head slots (24). Insert line into mounting hole (23) until it exits the opposite hole. Pull line through for equal length on both sides. Rotate spool cover clockwise to wind line, leaving approximately 5 inches out of each side. Push spool cover until it clicks into position.
- Replacing the Spool: Disassemble the trimmer head by pulling off the spool cover (b). Clean dirt and debris. Replace spool (d) if worn/damaged. Loosen screws (e), remove spool (d), slot cover (f), and location housing (g). Replace with a new spool. Insert location housing and slot cover onto spool cover (b), then place spool onto slot cover to the desired position. Tighten screws.
- Removing/Assembling Trimmer Head: To remove, insert metal rod (26) into angle transmission hole (25) to fix the head. Turn clockwise to loosen. Do not remove spacer. To assemble, insert metal rod (26) into angle transmission hole (25). Assemble trimmer head. Turn counterclockwise to tighten. Remove metal rod. The cut-off blade must be installed when using the trimmer head.
Transportation and Storage:
Always remove the battery pack before transportation and storage. When moving, stop the machine and remove the battery pack. For storage, remove the battery pack, ensure children cannot access it, keep away from corrosive agents, and secure during transport to prevent damage. Clean and inspect for damage.
The manual includes various safety symbols indicating voltage, current, frequency, power, time, revolutions per minute, direct current, general safety precautions, instructions to read the manual, eye protection requirements (ANSI Z87.1), warnings against rain/moisture, keeping bystanders at least 15m away, and not installing or using blades. Risk levels are categorized as DANGER, WARNING, and CAUTION, indicating potential for serious injury, moderate injury, or property damage.
Environmentally Safe Battery Disposal:
This product uses Lithium-Ion batteries, which contain toxic and corrosive materials. Do not dispose of batteries in regular household trash or fire. Do not open or mutilate batteries. If a battery pack cracks or leaks, do not recharge or use it; discard it and replace with a new one. Contact local waste disposal agencies or certified recycling centers for proper disposal. Cover battery terminals with heavy-duty adhesive tape before disposal.
Proposition 65 Warning:
This product contains chemicals known to the state of California to cause cancer, birth defects, or other reproductive harm. Dust created by power sanding, sawing, grinding, drilling, and other construction activities may contain chemicals such as lead, crystalline silica, and arsenic/chromium. Users are advised to work in well-ventilated areas and use approved safety equipment like dust masks to reduce exposure.
Warranty:
Greenworks offers a three (3) year limited warranty to the original purchaser against defects in materials, parts, or workmanship for personal use. The warranty does not cover misuse, commercial use, abuse, neglect, accidents, improper maintenance, alterations, normal wear, routine maintenance items (lubricants, blade sharpening), or normal deterioration of the exterior finish. For warranty service, contact the toll-free helpline at 1-888-909-6757. Transportation charges for warranty returns are the responsibility of the purchaser unless requested otherwise by Greenworks.