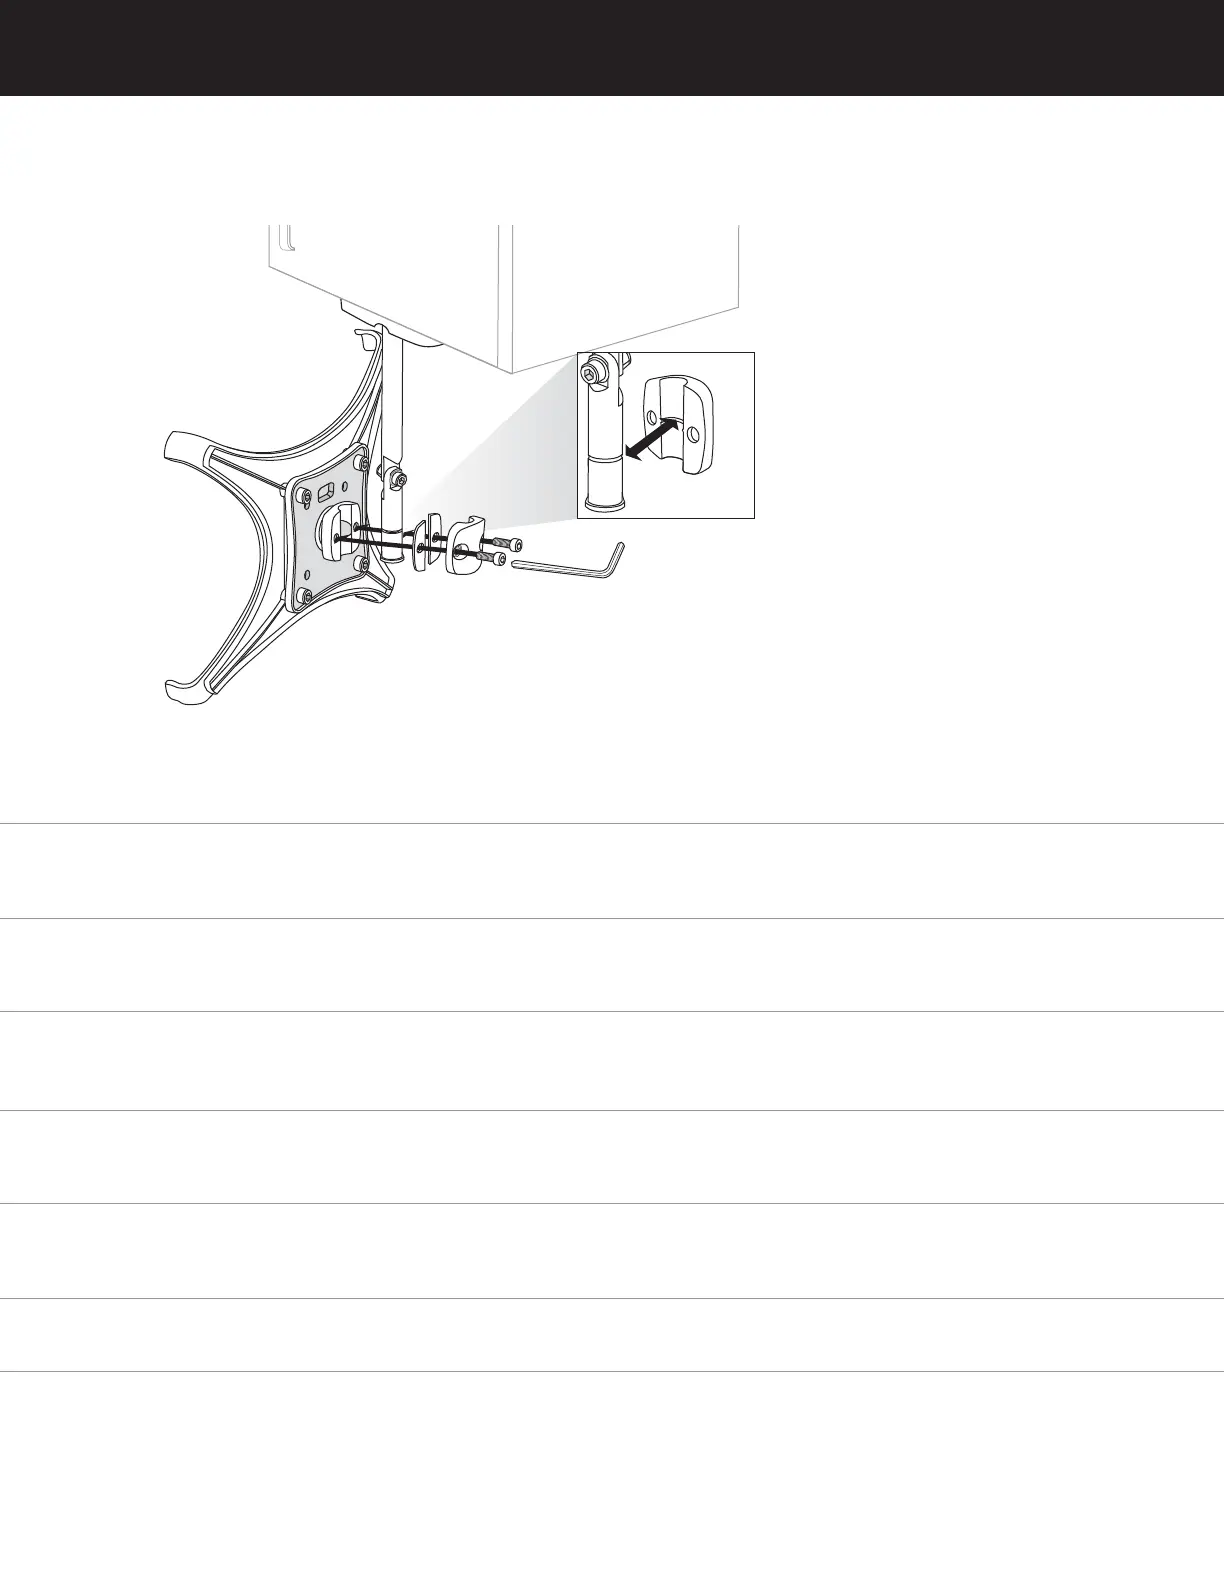
STEP 6: Connect Frame to the Arm Assembly
Align the Frame assembly with the groove in the Arm using the Arm Joint Cover, 2 washer plates and 2 Arm Joint
socket-head screws. This may require small adjustments to each of the socket head screws until you achieve the grip
necessary to hold the Frame at the desired angle.
アームジョイントカバー、2 個のワッシャープレート、および 2 本のアームジョイント用ソケットネジを使用して、
フレームアセンブリをアームの溝の位置に合わせます。フレームが望ましい角度で保持されるように、各ソケッ
トネジを微調整しなければならない場合があります。
将 固定架与连接臂的凹槽对准,并用臂连接板、两个垫片和两颗连接六角螺丝紧固。这需要分别对两
颗六角螺丝进行微调,使得刚好能够将支架持放在所需角度。
使用旋臂接頭蓋、2 只墊片與 2 顆旋臂接頭內六角螺絲,將固定架與旋臂中的凹槽對齊。您可能需要對
每一個內六角螺絲進行微調,直到緊度可讓框架維持在想要的角度為止。
Allineate il gruppo della cornice alla scanalatura del braccetto utilizzando le coperture del giunto del braccetto,
due rondelle e due viti a brugola del giunto del braccetto. Potrebbe a tal fine essere necessario registrare
ciascuna delle viti a brugola fino a che non si ottiene la presa necessaria per sostenere la cornice
nell'angolazione desiderata.
Richten Sie die Rahmen-Baugruppe mit der Nut am Arm unter Verwendung der Armverbindungsabdeckung, den
beiden Unterlegscheiben und den beiden Innensechskantschrauben für die Armverbindung aus. Dies macht
eventuell kleine Anpassungen an den Innensechskantschrauben erforderlich, bis Sie die Griffigkeit erzielt haben,
die notwendig ist, um den Rahmen im gewünschten Winkel zu halten.
Lijn de assemblage van de houder uit op de groef in de arm met de afdekking voor de armverbinding, 2
moerplaten en 2 inbusschroeven voor de armverbinding. Dit kan kleine aanpassingen vereisen aan elk van de
inbusschroeven tot u de grip bereikt die nodig is om de houder in de gewenste hoek te houden.
Alinee el conjunto del marco con la guía del brazo utilizando la tapa de la junta del brazo, dos placas de
arandela y dos tornillos para la junta. Puede que deba realizar pequeños ajustes en cada tornillo hasta que
consiga el suficiente agarre para sostener el marco en el ángulo deseado.
Alignez le cadre sur la rainure du bras à l’aide de la fixation bras, des 2 plaques à vis et des 2 vis à six pans creux
pour fixation bras. Il peut s’avérer nécessaire d’effectuer de légers ajustements pour chacune des vis à six pans
creux afin que le serrage soit suffisant pour maintenir le cadre dans l’angle désiré.
ÉTAPE 6
Fixez le cadre au
bras
PASO 6
Conecte el marco al
brazo montado
STAP 6
Sluit de houder
aan op de
armassemblage
SCHRITT 6
Rahmen mit der
Arm-Baugruppe
verbinden
PASSAGGIO 6
collegate la cornice al
gruppo del braccetto
手順 6
フレームとアームア
センブリの接続
步骤 6
将固定架连接到臂
组件
步驟 6
將固定架連接至
旋臂組裝元件
 Loading...