Climber 9.18/ Translation of the original instructions
ENGINE – BLADE BELT
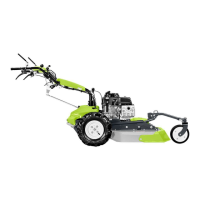
910 mm CUTTING DECK
The engine – blade belt is self-adjusting. Therefore no adjustment is required. Simply check the spring
tension (fig. 15). If the belt becomes twisted or comes off, check the parameters below, keeping the
cutting deck in the highest position (“travel” position):
1) 170 mm from the edge of the deck to the ground (fig. 24).
2) 170 mm from the rear edge of the deck to the ground (fig. 24).
3) Adjust the registers (fig. 14 – 14A).
4) Take care when positioning the belt guides; move them towards the belt, checking the cutting deck at
the various height settings (fig. 12, ref. A). Check that during operation the belt I always in the centre of
the stretcher (fig. 15, ref. A). The stretcher has to stick about 5/8 mm out of the frame (fig. 25).
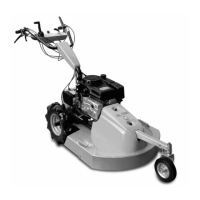
110 MP CUTTING DECK
This cutting deck with 3 blades has a cutting width of 1100 mm. It has two functions: rear discharge and
mulching. If you want to change from rear discharge function to mulching function you simply have to
use the lever. It is namely not necessary to change the blades (fig. 26 – 27). The cutting height can be
adjusted electrically using the button on the dashboard (fig. 36).
MAINTAINANCE 110MP CUTTING DECK
To ensure the deck belt works properly and to have a uniform cut, please follow these instructions:
– put the cutting deck in its lowest position.
– adjust the front arms fig. 34 in order to set the front part of the cutting deck at 35 mm from the ground
(fig. 28): you have to measure the point A as indicated (fig. 29).
– regulate the adjusting device (fig. 35) in order to set the rear part of the cutting deck at 35 mm from the
ground (fig. 30): you have to measure the point B as indicated (fig. 29).
To check the cutting deck belt you have to unscrew the knob D in fig. 31 and remove the two protections.
If you see that the length of the belt has changed, resulting in malfunctioning, you can regulate the belt
tension using the adjusting screw (fig. 32). If you want to replace the belt, please follow the fig. 33 to re-
assemble it. The spring has to be adjusted at 86 mm and it is indicated by the red arrow (fig. 32B). The
stretcher has to be lubricated every 50 working hours (fig. 32/C).
ENGINE – HYDROSTATIC TRANSMISSION BELT
Whenever there is a change in belt length (causing therefore its malfunctioning), the tension can be
regulated by means of the adjustment device (fig. 16). Take care not to compress the spring beneath the
unit completely; belts must be neither too tight nor slack. The spring must be kept set at 44 mm and it is
indicated by the red arrow (fig. 16)
BLADE ROTATION
Rotation is started and stopped using the switch (no. 1, fig. 1). When rotation is engaged, the engine
must be running at medium r.p.m (see throttle sticker) and the machine must not be in the grass for
cutting. Never start the blades with the engine at maximum r.p.m. The machine is equipped with an
electromagnetic clutch which also brakes the blade during disengagement. The blades are also
disengaged automatically when the cutting height adjuster lever is moved to the highest position. Always
work at maximum rpm.
CHANGING THE BELTS
The movement is transmitted from the motor to the hydraulic transmission and to the blades by means of
two v-belts. Replace the belts as soon as they show signs of wear!
Their replacement and subsequent adjustment are fairly complex procedures and must be carried out by
an Authorised After-Sales Service Centre. For the cutting deck – engine belt, the belt guides of the deck
pulley have to be removed; release the belt stretcher spring (fig. 15, ref. B). For the two transmission and
hydraulic engine belts proceeds as follows:
-remove the rear and top grids
-undo the belt stretcher nut (fig. 16).
ALWAYS USE ORIGINAL BELTS!
11