10 OM-DH/DHT
Operation
WARNING
WHEN TILTING KETTLE:
1) WEAR PROTECTIVE OVEN MITT AND
PROTECTIVE APRON.
2) USE DEEP CONTAINER TO CONTAIN
AND MINIMIZE PRODUCT SPLASHING.
3) PLACE CONTAINER ON STABLE,
FLAT SURFACE, AS CLOSE TO
KETTLE AS POSSIBLE.
4) STAND TO RIGHT OF KETTLE WHILE
POURING — NOT DIRECTLY IN POUR
PATH OF HOT CONTENTS.
5) POUR SLOWLY, MAINTAINING
CONTROL OF KETTLE, AND RETURN
KETTLE BODY TO UPRIGHT POSITION
AFTER CONTAINER IS FILLED OR
TRANSFER IS COMPLETE.
6) DO NOT OVERFILL CONTAINER.
AVOID SKIN CONTACT WITH HOT
CONTAINER AND ITS CONTENTS.
WARNING
AVOID ALL DIRECT CONTACT WITH HOT
SURFACES AND HOT FOOD OR WATER
IN THE KETTLE. DIRECT CONTACT
COULD RESULT IN SEVERE BURNS.
CAUTION
DO NOT TILT KETTLE WITH LIFT-OFF
COVER IN PLACE. COVER MAY SLIDE
OFF, CAUSING INJURY TO OPERATOR.
the set temperature is accepted, it may be changed at any time by
pressing the MANUAL button and resetting the temperature using the
same process above.
i. HIGH TEMP button – Used to set operating temperature of the kettle
at a preset high intensity (default = 7). Can be pressed at any time
during operation of the unit to change the set temperature to the
preset value except when there is an active TIMER enabled.
1. TIMER button - once the appropriate set temperature is
selected using the HIGH TEMP, MANUAL or LOW TEMP buttons;
a countdown timer can be set to remind the user when the
cooking process is completed. Range – 1 minute to 10 hours
2. When the timer expires:
a. the set temperature will automatically change to the LOW
TEMP setting and will continue at this setting until the
user changes the temperature via MANUAL or HIGH TEMP
buttons
b. An audible alarm will notify the user that attention is
required, the alarm will continue to sound until the user
presses the TIMER button.
3. An active timer can be cancelled by pressing and holding the
TIMER button for 5 secs
4. Set temp can be changed during an active timer by pressing
the MANUAL button and adjusting the set temp using the
Temperature knob and display
5. HIGH TEMP and LOW TEMP presets cannot be used to change
the setpoint once a TIMER has started.
j. READY alarm – The control will sound 3 beeps when the unit has
reached within 20 degrees of set point during pre-heat and when a
higher set temperature is selected.
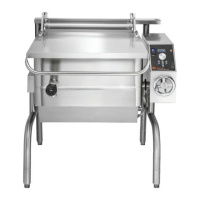
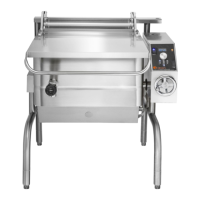
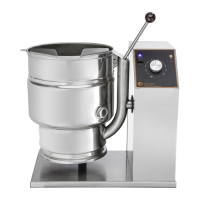
k. Crank tilt - a handle controls the worm and gear mechanism that
smoothly tilts the kettle body and holds it in the desired position.
B. Operating Procedure
1. To Start Kettle Heating:
a. EVERY DAY make sure that the jacket water level in the middle of
the sight glass. If the level is too low, see “Jacket Filling and Water
Treatment” on page 16.
b. Check the pressure/vacuum gauge. If the gauge does not show 20
to 30 inches of mercury (Hg) vacuum (that is a reading of 20 to 30
below 0 atmospheric pressure), see “Jacket Vacuum” on page 16.
c. Do not attempt to light any burner with a flame.
d. Turn the manual gas valve ON (align handle with gas line).
e. Turn rocker (on-off) switch ON. The electronic ignition will attempt to
light the pilot for 90 seconds, or until it is lit. Once lit proceed to step
two.
f. Turn controller to desired setting. The main gas burner will ignite, and
will cycle to maintain the set temperature. The heat indicator light will
come on.
g. If the unit does not light, turn it off and wait five minutes. Then follow
the instructions again.
 Loading...