11
Maintenance
1.Shut off hot and cold water supply!
2.Turn the shut-off lever counter-clockwise
to fully open position and open water
flow.
3.Turn the temperature cross handle
counter-clockwise to maximum hot
water temperature.
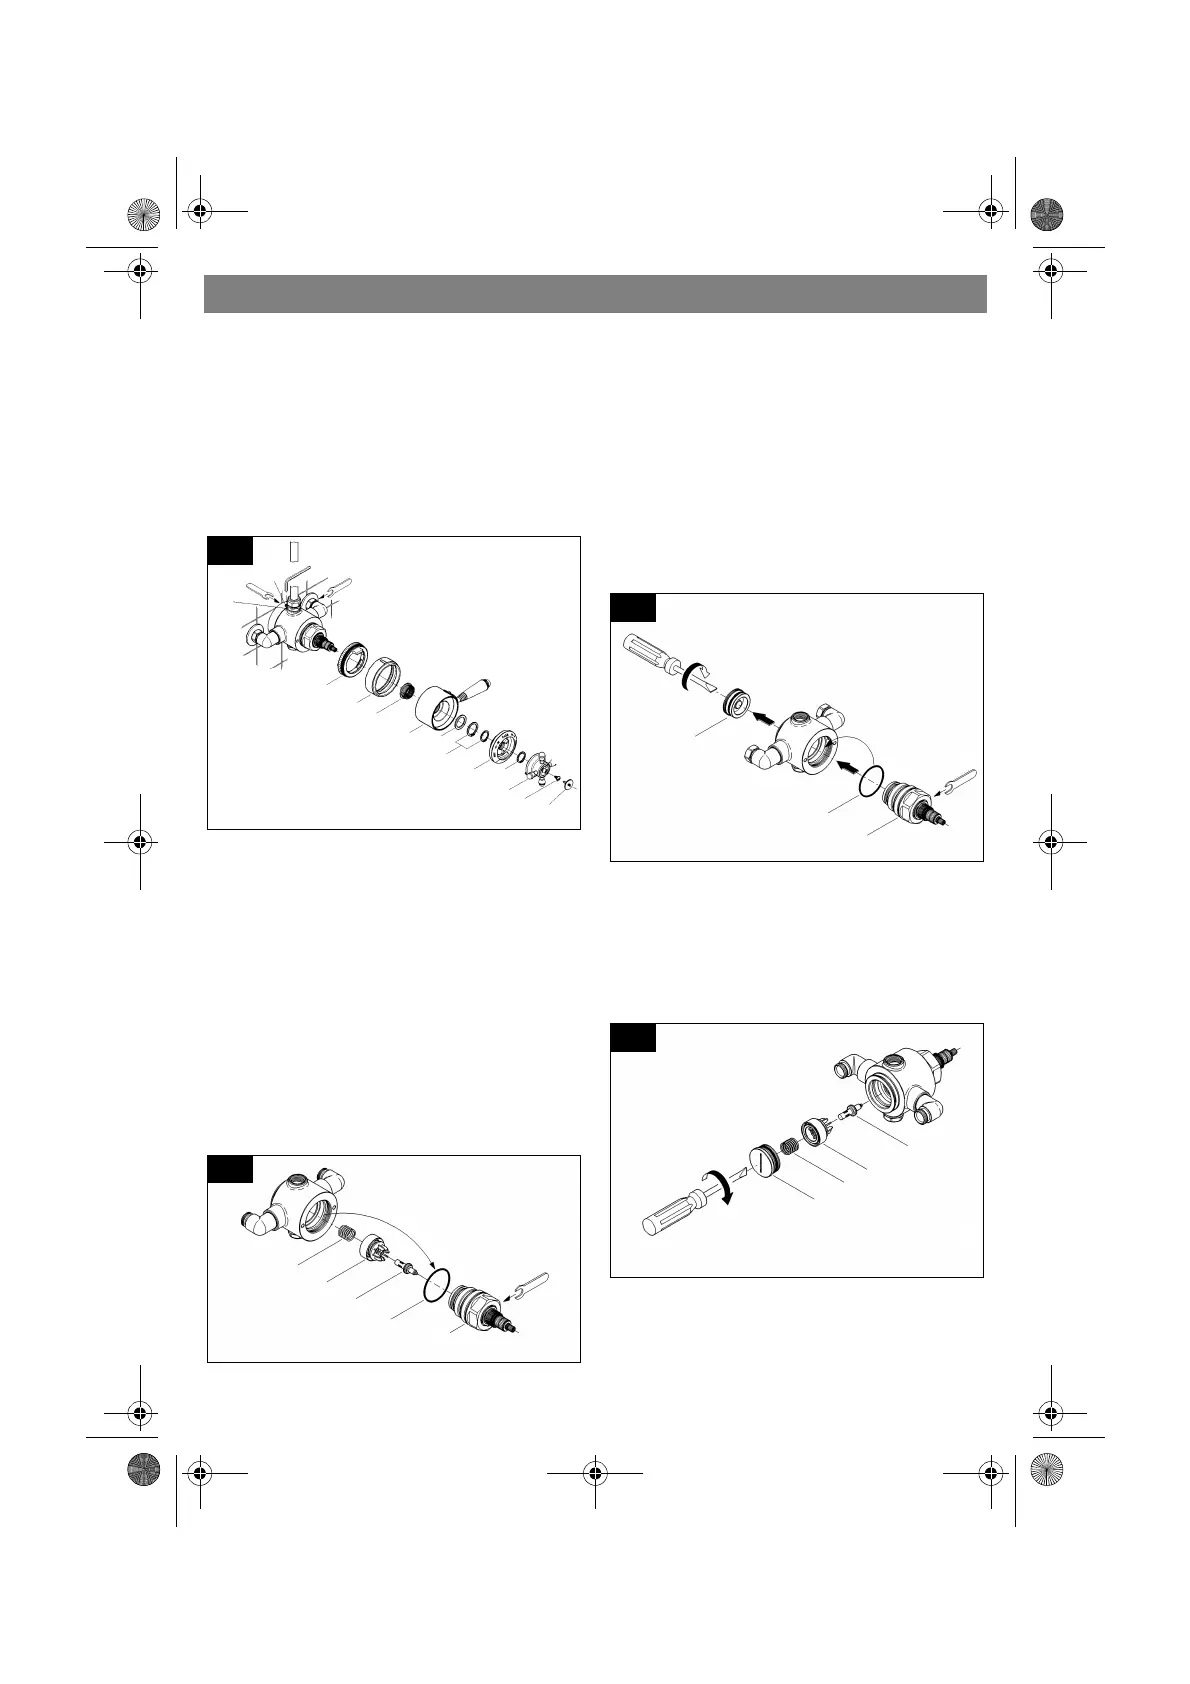
4.Lever out cap (M), see Fig. [12].
5.Unscrew screw (N).
6.Pull off temperature cross handle (O).
7.Remove circlip (P1) and pull off scale
ring (P).
8.Remove circlips (Q1), washer (Q2) and
pull off shut-off lever (Q).
9.Pull off adapter (R).
10.Pull off cover ring (S) and stop ring (T).
11. Loosen outlet nipple (L) and reinstall
shower.
12.Loosen set screw (D1).
13.Unscrew connections and take valve
from the supplies.
14.Screw out control unit (U), see Fig. [13].
15.Take out O-ring seal (U1).
16.Take out wax element (V), slider (W) an
spring (X).
Inspect and clean all parts, replace if
necessary and grease with special valve
grease (ref. No. 18 012).
Reinstall control unit
1.Unscrew seat (Y) with O-ring, see
Fig. [14].
2.Reinstall O-ring seal (U1).
3.By turning the unit stem counter-clockwis
make sure the control unit (U) is in open
position and screw in.
4.Reinstall wax element (V), slider (W) and
spring (X) from behind, see Fig. [15].
5.Close control unit (U) by turning the unit
stem clockwise to closed position.
6.Tighten seat (Y) in the valve body.
12
P
S
T
O
2
.
5
m
R
Q
Q1
D1
2
4
m
m
L
2
4
m
m
Q2
M
N
P1
13
X
W
V
U1
4
6
m
m
U
14
U
4
6
m
m
Y
U1
15
X
W
V
Y
956212.book Seite 11 Mittwoch, 19. Dezember 2001 8:04 08