23
V6.0
DMX model 226 en
6.3 Adjusting the Dosing Flow by Means of the Stroke length
CAUTION Adjust the stroke length only while the pump is
running!
Danger of damages.
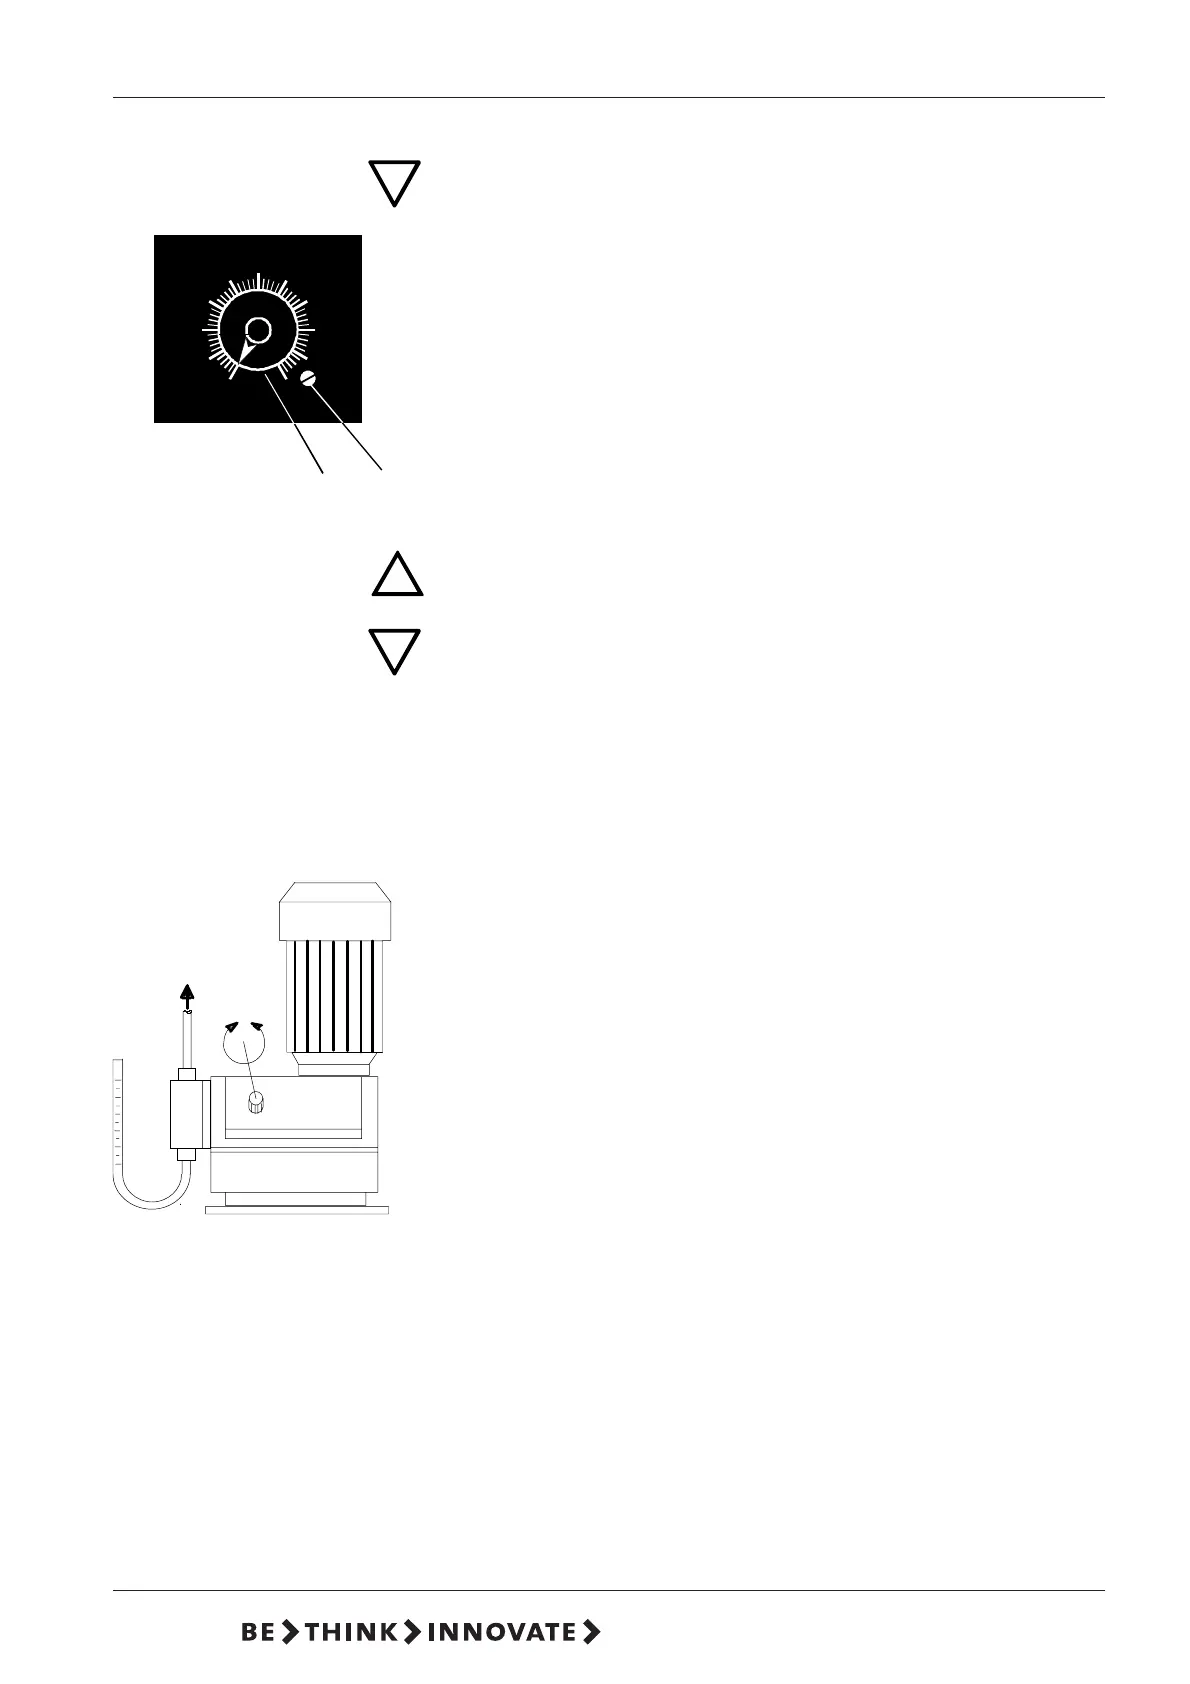
● Loosen the locking screw (A) on the stroke length adjustment knob (8) a little
using a screwdriver.
● Increasing the dosing flow: Turn the stroke adjustment knob slowly to the left
until the desired dosing flow is reached.
● Decreasing the dosing flow: Turn the stroke adjustment knob slowly to the
right until the desired dosing flow is reached.
● Gently tighten the locking screw (A) again using a screwdriver.
6.4 Adjusting the Stroke Length Adjustment
!
WARNING Wear protective gloves and glasses when executing
work at the dosing head, connections or lines!
CAUTION Adjust the stroke length only while the pump is
running!
Danger of damages.
The zero point (no dosing) of the dosing pump is adjusted in the works at a
counterpressure of 3 bar (see dosing curves).
If the operational counterpressure at the injection point is considerably above or
below this value, it is advisable to readjust the zero point to obtain more precise
values of the dosing output.
● Install a graduated tube at the suction valve.
If this is not present:
• insert the suction line into a graduated measuring jug.
● Start the dosing pump and adjust the dosing flow to 15%.
For pumps with tank empty indication:
• Remove the plug of the tank empty indication.
● Completely unscrew the locking screw (A) on the stroke length adjustment
knob (1) using a screwdriver.
● Turn the adjustment knob slowly clockwise until the dosage stops in the
measuring jug or tube.
● Remove the plug with a small screw driver without changing the position of
the adjustment knob and unscrew the cheese head screw together with the
flat spiral spring.
● Fit the adjustment knob on the adjusting spindle so that the zero line on the
scale and the mark on the adjustment knob coincide.
● Screw in the cheese head screw and the spiral spring until the spring is
preloaded but does not block. Even when adjusted to 100% the spring of the
adjustment knob must still remain preloaded.
● Screw in the locking screw (A) again using a screwdriver, and tighten gently.
100
%
9
0
8
0
7
0
6
0
5
0
4
0
3
0
2
0
1
0
0
A
8
 Loading...