17
V6.0
DMX model 226 en
4 Installation
4.1 Installation Information
1
2
3
4
5
6
7
9
10
8
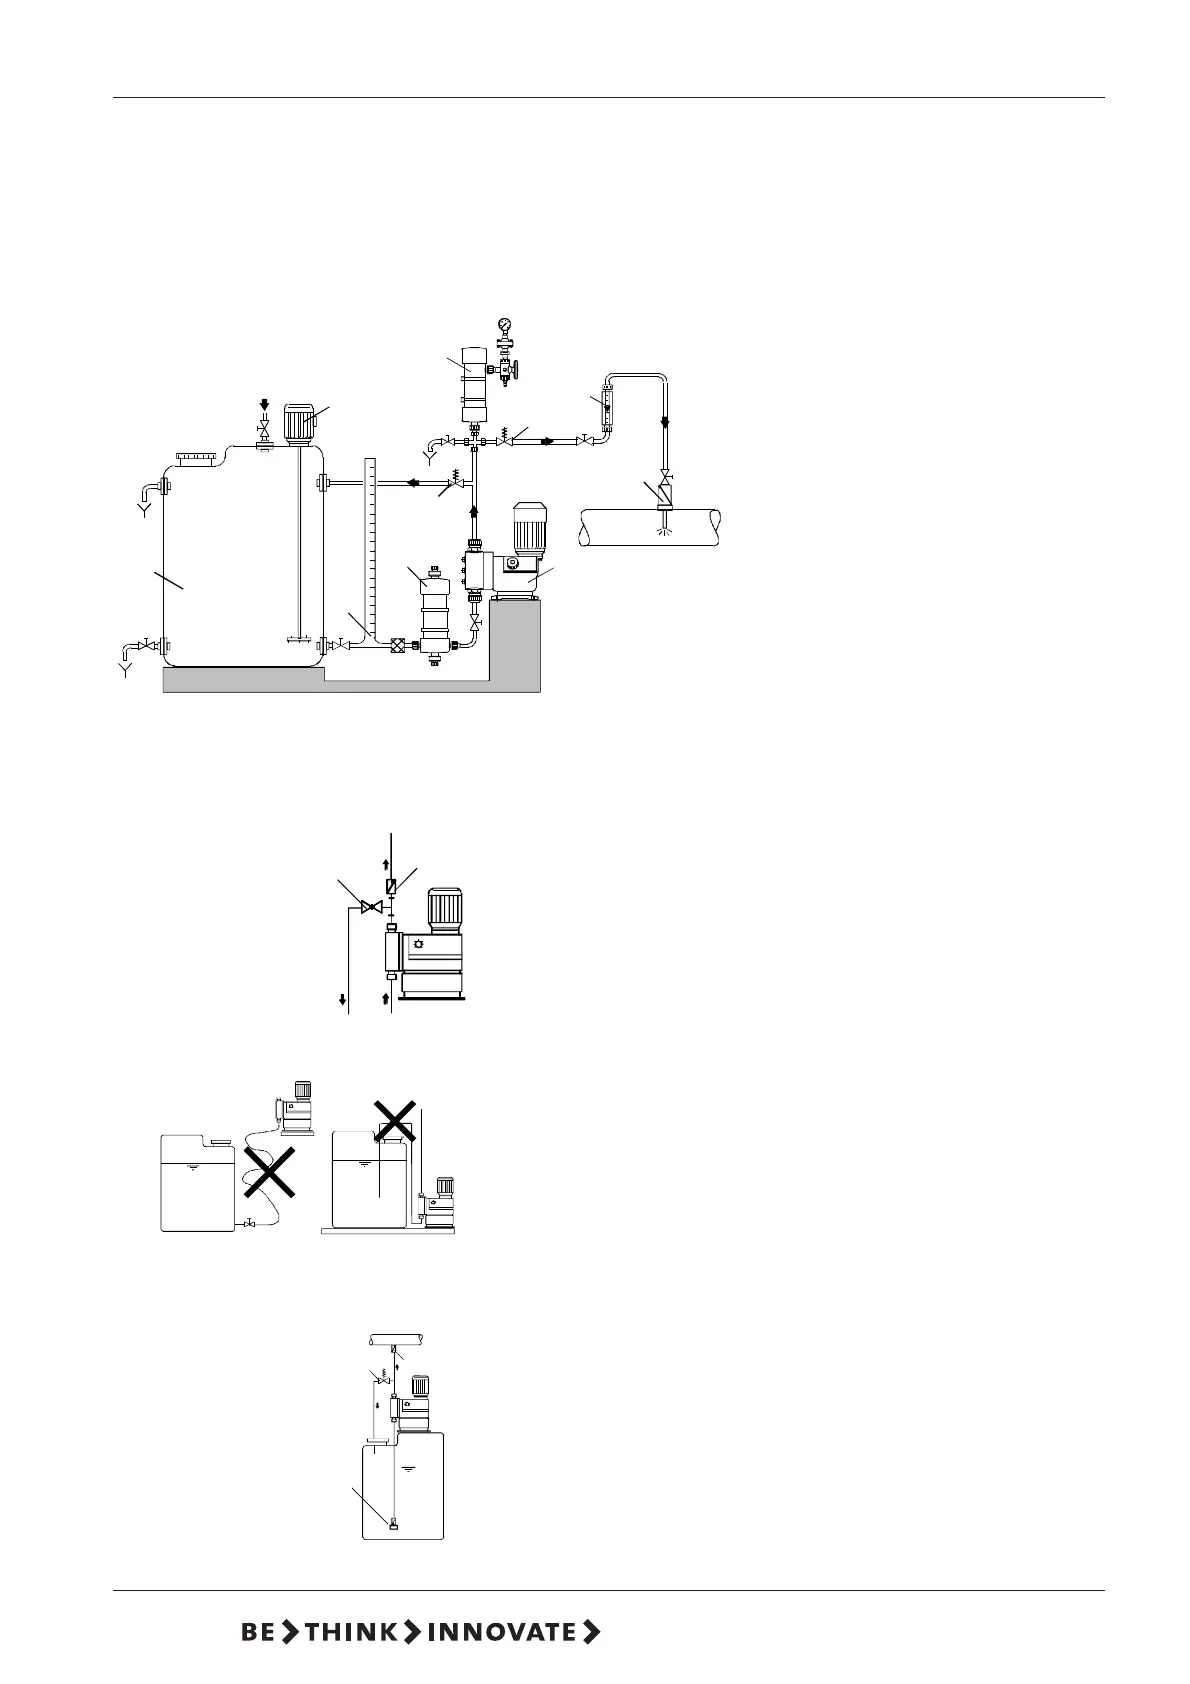
Picture of optimal installation:
1 Dosing tank
2 Electric agitator
3 Extraction device
4 Suction pulsation damper
5 Dosing pump
6 Overflow valve
7 Pressure retention valve
8 Pulsation damper
9 Measuring glass
10 Injection unit
p
10
6
13
11
12
For easy deaeration of the pump:
● Install a ball valve (11) with bypass line (back to the dosing tank)
immediately behind the pressure valve
In case of long pressure lines:
● Install a check-back valve (12) into the dosing line.
● Keep the suction line as short as possible, avoid a tangled suction
line
• If necessary, use swept bends instead of elbows.
● Always lay the suction line rising to the suction valve of the dosing
pump.
• Avoid loops which cause air bubbles.
● For non-degassing media with viscosity similar to water, the pump can
be mounted onto the tank (observe the admissible suction height).
Preferably flooded suction.
For dosing media which tend to sedimentation:
● Install a suction line with filter (13) in a way ensuring that the suction
valve remains several centimetres a bove the botton of the tank.
6 Overflow valve
10 Injection unit
 Loading...