3.2.5.1 Preliminary alignment
DANGER
Electric shock
Death or serious personal injury
‐ Before starting work on the pump,
make sure that the power supply has
been switched off and that it cannot be
accidentally switched on.
The pump and motor are pre-aligned on the base
frame from the factory. Some deformation of the base
frame may occur during transport, and it is therefore
essential to check alignment at the installation site
before final grouting.
Inaccurate alignment results in vibration and
excessive wear on the bearings, shaft and wear rings.
Carry out alignment of the motor only, as
pipe strain will occur if the pump is shifted.
If the coupling guard is installed, remove it before the
alignment. For align methods, see sections Aligning
the pump and motor with a straightedge ruler,
Aligning the pump and motor with a dial indicator and
Aligning the pump and motor with a laser equipment.
Related information
4.5.4 Tightening torques
4.5.1 Aligning the pump and motor with a
straightedge ruler
4.5.2 Aligning the pump and motor with a dial
indicator
4.5.3 Aligning the pump and motor with a laser
equipment
4.5.5 Pin coupling air-gap width S2
3.2.5.2
Spacer coupling installation
Preparation
• Check the spacer coupling for possible transport
damage and missing parts. Clean the spacer
coupling components.
• Proper lifting and assembling devices should be
on hand.
Installing the spacer coupling
Make sure the spacer coupling is clean.
Make sure the keys fit in key slots between
shafts and hubs properly with a small
clearance over the top to keep dynamic
balance.
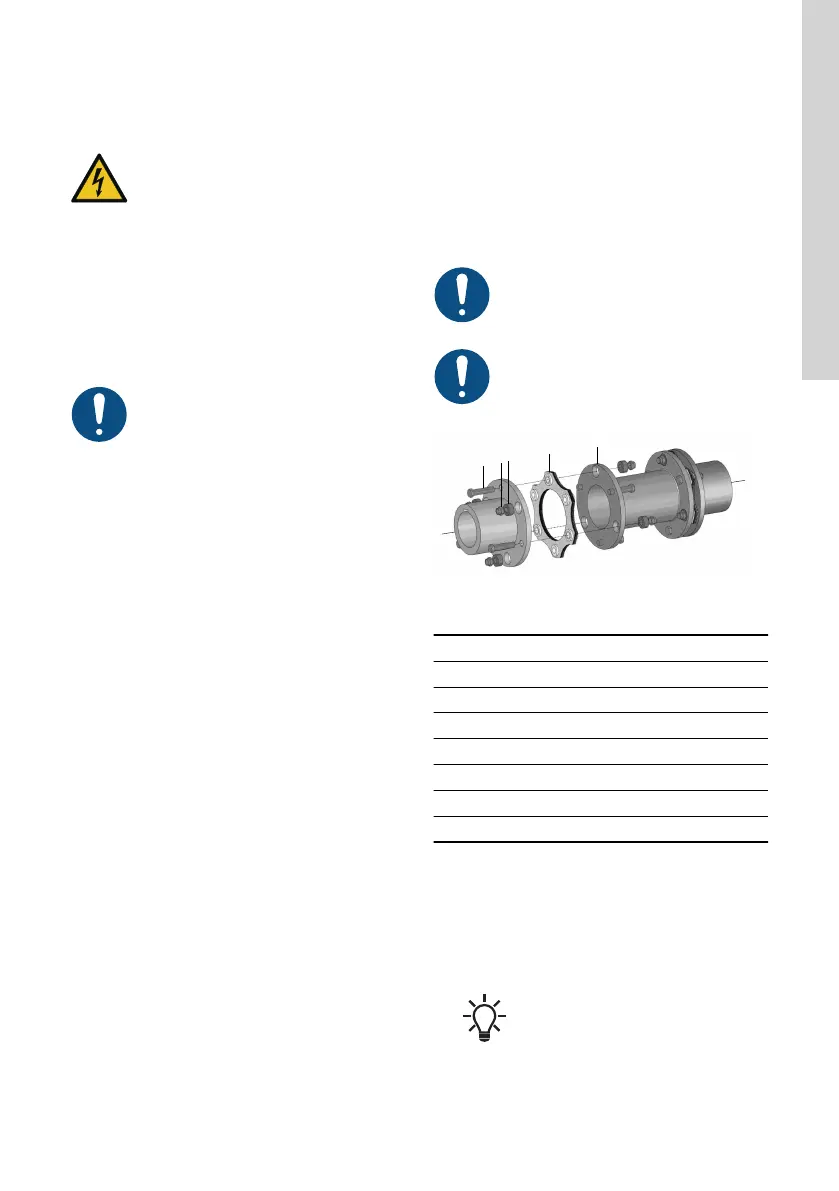
TM082157
Spacer coupling
Pos. Description
1 Hub
2 Bolt
3 Lock nut
4 Sleeve
5 Disc pack
6 Spacer
7 Hub
1. Install the hub on the shaft. Make sure the shaft
end align with the hub end. If necessary, place
limit blocks to limit the gap between coupling and
shaft shoulder. Use shaft lock nut or end plate to
secure the hub axially. To achieve clearance fit,
install the hub on the shaft directly and use soft
hammer to hit the hub gently.
After the installation of hubs, apply rust
prevention to the hubs immediately.
9
English (GB)