5 / 17
4.2.3 Removing the valve
1. Remove side cover (pos. 8) and clamp (pos. 7).
2. Remove the fitting and valve (pos. 6) out of the housing (pos. 5) by pulling the outlet fitting.
4.2.4 Fitting the valve
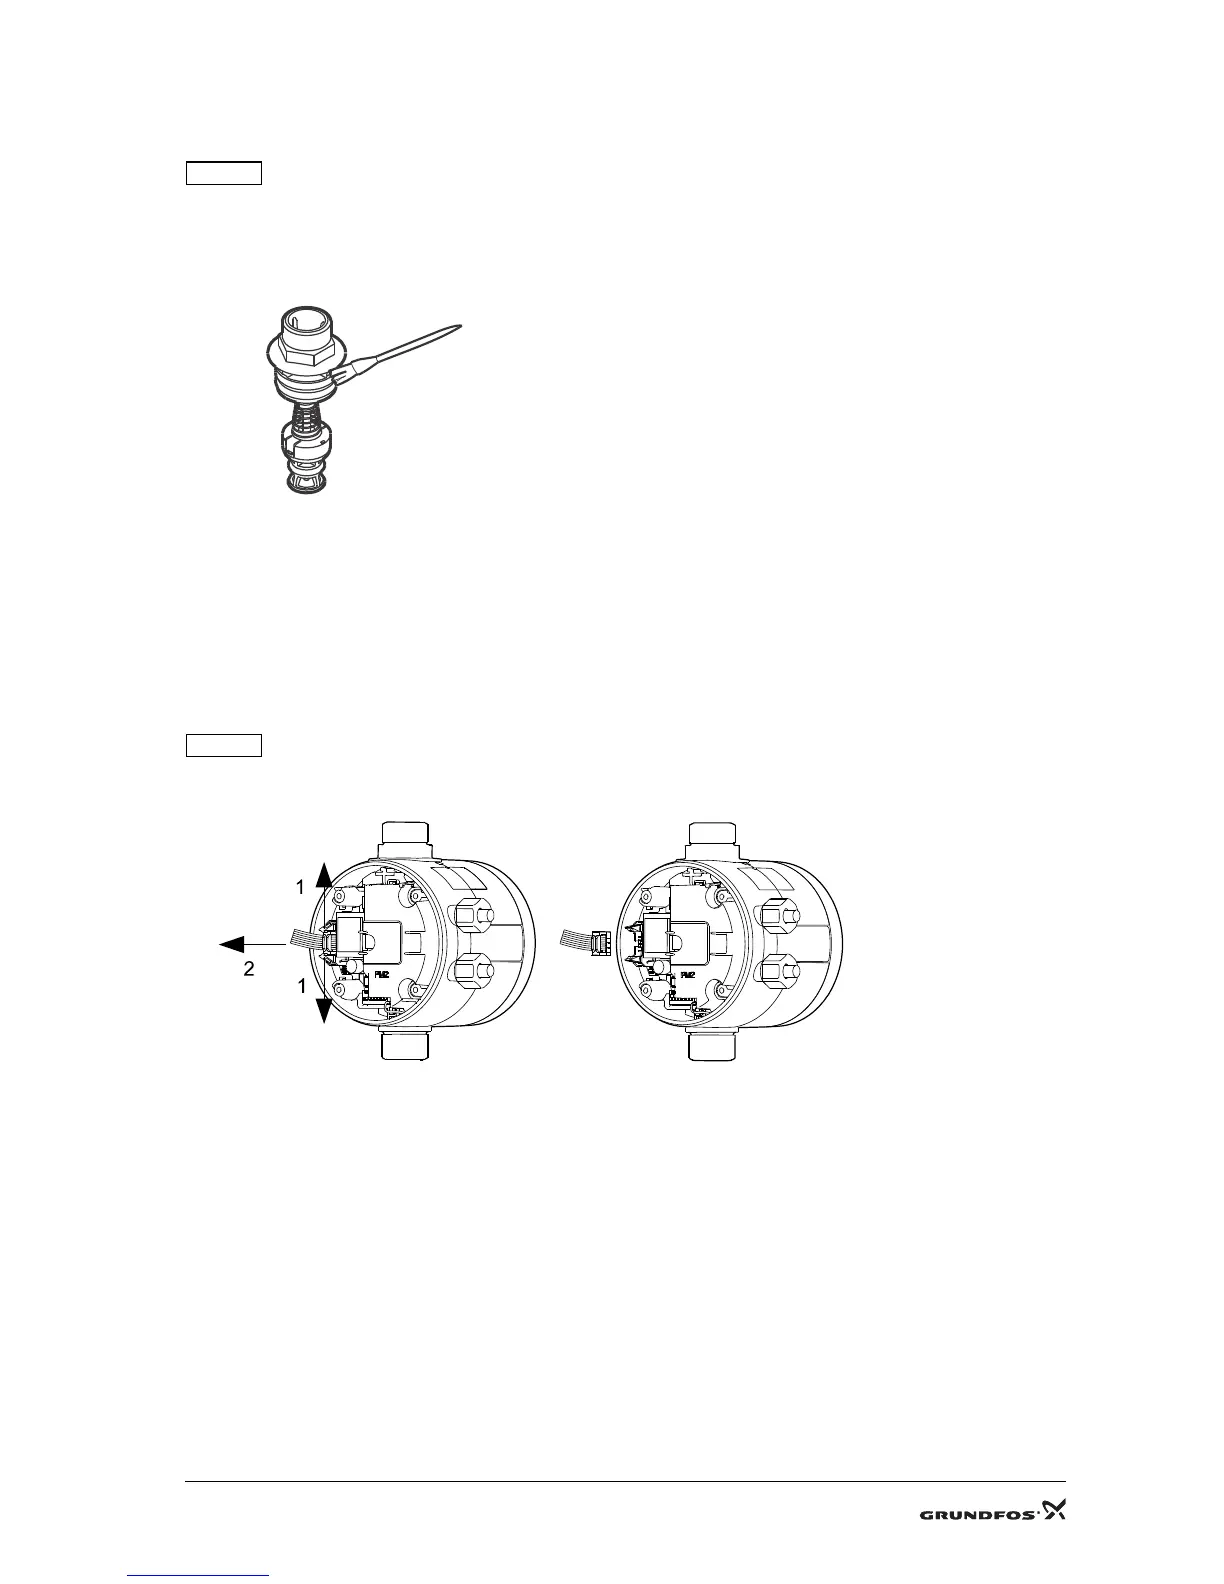
1. Lubricate the O-ring. See Fig. 2
Fig. 2 Lubricating the O-ring
2. Press valve (pos. 6) home in the housing (pos. 5).
3. Fit clamp (pos. 7) and side cover (pos. 8).
4.3 PM 2
4.3.1 Removing the electronic unit
1. Remove screws (pos. 1), and take off front cover (pos. 2).
2. Pull the flat cable out of the plug in the electronic unit (pos. 4).
Fig. 3 Removing the flat cable
3. Remove terminal board cover (pos. 3).
4. Disconnect cables (pos. 9 and 10) from the terminals on the electronic unit (pos. 4).
5. Loosen cable entries (pos. 11), and pull cables (pos. 9 and 10) out of the cable entries.
6. Remove plug for sensor (pos. 13).
 Loading...