English (GB)
13
Proceed as follows:
1. Remove the fuses, and check that the impeller
can rotate freely. Turn the grinder head by hand.
2. Check the condition of the oil in the oil chamber.
See also section 8.4 Oil check and oil change.
3. Check whether the monitoring units, if used, are
operating satisfactorily.
4. Check the setting of the air bells, float switches
or electrodes.
5. Open the isolating valves, if fitted.
Auto coupling: It is important to grease the
gasket of the guide claw before lowering the
pump into the pit.
6. Lower the pump into the liquid and insert the
fuses.
Auto coupling: Check that the pump is in the
right position on the auto-coupling base unit.
7. Check that the system has been filled with liquid
and vented. The pump is self-venting.
8. Switch on the power supply to the pump. When
power is on, the pump will start and pump down
to the dry-running level. This process can be
used to check that the pump functions correctly.
After one week of operation or after replacement of
the shaft seal, check the condition of the oil in the
chamber. See section 8. Servicing and maintaining
the product.
4.5 Resetting the pump
To reset the pump, switch off the power supply to the
pump for one minute, and switch it on again.
5. Handling and storing the product
5.1 Handling the product
Before handling the product, see section 3.1.1 Lifting
the product.
5.2 Storing the product
During long periods of storage, protect the pump
against moisture and heat.
After a long period of storage, inspect the pump
before putting it into operation. Make sure that the
impeller can rotate freely. Pay special attention to the
condition of the shaft seal and the cable entry.
6. Product introduction
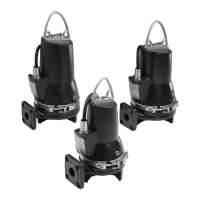
6.1 Product description
Fig. 9 SEG pump
TM06 5740 0116
Pos. Designation
1 Cable plug
2Nameplate
3 Outlet flange DN 40 and 50
4 Outlet port
5 Lifting bracket
6 Stator housing
7Oil screw
8 Clamp
9 Pump foot
10 Pump housing
 Loading...