57
Move “Active Frame” to “PTZ Linkage” button, press [ENTER] key to enter
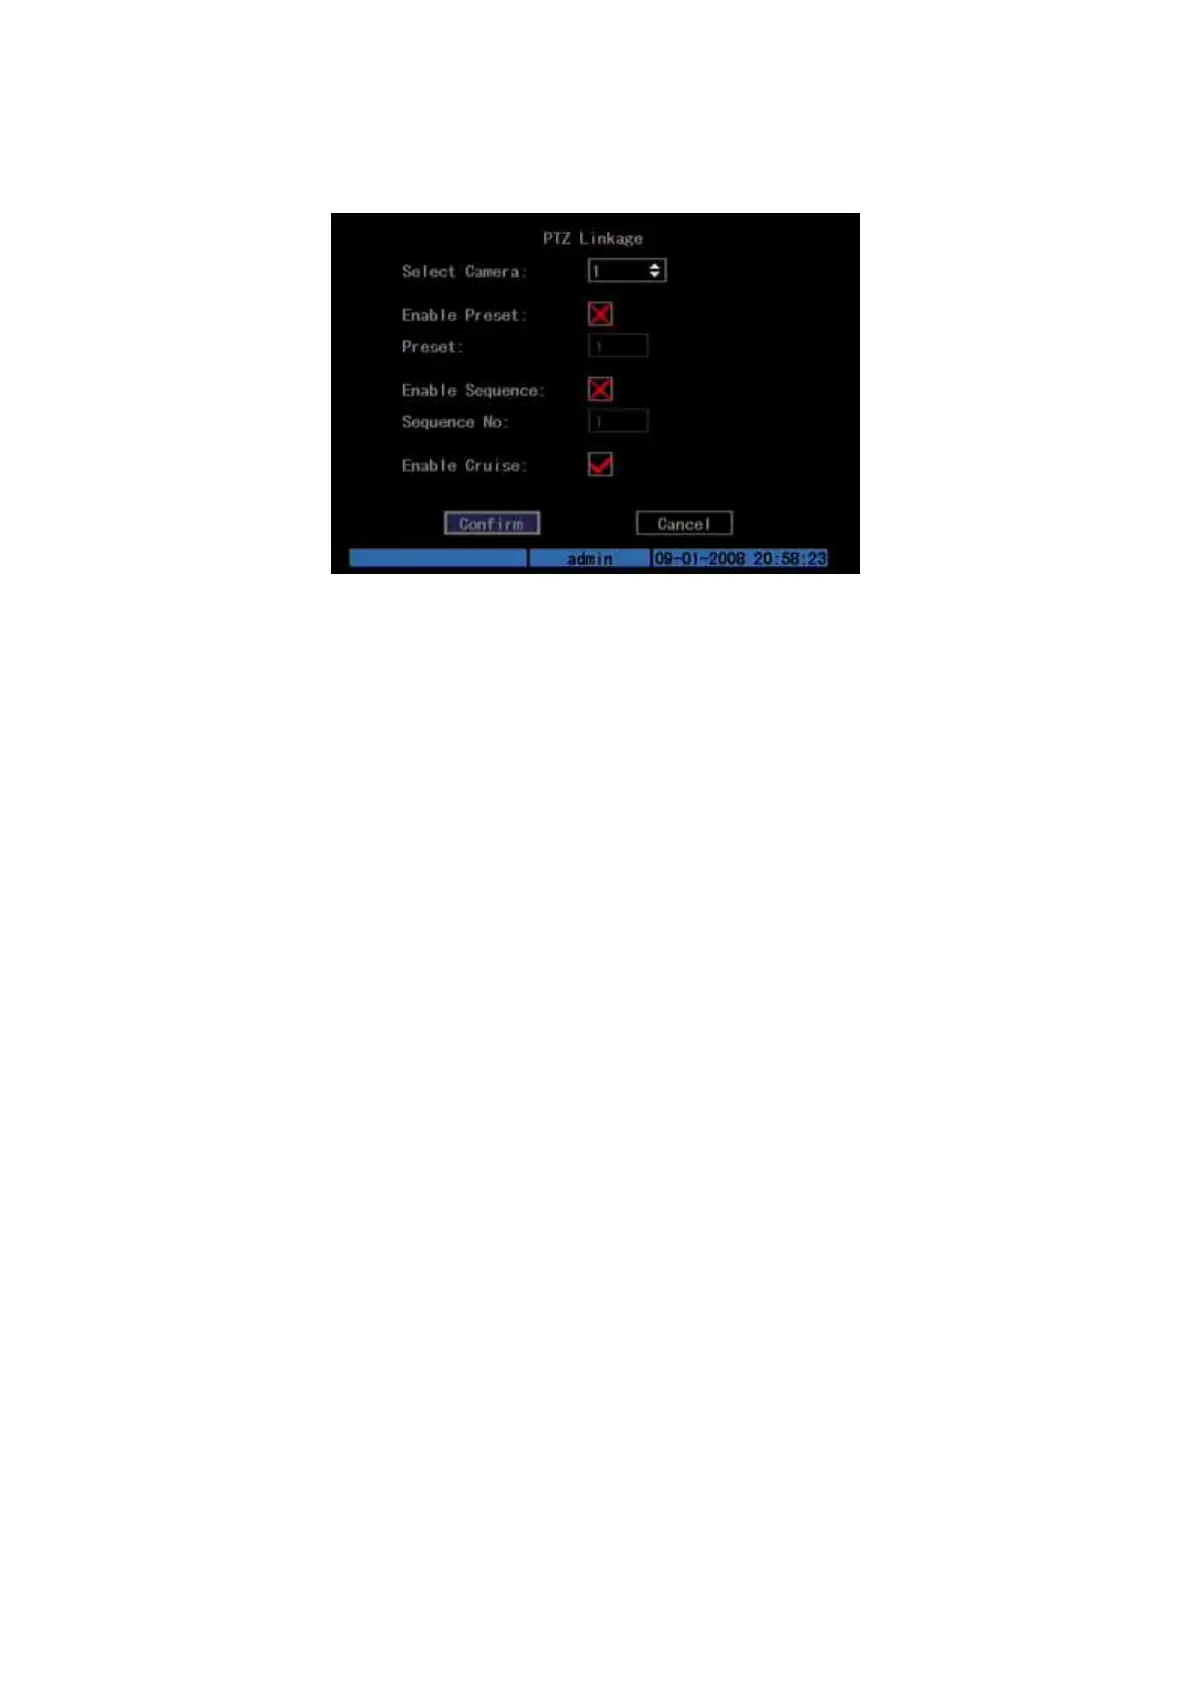
“PTZ Linkage” setup menu: Shown as Fig.5.25 below
Fig. 5.25 PTZ linkage setup
First select one camera, and then select one of following PTZ linkages:
Preset: Set the flag as “” to enable preset, in the preset number edit box and
input one preset number that has been setup already. Please refer to chapter
5.15 for preset setup.
Sequence: Set the flag as “” to enable sequence and input one sequence
number that has been setup already. Please refer to chapter 5.15 for sequence
setup.
Cruise: Set the flag as “” to enable cruise. Please refer to chapter 5.15 for
cruise setup.
Press “Confirm” button to save and return “Alarms” menu. Press “Cancel” button
or [ESC] key to abort and return “Alarms” menu.
Note: Please make sure that the PTZ you are using can support preset,
sequence and cruise functions. One external alarm input can trigger many
cameras PTZ linkage.
Step 9: Copy the parameters to other external alarm input, you can copy the
parameters of current alarm input to other external input.
Step 10: Save setup In “Alarms” menu, press “Confirm” button to save the
parameters. Press “Cancel” button or [ESC] key to abort.
Alarm relay output setup
Step 1: In “Alarms” menu, use [↑] [↓] keys to select one alarm output.
Step 2: Select delay time
The delay time is when the alarm is disappeared; the alarm output will continue
output time. The delay time options are: 5 Seconds, 10 Seconds, 30 Seconds, 1