2-21
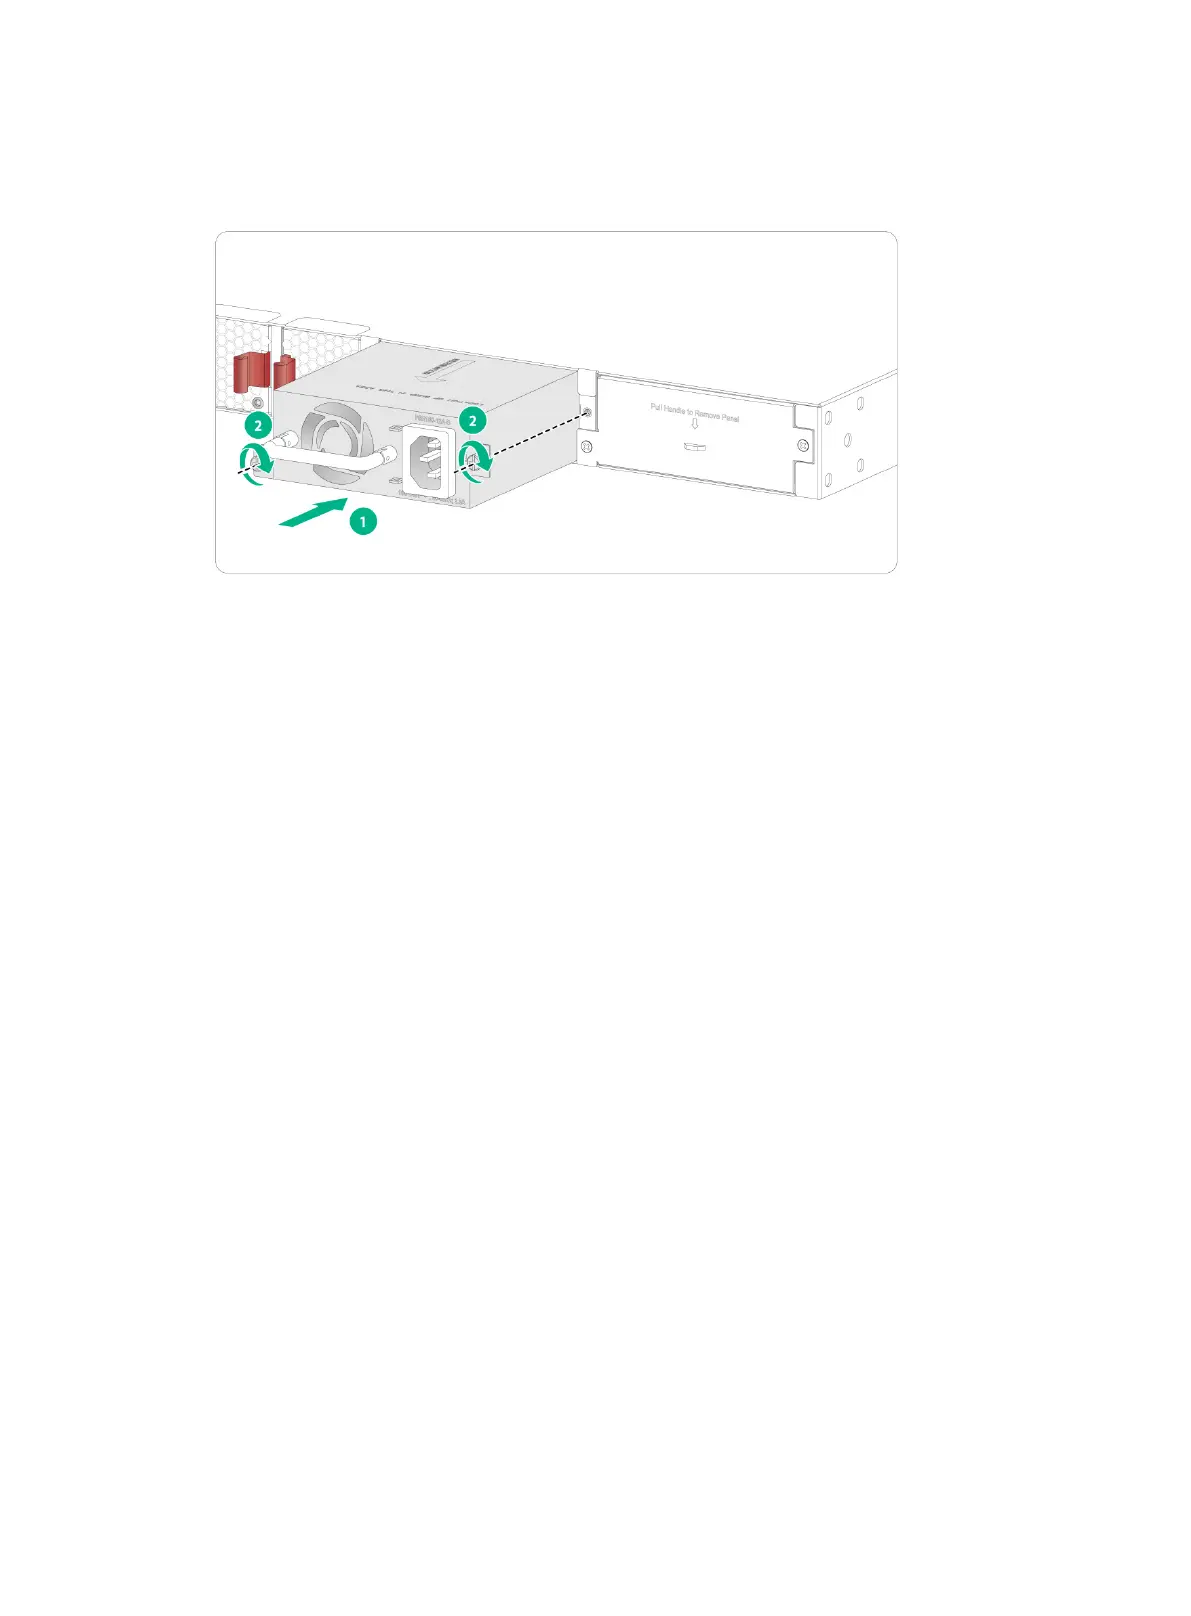
6. Install the filler panel over the empty power supply slot to prevent dust and ensure good
ventilation if you install only one power supply.
Figure2-28 Installing a power supply
Removing a PSR250-12A, PSR250-12A1, PSR1600-54A-B,
PSR920-54A-B, or PSR600-54A-B power supply
The removal procedure is the same for the PSR250-12A, PSR250-12A1, PSR1600-54A-B,
PSR920-54A-B, and PSR600-54A-B power supplies.
To remove a PSR250-12A1 power supply:
1. Wear an ESD wrist strap. Make sure the strap makes good skin contact and is reliably
grounded.
2. Disconnect the power cord.
3. Press the latch on the power supply towards the handle side, and pull the power supply part
way out of the slot along the guide rails.
4. Grasping the handle of the power supply with one hand and supporting module bottom with the
other, pull the power supply slowly out of the slot along the guide rails.
5. Place the removed power supply on an anti-static mat or put it into its packaging bag.
6. If you are not to install a new power supply in the slot, install a filler panel in the slot to prevent
dust and ensure good ventilation.
 Loading...