• VAP235: Service tool software
Step Description Picture
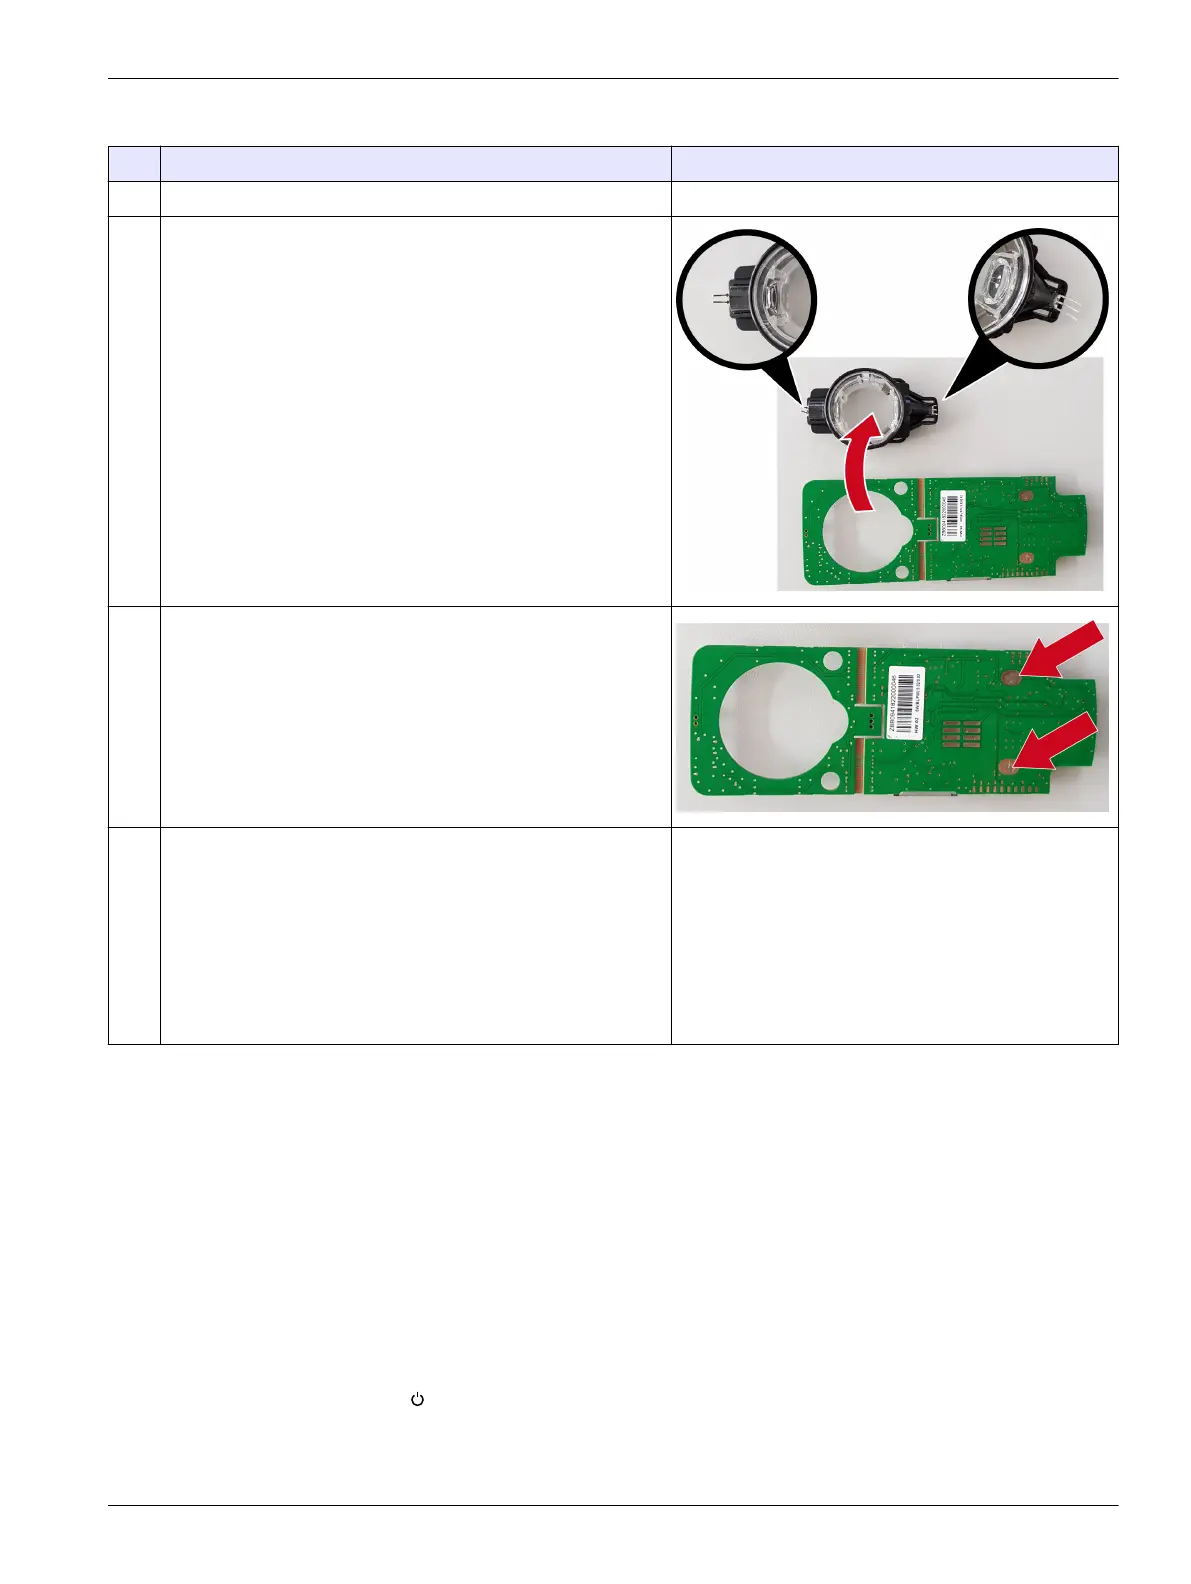
1 Open the instrument, refer to Open the instrument on page 35.
2 Remove the optical unit carefully.
Note: Make sure that the contact pins are not damaged.
3 To reassemble the mainboard, follow the previous steps in
reverse order.
Note: Coat the battery contact surfaces on the mainboard with Krytox
oil.
Note: Coat the seal groove with Krytox oil.
4 After replacing the mainboard it is necessary
• to set the part number. Refer to Set the part number
on page 43.
• to set the serial number. Refer to Set the serial number
on page 44.
• to do an inspection. Refer to Do an inspection with the
test filter set, service cable, PC and VAP235 software
on page 21.
This repair task is also available as a service video on HSO. HSO full access requires
login credentials. First log into HSO and afterwards click on
https://support.hach.com/app/answers/answer_view/a_id/1024331. Select the desired
service video.
Note: Following hyperlink without being logged will end in a permission denied information
screen.
5.3.1 Set the part number
Note: It's not allowed to reconfigure an instrument to another parameter!
1. Install the service cable VAA10036.99.G00 in the DR300. Refer to Insert the service
cable on page 19.
2. Start the VAP235.
3. Connect the VAA10036.99.G00 to an USB port.
4. Push on the DR300.
5. Push Connect. The display of the DR300 shows Service.
Repairs
43

 Loading...