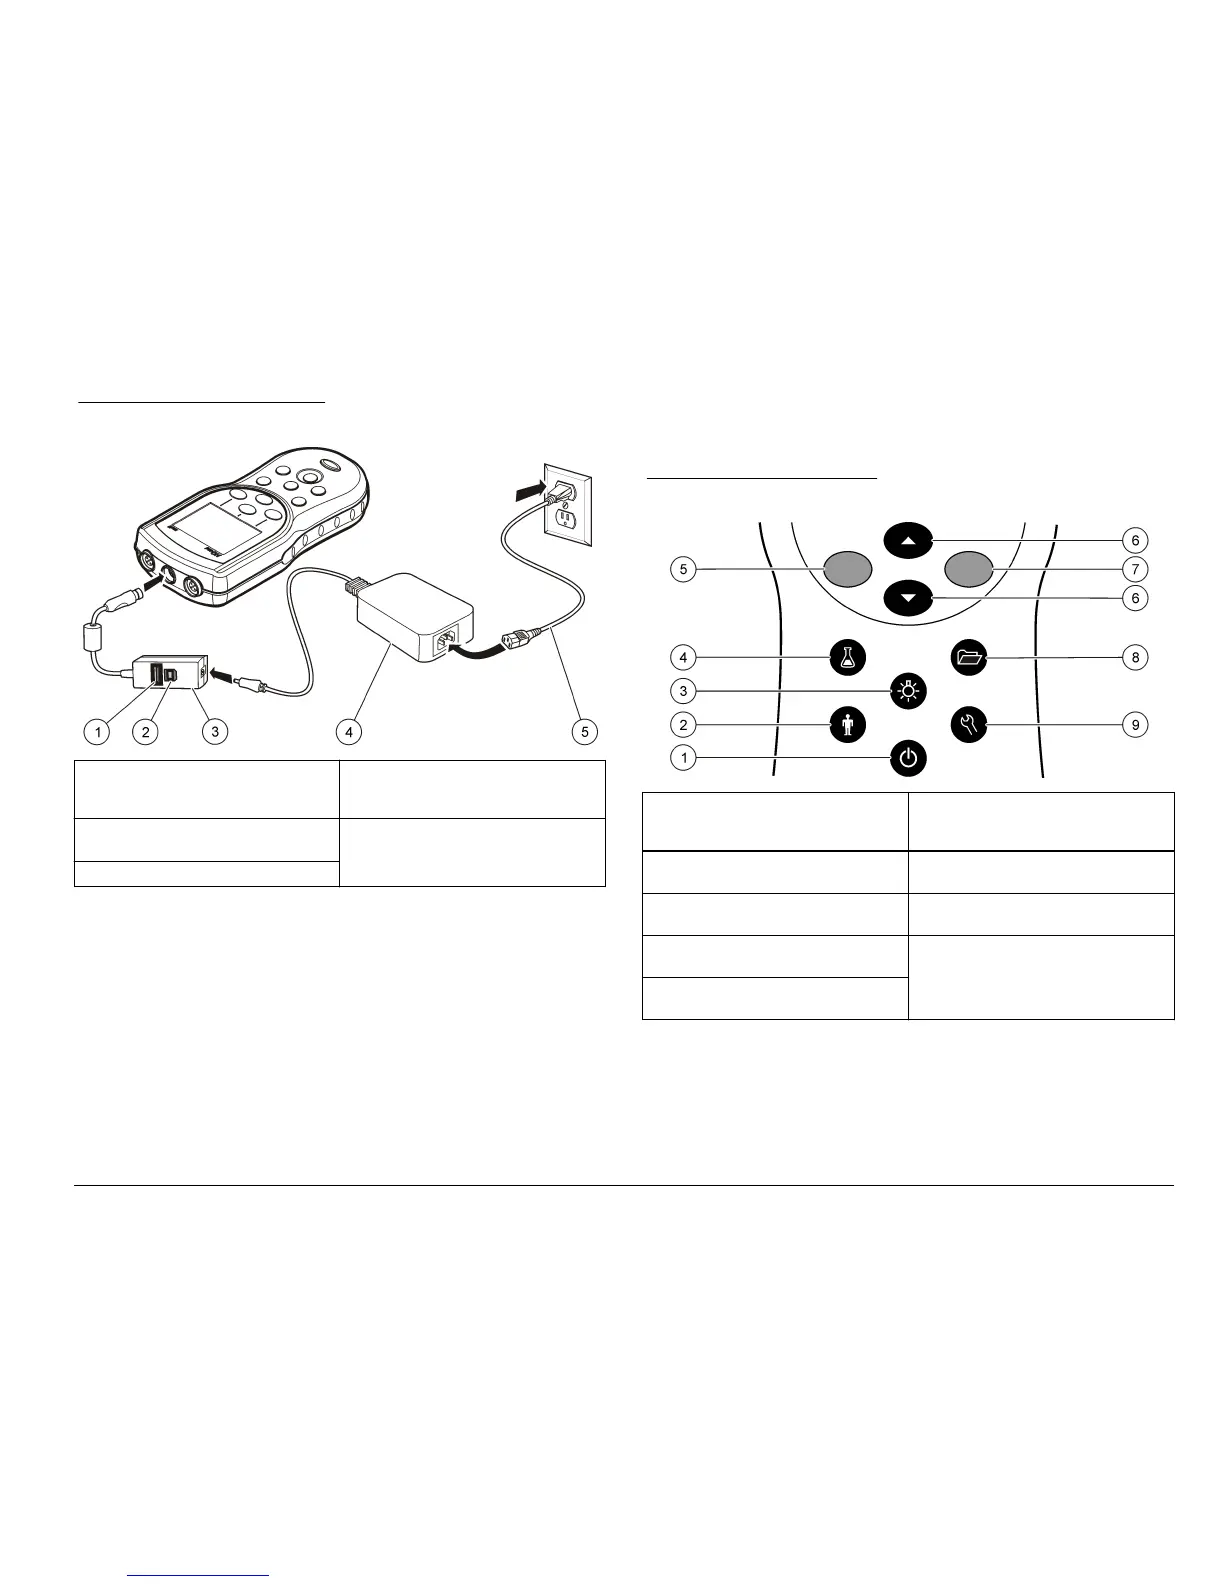
Figure 4 AC power connection
1 USB storage device/printer/Qwerty
keyboard connection (USB
peripheral)
4 AC-DC power supply
2 Personal computer connection
(USB host)
5 AC power cord
3 USB/DC adapter
User interface and navigation
User interface
Figure 5 Keypad description
1 ON/OFF: turn on or turn off the
meter
6 UP and DOWN key: scroll through
menus, enter numbers and letters
or change the reading screen view
2 OPERATOR ID: associate data with
an individual
7 GREEN/RIGHT key: reads, selects,
confirms or stores data
3 BACKLIGHT: illuminate the display
screen
8 DATA LOG: recall or transfer stored
data
4 SAMPLE ID: associate data with a
sample location
9 METER OPTIONS: change
settings, run check standards, view
meter information
5 BLUE/LEFT key: calibrates, cancels
or exits the current menu
Display description
Measurement screen
The meter display shows the concentration, units, temperature,
calibration status, operator ID, sample ID, date and time (Figure 6).
English
9
 Loading...