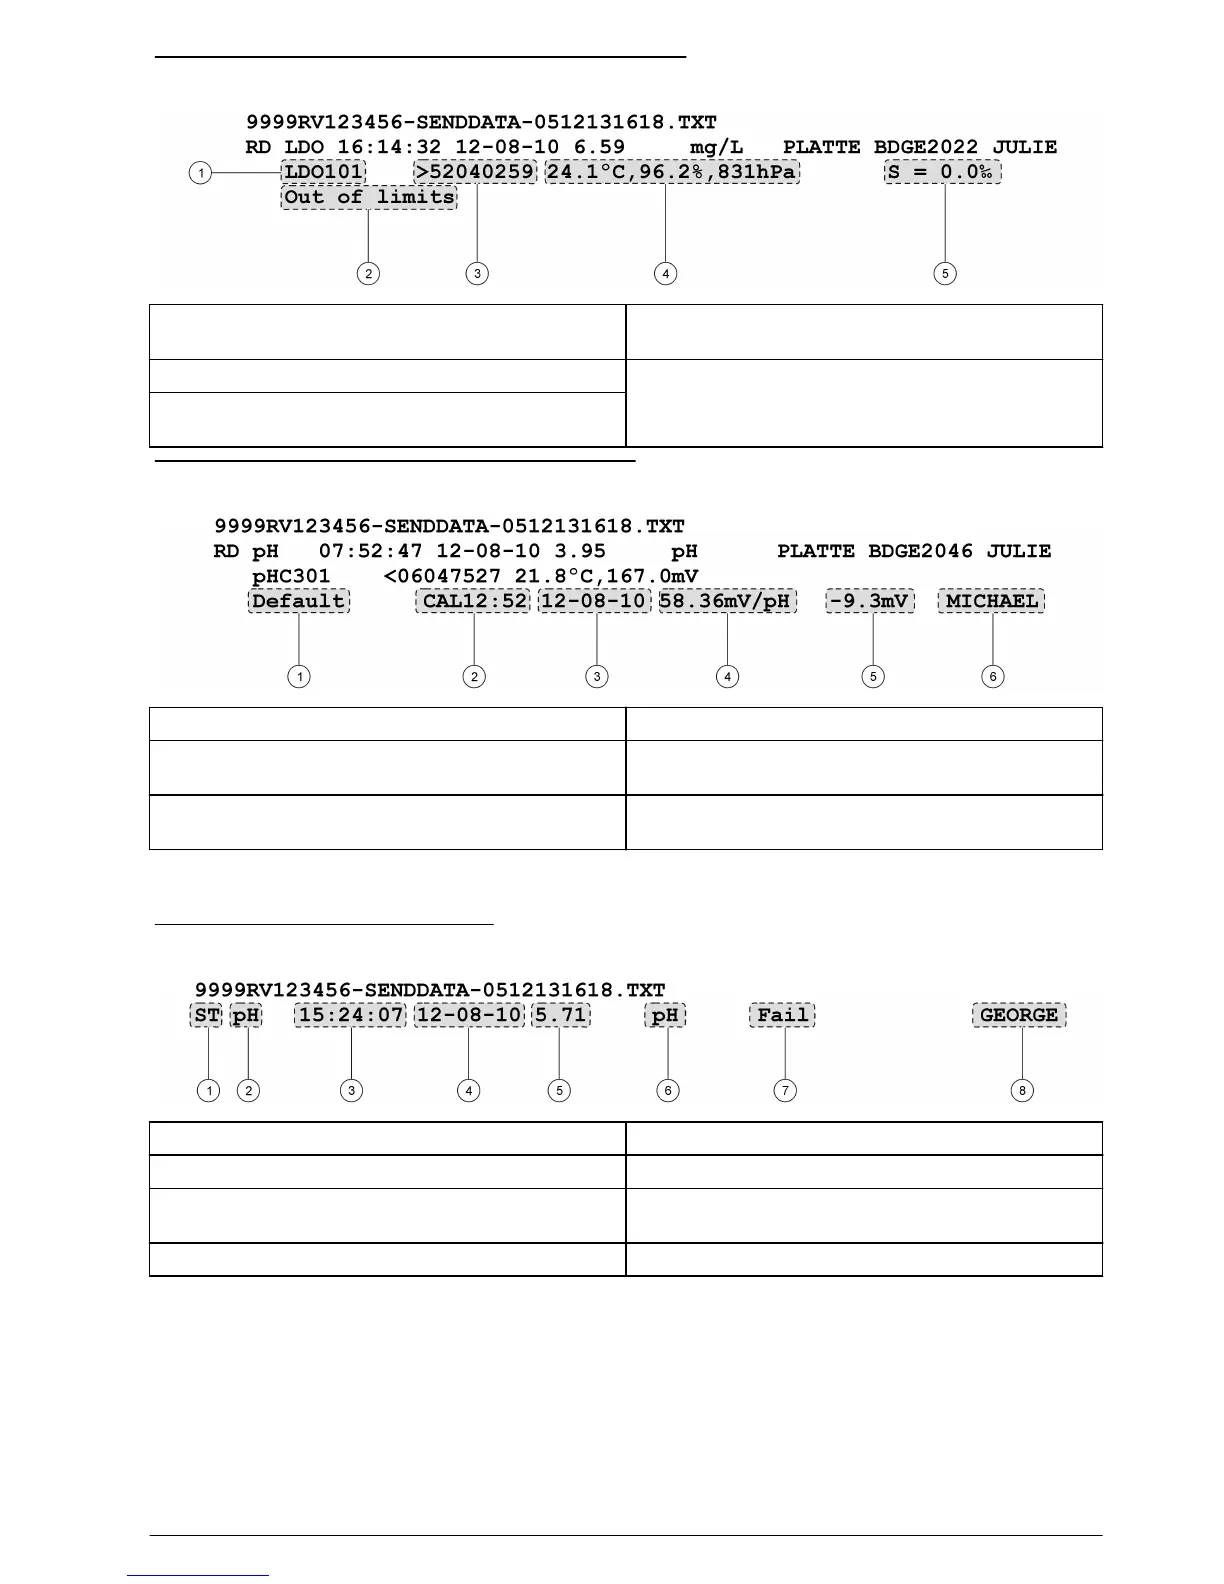
Figure 14 Advanced report for sample data—2 lines
1 Probe model 4 Additional units: shows all additional units
associated with the reading.
2 Error message (if applicable) 5 Probe settings: shows the highest-priority setting
associated with the reading
3 Probe serial number (a “<“ or “>” on the HQ40d
meter indicates the probe position)
Figure 15 Total report for sample data—3 lines
1 Method name for probe settings 4 Calibration slope/ratio/constant
2 Time of calibration, prefaced by “CAL” and
displayed as hh:mm in 24 h (or user-defined) format
5 Offset—contents vary depending on type of
parameter and user settings. May be blank.
3 Date of calibration (DD-MM-YY or user-defined
format)
6 Operator ID: user-defined; shows “- - -” if undefined
Check standard reports
Check standard data is printed with 1 line of information (Figure 16)
Figure 16 Check standard report
1 Report type (ST = check standard) 5 Measured value
2 Report type (ST = check standard) 6 Units
3 Time (hh:mm:ss in 24 h or user-defined format) 7 Check standard status: Pass/Fail based on the
acceptance criteria
4 Date (DD-MM-YY or user-defined format) 8 Operator ID: user-defined; shows “- - -” if undefined
Calibration reports
Calibration data is printed when the data log is sent to the printer or when probe data is sent to the
printer. Calibration data is printed with 2 lines of information (Figure 17).
English
29

 Loading...