J
Javier ChanSep 6, 2025
What does error E3 mean on a Haier HDW12-TFE3WH?
- RreynoldskatherineSep 6, 2025
If your Haier Dishwasher displays the error "E3", it indicates that the drain hose is too low. Check the height of the drain hose.
What does error E3 mean on a Haier HDW12-TFE3WH?
If your Haier Dishwasher displays the error "E3", it indicates that the drain hose is too low. Check the height of the drain hose.
Why is there detergent stuck in the dispenser of my Haier Dishwasher?
If there are remnants of detergent stuck inside the dispenser of your Haier Dishwasher, it's likely because the compartment was damp when it was filled. Ensure the compartment is dry before adding detergent.
Why are tea stains still on my cups after using the Haier Dishwasher?
If tea stains or traces of lipstick are not completely removed after washing in your Haier Dishwasher, the detergent may not have a sufficient bleaching effect, or the washing temperature was set too low. Use a detergent with a better bleaching effect or increase the washing temperature.
Why is there too much foam in my Haier Dishwasher?
If an unusual amount of foam is created in your Haier Dishwasher, it's likely that normal washing up liquid has been poured into the rinse-aid container. Remove any spilled rinse aid.
Why is my Haier HDW12-TFE3WH Dishwasher making a knocking sound?
If you hear a knocking sound while your Haier Dishwasher is running, a spray arm is likely hitting the dishes inside. Rearrange the dishes to prevent the knocking.
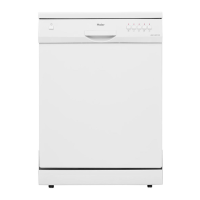
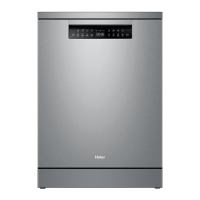
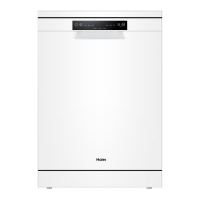
| Wash Programs | 6 |
|---|---|
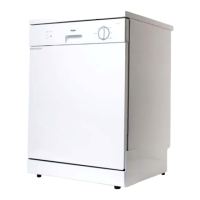
| Door Colour | White |
| Control Panel Colour | White |
| Built-in Display | Yes |
| Inlet Hose Length | 1.5 m |
| Delayed Start Timer | Yes |
| Delay Start (max) | 24 h |
| AquaStop Function | Yes |
| Salt Indicator | Yes |
| Rinse Aid Indicator | Yes |
| Upper Basket Adjustable Height | Yes |
| AC Input Voltage | 220-240 V |
| AC Input Frequency | 50 Hz |
| Child Lock | Yes |
| Place Settings | 12 |
| Washing Programs | Eco |
| Width | 598 mm |
Check packaging for transport damage and dispose of materials properly.
Appliance intended for household use, connect according to instructions, ensure proper earthing and accessible plug.
Avoid door hazards, adult use only, no outdoor installation, no heavy objects on door, no solvents.
Supervise children, keep detergents away, children not to play with appliance.
Turn off water/power, contact service, use authorized personnel and spare parts.
Cut power cord, remove door lock, take to waste disposal center.
Installer responsibility, qualified person, read safety section, earthing, accessible plug, dispose of old appliance.
Check for damage, recycle packaging, lift carefully, avoid kinking hoses/cords.
Power cord length, no extension cords, hose length, water temperature limits, no high-pressure hot water.
Standpipe requirements, use drain hose support, avoid waste disposal units.
Connect to sink trap with spigot, ensure support, check spigot diameter.
Check door, plug accessibility, and dishwasher levelness.
Identifies buttons, lights, and indicators on the control panel.
Identifies racks, spray arms, filter, and dispenser.
Explains rinse aid function and when to refill.
Instructions for opening dispenser, filling, and adjusting dosage.
Specifies detergent type and when to refill dispenser.
Instructions for opening dispenser, filling compartments, and closing.
Lists materials like wood, delicate glassware, certain plastics, and metals not suitable for washing.
Advise purchasing only dishwasher-proof items in future.
Discusses causes of damage and remedies like using specific detergents and programs.
Instructions for loading pots, pans, bowls, and silverware basket in the lower rack.
Instructions for placing tall glasses, cups, and small bowls on the upper rack shelf.
Describes how to use the knife rack for safe washing of knives.
How to identify the most appropriate programme based on crockery and food remains.
Suggests using the "Half load" function for fewer dishes.
Explains that data is based on standard conditions and lists influencing factors.
Steps to turn on the dishwasher, select a programme, and indicators.
Steps to turn off the appliance after the cycle, including opening the door and turning off the tap.
How to stop a running cycle, caution about water squirting and door opening.
Instructions on how to set a delayed start for a wash cycle.
Explains the function of the Half Load button for washing only the upper rack.
How to use the reset drain function to stop a running cycle.
Turn off water, leave door ajar to prevent moisture and odors.
Unplug before cleaning or maintenance.
Use mild soap and water for cleaning exterior and interior.
Keep appliance vertical during movement, if possible.
Clean seals periodically to prevent odors from trapped food.
Run empty cycle, unplug, turn off water, leave door ajar.
Check for grease/scale, clean interior with detergent solution if needed.
Check the low rinse aid indicator and top up if necessary.
Instructions for checking and cleaning filters (coarse micro-filter, filter unit).
Encourages self-resolution of common issues to save costs and time.
Lists potential reasons why the appliance might not start up.
Explains error codes E3, E4, E5 related to drain hose, water supply, and filters.
Cause is blocked spray arm by items or food.
Causes include overfilling or clogged mechanism with detergent.
Compartment must be dry before adding detergent.
Possible causes include blocked drain hose, jammed pump, or blocked filters.
Covers unusual foam, sudden stops, knocking sounds, and rattling sounds.
Addresses food remnants on dishes due to loading, spray arm obstruction, or blocked filters.
Covers issues like discoloured plastic, white stains, poor drying, dull glasses, rust, and smears.
General important notes.
Instructions for environmentally friendly disposal of old appliances and packaging.
Details on comparability tests according to AS/NZS 2007 standards.