4
5.2 Navigation and controls
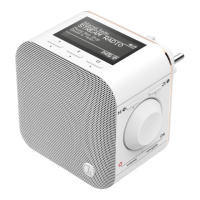
[NAVIGATE/ENTER/VOLUME] (7) has two different
functions:
• Turn [NAVIGATE/ENTER/VOLUME] (7) to select among
menu items.
• Conrm the selection by pressing [NAVIGATE/ENTER/
VOLUME] (7).
Press [Back/Info] (6) to return to the previous menu level.
After pressing a shortcut button, navigate amongst the
menu items using [VOLUME/ENTER/NAVIGATE].
5.3 Volume adjustment
Turn [NAVIGATE/ENTER/VOLUME] (7) to increase/reduce
the volume.
5.4 Entering passwords, search terms, and so on
• Select each successive letter and digit by turning
[VOLUME/ENTER/NAVIGATE] and conrm each
selection by pressing [VOLUME/ENTER/NAVIGATE].
• To make corrections, select BKSP and conrm. The last
input made is deleted.
• To cancel input, select CANCEL and conrm.
• Once your input is complete, select OK and conrm to
nish.
5.5 Additional Information
Press and hold [BACK/INFO] for 3 seconds to display
context-dependent additional information. The information
shown depends on the operating mode as well as the
current station.
• Program genre/country
Indicates the genre (music style) and the country or
region of the station.
• Signal strength
• Bit rate
The current digital bit rate of the station currently being
received.
• Codec
Species the encoding scheme used to digitise the data
or signal (such as MP3 or WMA).
• Sampling rate
Species the sampling rate, or the frequency with which
the audio signal is polled in a certain period of time.
• Playback buffer
The signal strength of the current station is indicated by
the length of the bar display.
• Today’s date
• Artist
• Album
• Folder
• Path
Species the directory path at which the le currently
being played back is saved
6. Getting started
6.1 WLAN/WiFi connection (wireless network)
• Make sure that the router is on and that you have an
Internet or network connection.
• If it is not already activated, activate the WLAN network
of your router.
• If you have questions about router conguration,
please consult the operating manual of the router for
troubleshooting.
• A detailed description of how to congure the WLAN
connection is given in the Wireless connection section.
6.2 Radio – Connecting and starting up
Connect the power cable to a properly installed socket.
The integrated power supply unit is suitable for mains
voltages between 100 and 240 V, and is thus operable on
almost any AC power grid. Please note that a country-
specic adapter may be necessary.
You can nd a selection of compatible products at
www.hama.com.
Warning
• Connect the product only to a socket that has been
approved for the device. The socket must be installed
close to the product and must be easily accessible.
• Disconnect the product from the power supply using
the on/off switch – if this is not available, unplug the
power cord from the socket.
• When using a mult-socket power strip, make sure
that the sum power draw of all the connected devices
does not exceed its maximum throughput rating.
• If you will not be using the product for a long period
of time, disconnect it from mains power.
Once the product has been connected to mains power,
initialisation takes place.
The radio starts.
To assist you in rst-time setup of the radio, a Setup
Wizard (6.3) is provided.

 Loading...