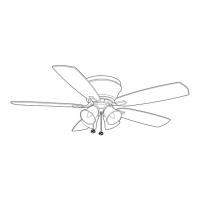
Attaching the Fan
Blades
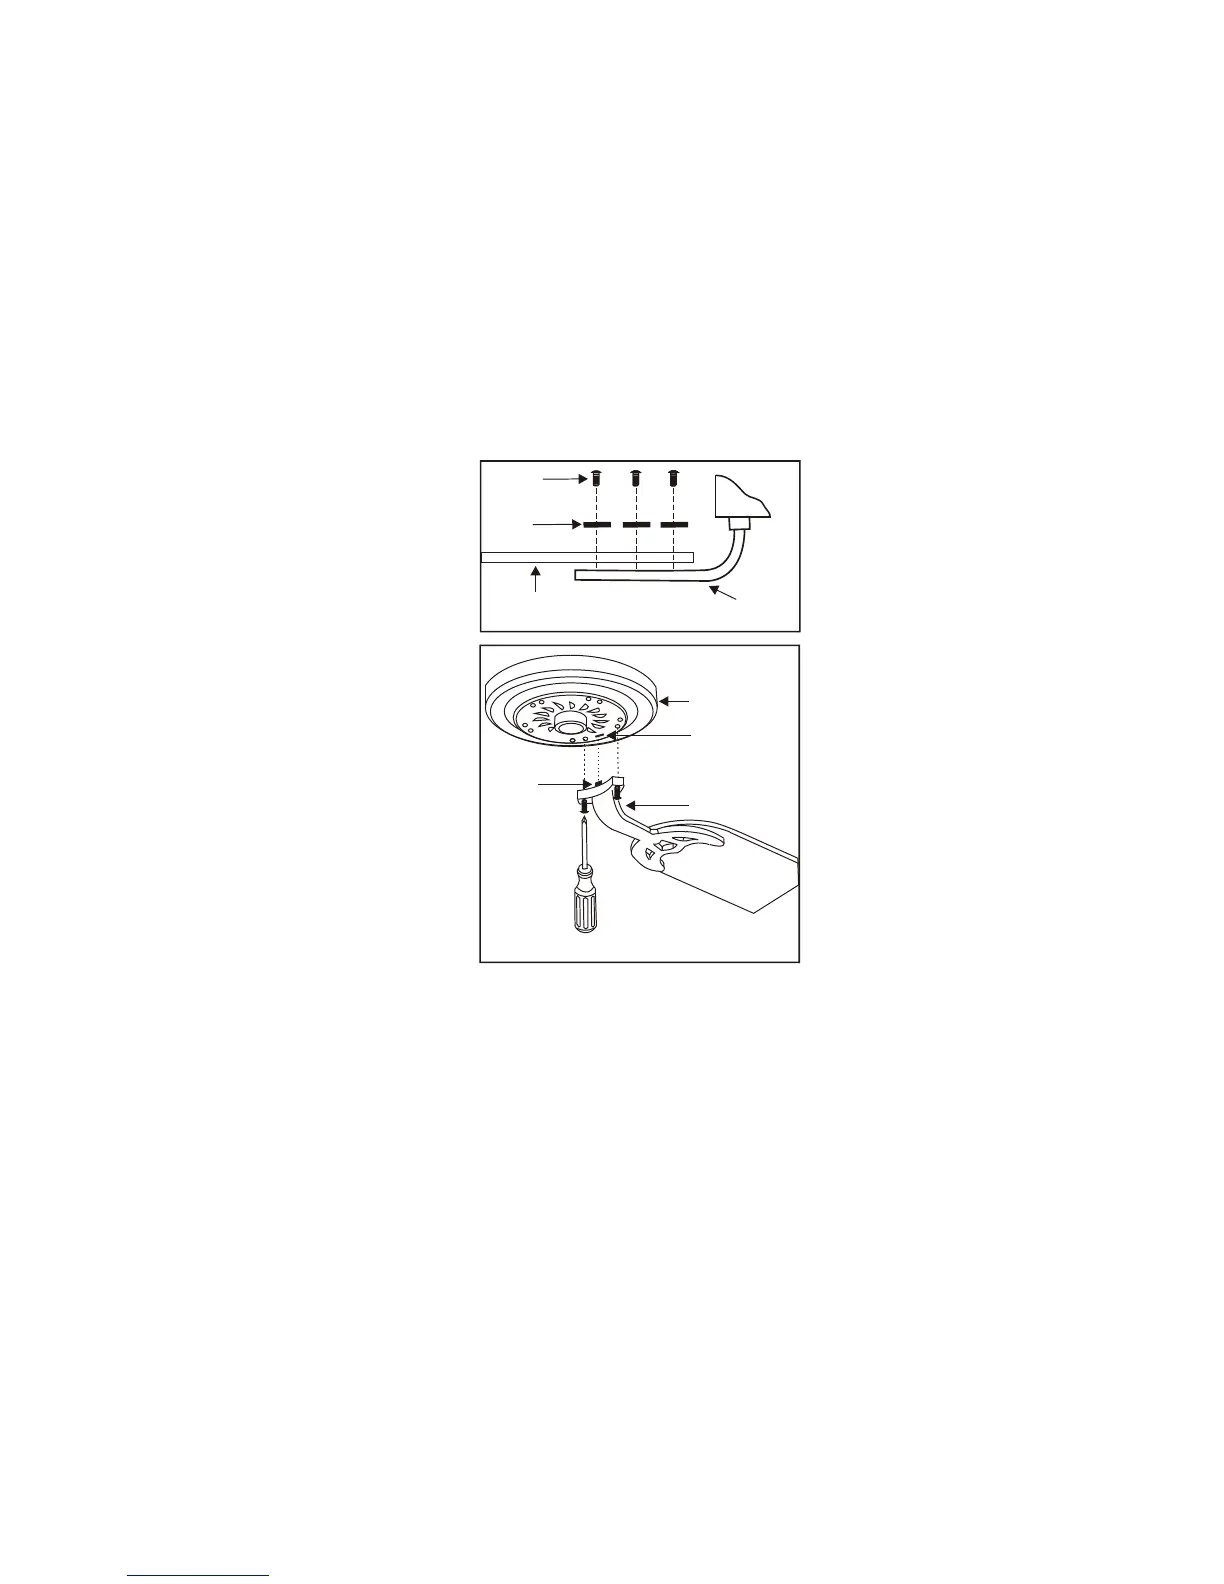
Step 1 Attach blades to blade brackets using
three screws and fiber washers as shown in
Figure 13. Start a screw into the bracket, do not
tighten. Repeat for the 2 remaining screws and
washers.
Step 2 Tighten each screw securely , make sure
the blade is straight.
Step 3 Fasten the blade brackets to the motor
by inserting the tab from the blade brackets to
the slot in the bottom motor housing, then
tighten the two screws and washers already
installed in the blade brackets. (Figure 14)
Step 4 Install an optional light kit if you wish.
Follow the instructions included with the kit.
7.
All blades are grouped by weight. Because
natural woods very in density, the fan may
wobble even though the blades are weight
matched.
The following procedure should correct
most fan wobble. Check after each step.
1. Check that all blade and blade bracket
screws are secure.
2. Most fan wobble problems are caused
when blade levels are unequal. Check this
level by selecting a point on the ceiling
above the tip of one of the blades. Measure
this distance as shown in Figure 15. Rotate
the fan until the next blade is positioned for
measurement. Repeat for each blade. The
distance should be equal within
1/8".
If all blade levels are not equal, you can
adjust the blade level with the following
procedure.
deviation
Fiber
washer
Blade
bracket
Figure 13
Blade
Screws
Figure 14
Motor
Blade bracket
Slot
Tab
 Loading...