➤ Parts Needed
Fuselage
Plywood servo tray
3 servos
➤ Tools & Adhesives Needed
Hobby knife or round file
6-minute epoxy
Epoxy brush
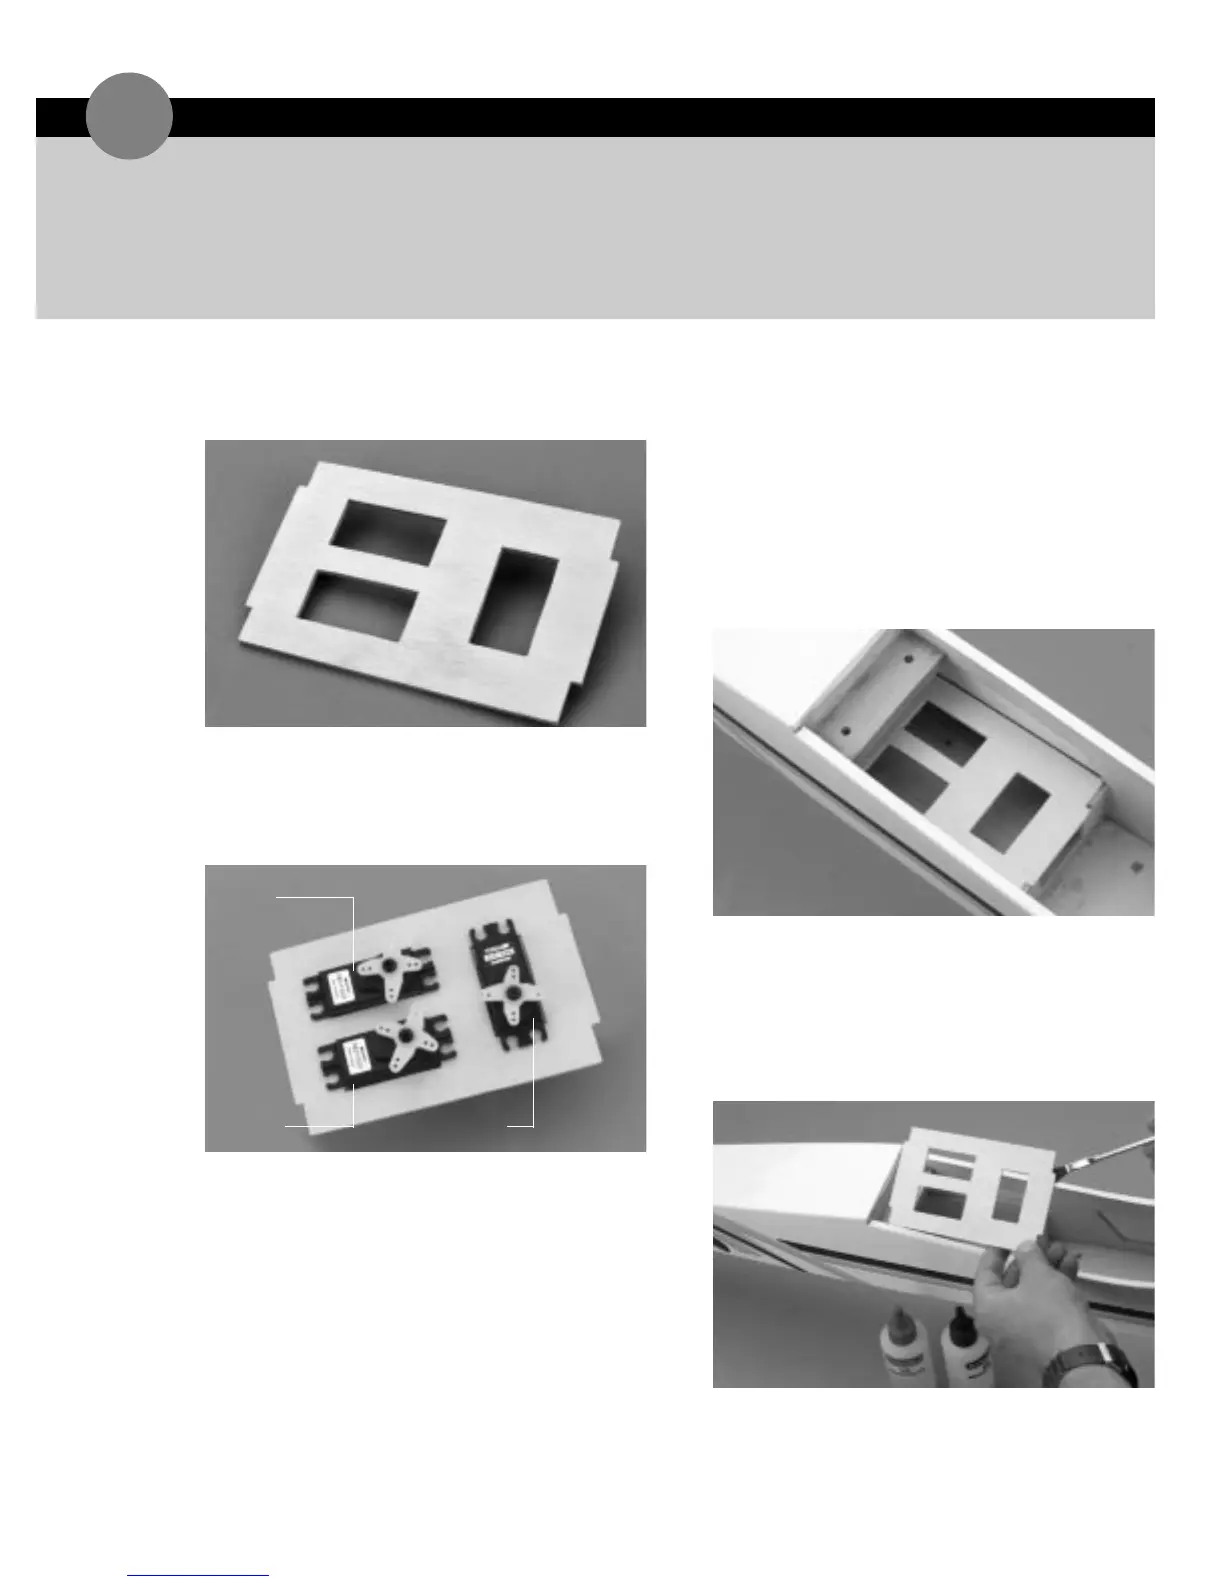
1. Remove the plywood servo tray from the die-cut
plywood sheet.
2. Trial fit the throttle,elevator and rudder servos in the
servo tray. Depending upon the servos utilized,it may
be necessary to enlarge the openings in the tray
slightly. To do so,use a file or sharp hobby knife
accordingly.
3. After the proper servo fit has been achieved,remove
the three servos from the servo tray. Trial fit the
servo tray into the fuselage,noting the correct
orientation. The single servo cut-out should be
closest to the front of the fuselage.
➤ Note:The tray should seat snugly into the notches in
the servo tray support and fuselage former. If it
doesn’t,remove a small portion of the tab from the
servo tray using a file or sharp hobby knife.
4. Mix a small amount,approximately 1/8 ounce,of
6-minute epoxy. Using an epoxy brush,apply epoxy to
the servo tray in the areas that will come in contact
with the servo tray support and the fuselage sides.
Install the servo tray into the fuselage,noting the
correct orientation as described in Step 3 of this
section.
INSTALLING THE SERVO TRAY
16
rudder
rudder
elevator
elevator
throttle
throttle
 Loading...