39
OUTPUTOUTPUT
OUTPUTOUTPUT
OUTPUT
CALIBRATIONCALIBRATION
CALIBRATIONCALIBRATION
CALIBRATION
CALIBRATIONCALIBRATION
CALIBRATIONCALIBRATION
CALIBRATION
CALIBRATIONCALIBRATION
CALIBRATIONCALIBRATION
CALIBRATION
TYPETYPE
TYPETYPE
TYPE
CODECODE
CODECODE
CODE
POINT 1POINT 1
POINT 1POINT 1
POINT 1
POINT 2POINT 2
POINT 2POINT 2
POINT 2
0-1 mA 0 0 mA 1 mA
0-20 mA 1 0 mA 20 mA
4-20 mA 2 4 mA 20 mA
0-5 VDC 3 0 VDC 5 VDC
1-5 VDC 4 1 VDC 5 VDC
0-10 VDC 5 0 VDC 10 VDC
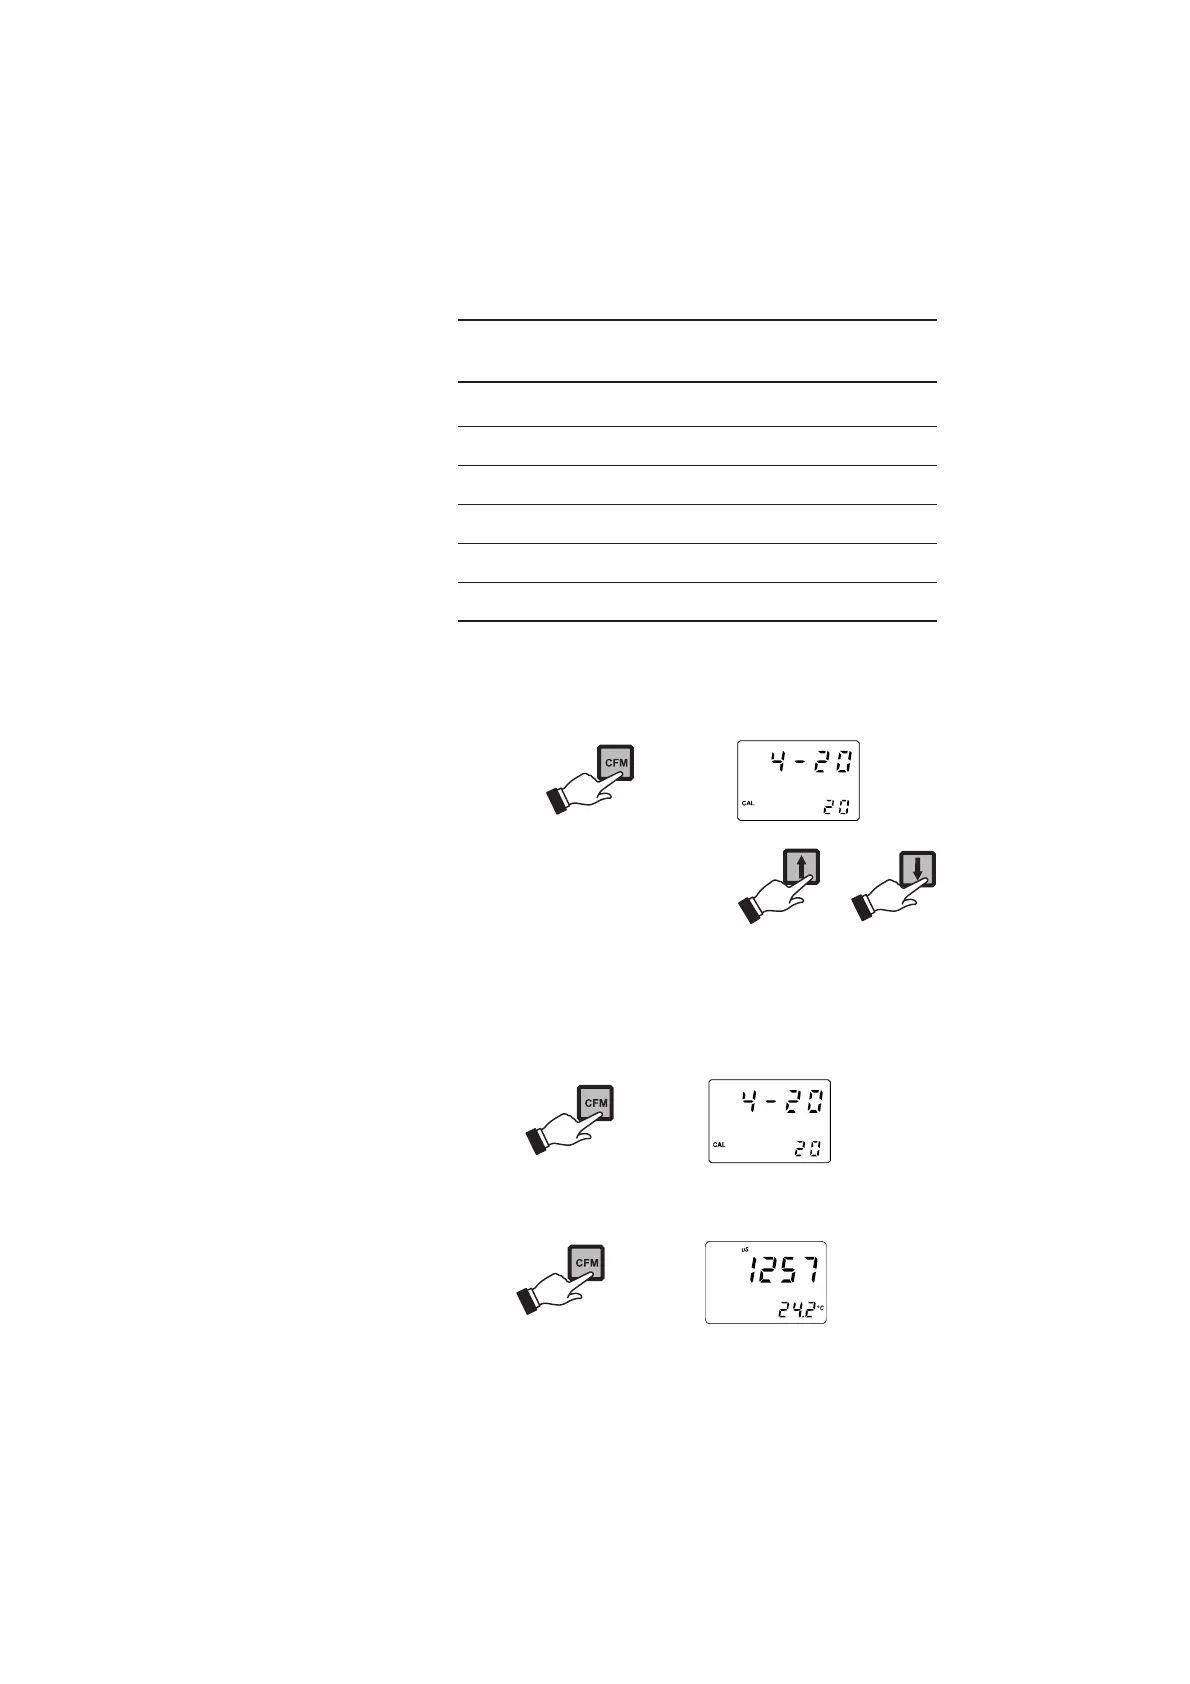
• Press CFM to confirm the selected parameter that will stop
blinking on the primary display. The secondary display shows
the HI 931002 or multimeter input value as lower limit of
the interval.
• Use the ñ or ò to make the HI
931002 or multimeter output cor-
respond to the meter’s value
shown on the secondary display
(e.g. 4).
• Wait for approximately 30 seconds (until the reading of the
calibrator is stable).
• Press CFM to confirm. The meter will switch to the second
calibration point. Repeat the above procedure.
• After the desired readings are obtained, press CFM and
the meter will skip back to normal operational mode.
 Loading...