Do you have a question about the Happymodel Mobula6 and is the answer not in the manual?
Configure receiver mode to SPI RX Support and select SPEKTRUM protocol for SPI Bus Receiver.
Set AUX1 (Channel 5) as the default arm/disarm switch or customize it in Betaflight Configurator.
Steps to bind the drone to the transmitter using the bind button or CLI command 'bind_rx'.
Switch VTX channels using CLI commands or OSD menu. Includes frequency table for bands A, B, E, F, R.
Procedure to check ESC status and flash firmware using BLHeliSuite, targeting S-H-50 firmware.
Update flight controller firmware using Betaflight configurator, STM32 Virtual COM Port Driver, and Zadig.
Default PID settings for Roll, Pitch, and Yaw axes, including Proportional, Integral, and Derivative values.
Configure a transmitter channel (default AUX4) to activate the 'Flip over after crash' function.
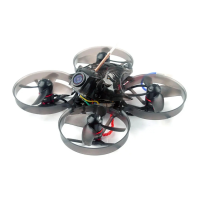
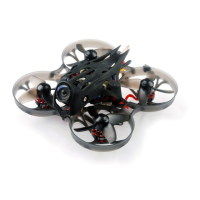
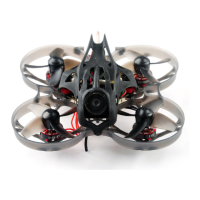
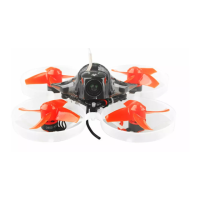
The Happymodel Mobula6 HD is a compact and lightweight 1S 65mm brushless HD whoop drone, designed for smooth and agile flight. It comes as a BNF (Bind-N-Fly) version, meaning it's ready to fly once bound to a compatible radio transmitter.
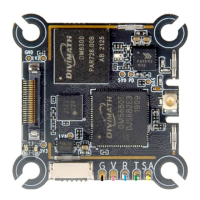
The core of the Mobula6 HD is its AIO (All-In-One) Crazybee F4 Lite flight controller, which integrates a 5.8G VTX (Video Transmitter). This integration simplifies the drone's build and reduces weight. The drone is equipped with an EX0802 KV19000 brushless motor, providing the power necessary for its agile flight characteristics. It uses Gemfan 1219-3 propellers for efficient thrust. A key feature is the integrated Runcam Split3-lite 1080P HD Camera + DVR, allowing pilots to record high-definition video directly on board while also providing a low-latency FPV feed. The drone operates on a 1S LiPo/LIHV battery, and four 250mAh 30C LIHV batteries are included, along with a USB charger.
The flight controller supports various receiver options, including internal SPI Frsky (compatible with ACCST D8/D16, D8 mode recommended), internal SPI Flysky (compatible with AFHDS and AFHDS-2A), and internal SPI DSM2/DSMX (compatible with Spektrum DSM2/DSMX radios). An external TBS CRSF NANO receiver option is also available for those who prefer TBS transmitters. The camera angle is adjustable, allowing pilots to fine-tune their view for different flying styles or environments.
To get started, the receiver mode needs to be set to "SPI RX Support" in the Betaflight Configurator, with the appropriate protocol (e.g., SPEKTRUM for DSM2/DSMX versions) selected for the SPI Bus Receiver provider. Serial RX should not be enabled as the flight controller has an integrated SPI BUS Receiver.
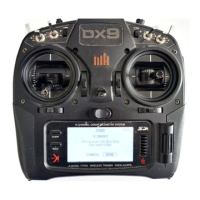
Binding the drone to a radio transmitter involves powering up the Mobula6 HD via USB and either pressing and holding the bind button on the flight controller or typing "bind_rx" in the Betaflight CLI. The red LED on the flight controller will blink rapidly to indicate bind mode. Once bound, the red LED should become solid or blink slowly. For Spektrum radios, the default channel map is TAER1234, and it's crucial to ensure the transmitter matches this configuration for proper arming.
Arming and disarming the motor is typically done via AUX1 (Channel 5) on the transmitter, which can be customized in the Betaflight Configurator's Modes tab. For Spektrum radios, channel 5 is often the "Gear" switch. A green LED on the flight controller will turn solid when the motor is armed, and "Armed" will be displayed on FPV goggles or monitors. It's important to keep the Mobula6 HD level before arming.
The VTX bands and channels can be adjusted in two ways: through the Betaflight CLI by typing "Set VTX_band=" and "Set VTX_channel=" followed by "save," or by disarming the drone and using the OSD (On-Screen Display) menu. To access the OSD menu, move the transmitter sticks to THR MID + YAW LEFT + PITCH UP, then navigate to Features -> VTX SA to set the band and channel.
The drone's motor direction is reversible, and the mixer type is set to Quad X. The ESC/motor protocol is DSHOT300. Features like MOTOR_STOP (to prevent motors from spinning when armed), ESC_SENSOR (for KISS/BLHeli_32 ESC telemetry), and Bidirectional DShot are supported.
The Mobula6 HD includes a "Flip over after crash" procedure, which can be activated by assigning a channel on the radio transmitter (default is AUX4/Channel 8) in the Betaflight Configurator's Modes tab. This allows the drone to right itself after an upside-down crash.
Regular maintenance involves checking and potentially flashing the ESC firmware. This is done using the BLHELISUITE software. First, download the BLHELISUITE and plug the flight controller into a computer via USB. Ensure the COM port serial number in the Device Manager is below 255; if not, it can be changed in the port settings. Open BLHELISUITE, select "SILABS BLHeli Bootloader (Cleanflight)," choose the correct serial COM port, and click connect. From here, the new BLHeli_s firmware (target "S-H-50") can be flashed.
Flight controller firmware updates are also a key maintenance aspect. This involves installing the latest STM32 Virtual COM Port Driver and STM BOOTLOAD Driver (STM Device in DFU MODE). Then, open Betaflight configurator, select the firmware target "CrazybeeF4DXS," and choose the desired firmware version. To enter DFU Mode, either solder the boot pad and plug in the USB, or load Betaflight firmware and hit "flash," which will automatically put it into DFU Mode. Zadig tools may be needed to replace drivers from STM32 Bootloader to WINUSB Driver. After replacing drivers, reconnect the flight controller and proceed with loading and flashing the firmware in Betaflight Configurator.
The default PID settings are provided, and users can adjust these in the PID Profile Settings and Rateprofile Settings tabs of the Betaflight Configurator to fine-tune flight performance. The D Min feature is disabled by default but can be enabled in PID Controller Settings.
| Weight | 20g (without battery) |
|---|---|
| Wheelbase | 65mm |
| Flight Time | 3-5 minutes |
| Flight Controller | Crazybee F4 Lite |
| Battery | 1S 300mAh LiPo |
| Receiver Options | Frsky, Flysky, DSMX |
| Propellers | 31mm |
| VTX | 25mW |
| Dimensions | 80mm x 80mm x 35mm |
| FPV Camera | 600TVL |