EasyManua.ls Logo

Harbor Breeze 3025021 - User Manual

Harbor Breeze 3025021
20 pages
Print Icon
To Next Page IconTo Next Page
Loading...
1
Questions, problems, missing parts? Before returning to your retailer, call our customer
service department at 1-888-251-1003, 8 a.m. - 8 p.m., EST, Monday - Sunday. You could also
contact us at partsplus@lowes.com or visit www.lowespartsplus.com.
ATTACH YOUR RECEIPT HERE
Purchase Date _________________________
Harbor Breeze® is a registered trademark
of LF, LLC. All Rights Reserved.
SM20655
ITEM #3025021
BOLTZ CEILING FAN
MODEL #42300
Español p. 21

Questions and Answers

  • T
    Trevor MillerJul 25, 2025
    Why is my Harbor Breeze Fan remote control not working?
    • S
      Sean ReyesJul 25, 2025
      If the Harbor Breeze Fan remote control isn't working, a power surge might have cleared its memory. To re-sync, turn off the main power, then turn it back on. Within 30 seconds, press and hold the high and low speed buttons on the remote at the same time for 5 seconds. The LED indicator will flash 3 times, signaling a successful synchronization. Once complete, the fan will start on the low speed with the light off (if applicable). Also, ensure that the remote's battery is new. Finally, if you have several fans in proximity, turn power off to other fans and re-sync the remote.
  • J
    jamesheatherJul 31, 2025
    What to do if the lights are not working on my Harbor Breeze Fan?
    • L
      Luis SummersJul 31, 2025
      If the lights on your Harbor Breeze Fan are not working, first ensure the 6-pin connectors in the light kit are connected properly. If the issue persists, turn off the power and check all wire connections at the ceiling outlet box for any faults.
  • J
    Joshua DaltonAug 6, 2025
    What to do if my Harbor Breeze Fan has excessive wobbling?
    • C
      Charles NorrisAug 7, 2025
      If your Harbor Breeze Fan is excessively wobbling, start by checking and tightening all screws that hold the fan blades to the blade arms and the blade arms to the motor. If that doesn't solve the problem, try switching one blade with a blade from the opposite side or balance the fan using a blade balancing kit (sold separately). Also, turn off the power and verify that the mounting bracket is securely attached to the electrical outlet box. The bracket must be flush without movement against the outlet box. Using a longer downrod (sold separately) or moving the fan to another location might be required if the fan is too close to the vaulted ceiling. Finally, lift the yoke cover and tighten the set screw to the yoke until secure.
  • Y
    Yvonne HolmesAug 12, 2025
    What to do if my Harbor Breeze 3025021 does not move?
    • J
      jameschavezAug 12, 2025
      If your Harbor Breeze Fan isn't moving, make sure the reverse switch is fully engaged by firmly pushing it completely left or right. Ensure the wall switch is turned on. Check if the power is on or if a fuse (breaker) is blown. If these steps don't resolve the issue, turn the power off and inspect all wire connections at the ceiling outlet box for any faults.
  • D
    Danielle HoltAug 18, 2025
    How to fix a noisy Harbor Breeze Fan?
    • J
      Julie NormanAug 18, 2025
      If your Harbor Breeze Fan is noisy, check and tighten all screws that hold the fan blades to the blade arms and the motor. Replace any cracked blades. Ensure you are not using a full range dimmer switch to control the fan speed. Also, make sure the outlet box is secured to the building structure and the mounting bracket is secured to the outlet box with tight screws.

Summary

Safety Information

Preparation

Initial Installation

Mounting Methods

Explains standard, angle, flushmount, and closemount installation options for the fan.

Wiring

Wire Connections

Connects household supply wires to fan wires (green, white, black) using wire connectors.

Final Installation

Blade Installation

Attaches blades to the motor assembly using screws and washers.

Light Pan and Kit Installation

Connects light pan and light kit using screws and connectors.

LED Color Settings

Explains how to adjust the LED color temperature between five settings.

Glass Bowl Installation

Installs the glass bowl onto the light kit, cautioning against cross-threading.

Remote Bracket Mounting

Instructions for mounting the remote bracket to a wall for easy access.

Operating Instructions

Remote Battery Installation

Details on inserting the battery into the remote control, ensuring correct polarity.

Remote Control Functions

Explains the functions of each button on the remote control for operating the fan and light.

Fan Reverse Function

Explains how to use the reverse switch to control airflow direction for different weather conditions.

Care and Maintenance

Troubleshooting

Fan Does Not Move

Troubleshoots issues where the fan fails to operate, covering power, switch, and wiring.

Lights Not Working

Diagnoses problems with the light kit not functioning despite fan operation, focusing on connections.

Fan is Noisy

Addresses causes of fan noise, including loose blades, cracked blades, incompatible controls, and insecure mounting.

Excessive Wobbling

Troubleshoots causes of excessive fan wobbling, such as loose parts, unbalanced blades, or insecure mounting.

Remote Control Not Working

Resolves issues with the remote control not functioning, including power surges and battery replacement.

Limited Lifetime Warranty

Replacement Parts List

Overview

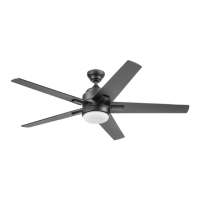
This document provides instructions for the installation, operation, and maintenance of the Boltz Ceiling Fan (Model #42300), a product of Harbor Breeze. The fan is designed for residential use and comes with a remote control for convenient operation.

Function Description

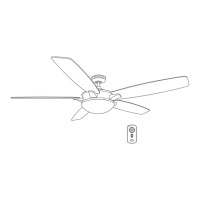
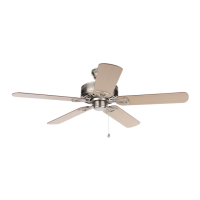
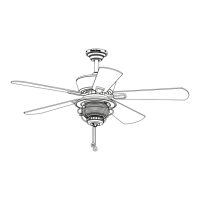
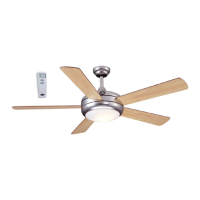
The Boltz Ceiling Fan is designed to provide air circulation and illumination in a room. It features four blades that rotate to create airflow, and an integrated LED light kit for lighting. The fan can be operated at different speeds and includes a reverse switch to change the direction of airflow, allowing for year-round comfort. In warmer weather, the fan can be set to create a downward airflow, producing a wind chill effect. In cooler weather, it can be set to create an upward airflow, helping to move warm air off the ceiling area. The LED light kit offers five color settings, ranging from soft white (2700K) to cool white (6500K), with a factory setting of 2700K. The fan is controlled by a remote pack, which allows for speed adjustment, light control (on/off and dimming), and activation of a light delay off mode.

Usage Features

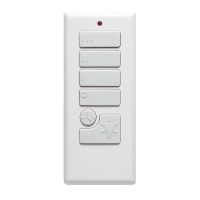
  • Remote Control Operation: The fan is primarily operated using a remote control. The remote allows users to:
    • Adjust Fan Speed: Select from high, medium, or low fan speeds.
    • Turn Fan On/Off: A dedicated button turns the fan off.
    • Control Light: Turn the light on or off, and dim or brighten the lights by pressing and holding the light control button.
    • Light Delay Off Mode: This feature allows the light to turn off automatically after one minute. It is activated by pressing and holding the fan power button for five seconds. The LED indicator on the remote will flash four times to confirm the mode setting.
    • D/CFL Switch: The remote includes a D/CFL switch, which is factory-set to "D" to ensure the halogen bulb is dimmable.
  • Reverse Switch for Seasonal Use: The fan includes a reverse switch located on the motor housing.
    • Warmer Weather: Pushing the reverse switch to the left displays a sun icon, resulting in downward airflow for a wind chill effect.
    • Cooler Weather: Pushing the reverse switch to the right displays a snowflake icon, resulting in upward airflow to help move hot air off the ceiling area.
    • Important Note: The reverse switch must be set completely to the left or right for the fan to function correctly. If it is in the middle position, the fan will not operate.
  • Adjustable LED Color Temperature: The LED light kit offers five color settings (2700K to 6500K). Users can adjust the LED color switch to change the color temperature to their preference.
  • Mounting Options: The fan supports standard mounting for ceilings 8 ft. or higher, and angle mounting for angled or vaulted ceilings. For angle mounting, it's important to ensure the ceiling angle is not steeper than 16° and that a longer downrod may be necessary for proper blade clearance. Flushmount and closemount installations are not available for this model.
  • Safety Clearances: For safe operation, the blades must be at least 30 inches from any obstructions, and the downrod length should ensure the blades are at least 7 feet above the floor.
  • Remote Mounting Bracket: The remote control comes with a mounting bracket that can be installed on a wall for easy storage and access.

Maintenance Features

  • Regular Inspections: At least twice a year, the canopy should be lowered to check the downrod assembly, and all screws on the fan should be tightened.
  • Cleaning: The motor housing should be cleaned with a soft brush or lint-free cloth to avoid scratching the finish. The blades should also be cleaned with a lint-free cloth. It is important not to use water or a damp cloth to clean the ceiling fan.
  • Battery Replacement: The remote control uses an A23, 12-volt alkaline battery. Exhausted batteries should be removed from the remote. Non-rechargeable batteries should not be recharged. Batteries should not be disposed of in fire, as they may explode or leak.
  • Power Disconnection for Maintenance: Before beginning any maintenance tasks, the main power supply to the fan must be shut off.
  • Troubleshooting Guide: The manual includes a comprehensive troubleshooting section to address common issues such as the fan not moving, lights not working, excessive noise, or remote control malfunction. This guide provides possible causes and corrective actions, such as checking wire connections, tightening loose blades or mounting brackets, replacing the remote battery, or re-syncing the remote to the receiver after a power surge.
  • Limited Lifetime Warranty: The manufacturer warrants the fan to be free from defects in workmanship and materials for a lifetime from the date of purchase by the original purchaser. Other fan parts, excluding glass or plastic blades, are warranted for one year. The warranty covers correction of defects or replacement with a comparable model. It is important to note that the warranty does not cover damage due to accident, misuse, improper installation, or unauthorized service. A small amount of "wobble" is considered normal and not a defect.

Harbor Breeze 3025021 Specifications

General IconGeneral
BrandHarbor Breeze
Model3025021
CategoryFan
LanguageEnglish

Related product manuals