Do you have a question about the Harbor Breeze TILGHMAN and is the answer not in the manual?
Follow wiring codes, use proper connectors, and ensure GFCI protection in damp locations.
Ensure secure outlet box, 7ft floor clearance, and 30in obstruction clearance for safe operation.
Avoid bending blades, use provided parts, and do not use incompatible speed controls.
Check parts, unpack carefully, and protect finish during initial handling.
List of required and helpful tools and estimated assembly duration.
Always disconnect power before starting installation to prevent electric shock or injury.
Select between downrod or angle mounting based on ceiling height and angle.
Ensure blades maintain 7ft floor and 30in obstruction clearance.
Secure downrod to motor assembly using pin and clip, and thread wires through.
Install downrod ball end into mounting bracket, aligning slot with tab for secure fit.
Remove canopy cover; downrod and cover are not used for this mount.
Align canopy holes with motor assembly and secure with closemount screws.
Connect fan wires (Green, White, Black, Blue) to corresponding supply wires using connectors.
Wrap wire connectors with electrical tape and ensure no bare wires are visible.
Align canopy keyholes onto mounting bracket screws and rotate to lock.
Use bracket screws to firmly secure the canopy to the mounting bracket.
Use pull chain for four speeds: HIGH, MEDIUM, LOW, and OFF.
Use reverse switch for summer (downward airflow) or winter (upward airflow).
Check power, wall switch, fuse, and wire connections if the fan does not move.
Tighten loose blades, check for cracked blades, compatible controls, or break-in period.
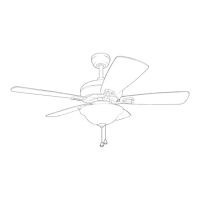
| Type | Ceiling Fan |
|---|---|
| Number of Blades | 5 |
| Control Type | Remote Control |
| Bulb Type | LED |
| Indoor/Outdoor | Indoor |
| Reversible Motor | Yes |
| Blade Span | 52 inches |
| Motor Type | AC |
| Warranty | Lifetime |
| Light Kit | Included |



 Loading...