Do you have a question about the Harbor Breeze TG52BNK3D1RC and is the answer not in the manual?
Instructions for installing the fan using a downrod, suitable for various ceiling heights.
Instructions for installing the fan directly to the ceiling without a downrod.
Explains FCC rules compliance for the remote control device and potential interference.
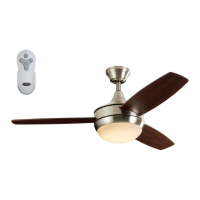
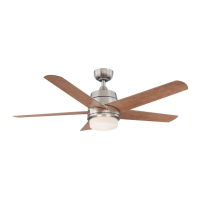
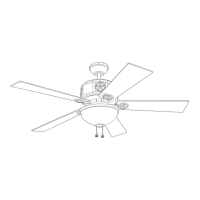
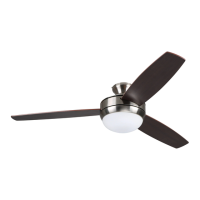
The Harbor Breeze Beach Creek LED Ceiling Fan is designed to provide both illumination and air circulation for residential spaces. This device can be mounted in two styles: downrod mount for standard or angled ceilings, and closemount for standard ceilings only, particularly those lower than 8 ft. The downrod mount is suitable for ceilings 8 ft. or higher, and for angled or vaulted ceilings, provided the angle is not steeper than 19°. A longer downrod may be necessary for taller or angled ceilings to ensure proper blade clearance. The closemount option is ideal for rooms with lower ceilings.
Safety is a primary concern during installation and operation. The fan must be mounted to an outlet box marked "ACCEPTABLE FOR FAN SUPPORT OF 35 LBS. OR LESS" using the provided mounting screws. A METAL octagonal outlet box is required; plastic outlet boxes are not suitable. The outlet box must be secured directly to the building structure and capable of supporting the fan's moving weight of at least 35 lbs. Gloves are recommended when handling fan parts due to potentially sharp edges. All electrical connections must comply with local codes, ordinances, the National Electrical Code, and ANSI/NFPA 70-1999. If unfamiliar with electrical wiring, a qualified electrician should be consulted. The installation site must allow a minimum clearance of 7 ft. from the blades to the floor and at least 30 in. from the end of the blades to any obstruction. After installation, all connections must be secure to prevent the fan from falling.
The fan's wiring system is designed to accept one 12-gauge house wire and two lead wires from the fan. If house wires are larger than 12-gauge or if there are multiple house wires to connect, an electrician should be consulted for appropriate wire connectors. It is crucial not to use the fan with any solid-state speed control device or a full-range dimmer switch, as this can lead to fire, electrical shock, or humming noise. Before any installation or maintenance, the electricity must be shut off at the main switch or circuit breaker. The outlet box must be properly grounded, with a green or bare ground wire present. All screws, bolts, and nuts on the fan motor assembly should be checked for security before beginning installation. The LED component is designed for this specific application and should not be tampered with or repaired by untrained personnel; customer service should be contacted for any servicing needs. The LED light is dimmable to 10% with select dimmers.
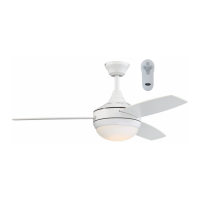
The fan's operation is controlled by a remote control transmitter. This remote allows for three fan speeds: HIGH (3 button), MEDIUM (2 button), and LOW (1 button). The "0" button turns the fan OFF. The light button (Ω) turns the light ON or OFF with a quick tap, and holding it down allows for dimming or brightening. The light button has an auto-resume function, maintaining the last brightness setting when turned off and on. The remote control transmitter can be programmed to multiple receivers or fans; to avoid this, the wall switch should be turned off to any other programmable receiver or fan during the programming process. The remote control is not for use with solid-state fans and has an electrical rating of 120V / 60 Hz with a motor amperage of 1.25 MAX.
The fan also features a reverse switch on the switch housing to optimize performance for different seasons. In warmer weather, setting the reverse switch to the LEFT position creates a downward airflow, producing a wind chill effect. In cooler weather, setting the reverse switch to the RIGHT position creates an upward airflow, which helps move stagnant, hot air off the ceiling area. It is important that the reverse switch is set either completely LEFT or completely RIGHT for the fan to function; if it is in the middle position, the fan will not operate. Before manually activating the reverse switch, the fan must be turned off at the wall switch, and the blades must come to a complete stop.
Maintenance of the Harbor Breeze Beach Creek LED Ceiling Fan is straightforward. At least twice a year, the canopy should be lowered to check the downrod assembly and tighten all screws on the fan. The motor housing should be cleaned with only a soft brush or lint-free cloth to avoid scratching the finish. The blades should also be cleaned with a lint-free cloth, and a light coat of furniture polish can be applied to wood blades for added protection. It is crucial to shut off the main power supply before beginning any maintenance. Water or a damp cloth should not be used to clean the ceiling fan.
Troubleshooting common issues includes addressing a non-moving fan, noisy operation, excessive wobbling, or light failure. If the fan does not move, possible causes include the reverse switch not being engaged, power being off, a blown fuse, faulty wire connections, or an unsuccessful learning code process between the fan and remote control transmitter. Corrective actions involve firmly pushing the reverse switch, checking power and fuses, loosening the canopy to check connections, and repeating the learning code instructions. Noisy operation can be caused by loose or cracked blades or using a full-range dimmer switch. Solutions include tightening blade screws, replacing a cracked blade, or replacing the dimmer with an approved speed control device. A new fan may also have a "break-in" period where some noise is normal. Excessive wobbling can result from loose or unbalanced blades, insecure mounting, the fan being too close to a vaulted ceiling, or improperly tightened set screws on the motor housing yoke. Corrective actions include tightening blade screws, balancing blades with the provided kit, verifying mounting bracket security, using a longer downrod or relocating the fan, and tightening yoke set screws. If the fan operates but the light fails, the wires in the canopy may not be properly connected, or the wall switch to the fan may be off. Checking and re-wiring connections as per instructions and ensuring the wall switch is on are the solutions. A small amount of "wobble" is considered normal and not a defect.
The fan comes with a Limited Lifetime Warranty, covering defects in workmanship and materials from the date of purchase for the original purchaser. The distributor agrees to correct any defect or replace the fan with a comparable or superior model at no charge. To obtain warranty service, a sales receipt is required as proof of purchase. The purchaser is responsible for all costs of removal and reinstallation. The warranty does not cover damage due to accident, misuse, improper installation, or the use of non-manufacturer parts or accessories. The distributor is not responsible for fan installation during the warranty period, and any service by an unauthorized person voids the warranty. The warranty also does not cover changes in brass finish, rusting, pitting, tarnishing, corroding, or peeling due to varying climatic conditions, nor does it cover any glass provided with the fan. Defective parts must be reported within the first year of purchase. For the remainder of the warranty, customer service should be contacted for return authorization and shipping instructions. The purchaser is solely responsible for improperly packaged returns. The distributor disclaims all implied warranties, limiting their duration to the limited lifetime period specified. The distributor is not liable for incidental, consequential, or special damages arising from product use or performance, except as accorded by law. This warranty provides specific legal rights, which may vary by state.
| Brand | Harbor Breeze |
|---|---|
| Model | TG52BNK3D1RC |
| Type | Ceiling Fan |
| Blade Span | 52 inches |
| Number of Blades | 5 |
| Motor Type | AC |
| Control Type | Remote Control |
| Finish | Brushed Nickel |
| Light Kit Included | Yes |
| Blade Color | Dark Walnut |
| Number of Bulbs | 2 |
| Bulb Type | LED |
| Indoor/Outdoor | Indoor |
| Style | Contemporary |
| Motor Speed | 3 Speed |
| Reversible Motor | Yes |
| Indoor/Outdoor Use | Indoor |
| Mounting Options | Downrod Mount |