GB 14 02 02 MA
Maintenance
Adjustment ofAdjustment of
Adjustment ofAdjustment of
Adjustment of
3-w 3-w
3-w 3-w
3-w
aa
aa
a
y-vy-v
y-vy-v
y-v
alvalv
alvalv
alv
ee
ee
e
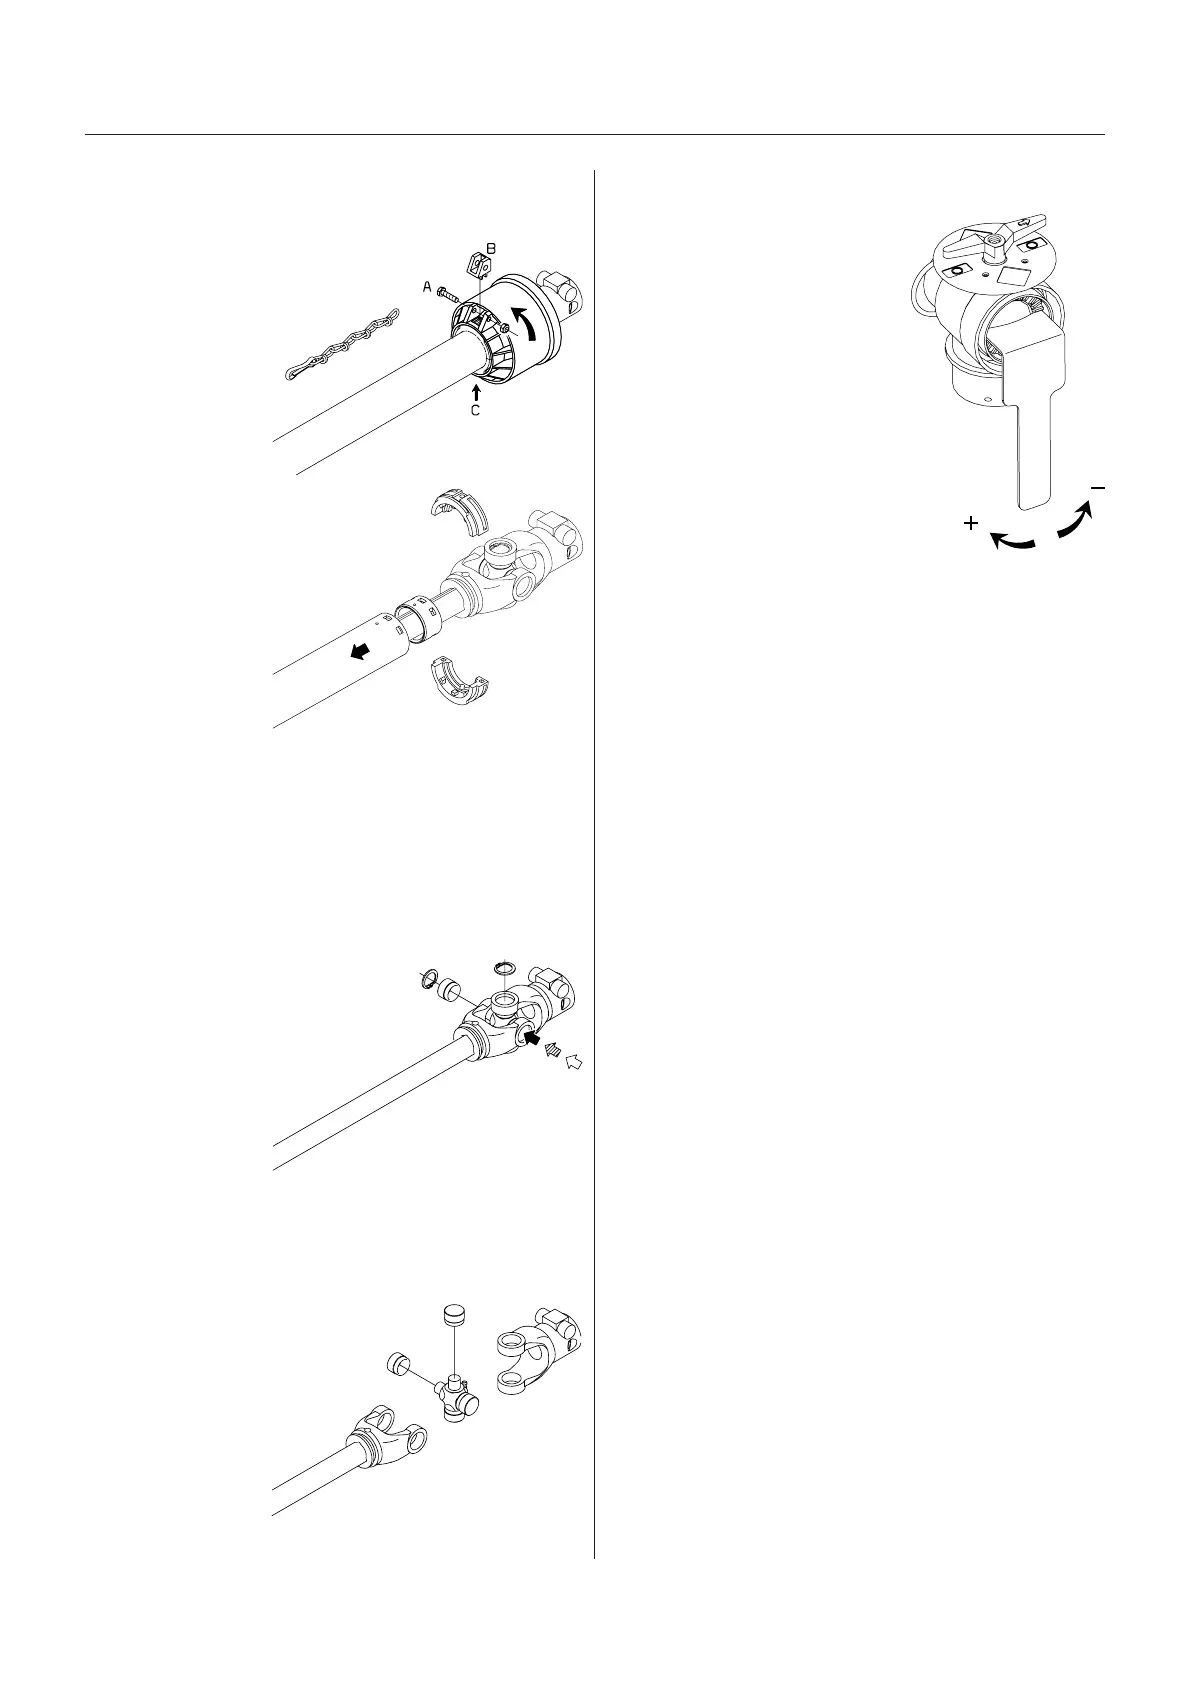
The MANIFOLD valve can be
adjusted if it is too tight to oper-
ate - or if it is too loose (= liquid
leakage).
Correct setting is when the valve
can be operated smoothly by one
hand
Use a suitable tool and adjust the
toothed ring inside the valve as
shown on the drawing.
T269-0012
T269-0013
T269-0014
T269-0015
RR
RR
R
ee
ee
e
placement ofplacement of
placement ofplacement of
placement of
tr tr
tr tr
tr
ansmission shaftansmission shaft
ansmission shaftansmission shaft
ansmission shaft
prpr
prpr
pr
otection guarotection guar
otection guarotection guar
otection guar
dsds
dsds
ds
1. Remove bolt A,
lock B and grease
nipple C. Twist uni
CV-joint cover 1/4
turn and pull it
backwards.
2. Remove the
synthetic bearings
and protection
tube.
2a. Remove inner
bush from
protection tube.
3. Assemble again in
reverse order,
using new parts
where necessary.
Remember to fit
chains again.
4. Grease bearings.
NOTE! Only use genuine HARDI spare parts to service
the transmission shaft.
RR
RR
R
ee
ee
e
placement ofplacement of
placement ofplacement of
placement of
tr tr
tr tr
tr
ansmission shaft cransmission shaft cr
ansmission shaft cransmission shaft cr
ansmission shaft cr
ossoss
ossoss
oss
journalsjournals
journalsjournals
journals
..
..
.
1. Remove protec-
tion guard as
described previ-
ously.
2. Remove Seeger
circlip rings
3. Press the cross
journal sidewards
- use hammer and
mandrel if neces-
sary.
4. Remove needle bearing cups and cross journal can
now be removed.
5. Carefully remove needle bearing cups from new cross
journal and install it in reverse
order. Before fitting the needle
bearing cups again, check
that needles is placed
correctly. Avoid dust and
dirt in the new bearings.
T090-0006