GB 05 02 MA
Sprayer setup
Connecting/disconnecting theConnecting/disconnecting the
Connecting/disconnecting theConnecting/disconnecting the
Connecting/disconnecting the
sprspr
sprspr
spr
aa
aa
a
yy
yy
y
erer
erer
er
SafSaf
SafSaf
Saf
ety infety inf
ety infety inf
ety inf
ormaorma
ormaorma
orma
tiontion
tiontion
tion
WARNING! Note the weight of the sprayer.
General recommendations are as follows:
1. Add ballast to front of tractor, if necessary.
2. Check tyre pressure (see tractor’s instruction book).
3. Be careful when filling/lifting the sprayer for the first
time.
4. Ensure the operating unit and tractor do not touch.
5. Travel at slower speeds when driving with a full tank,
as the tractor braking effect will be reduced.
QuicQuic
QuicQuic
Quic
k hitck hitc
k hitck hitc
k hitc
hh
hh
h
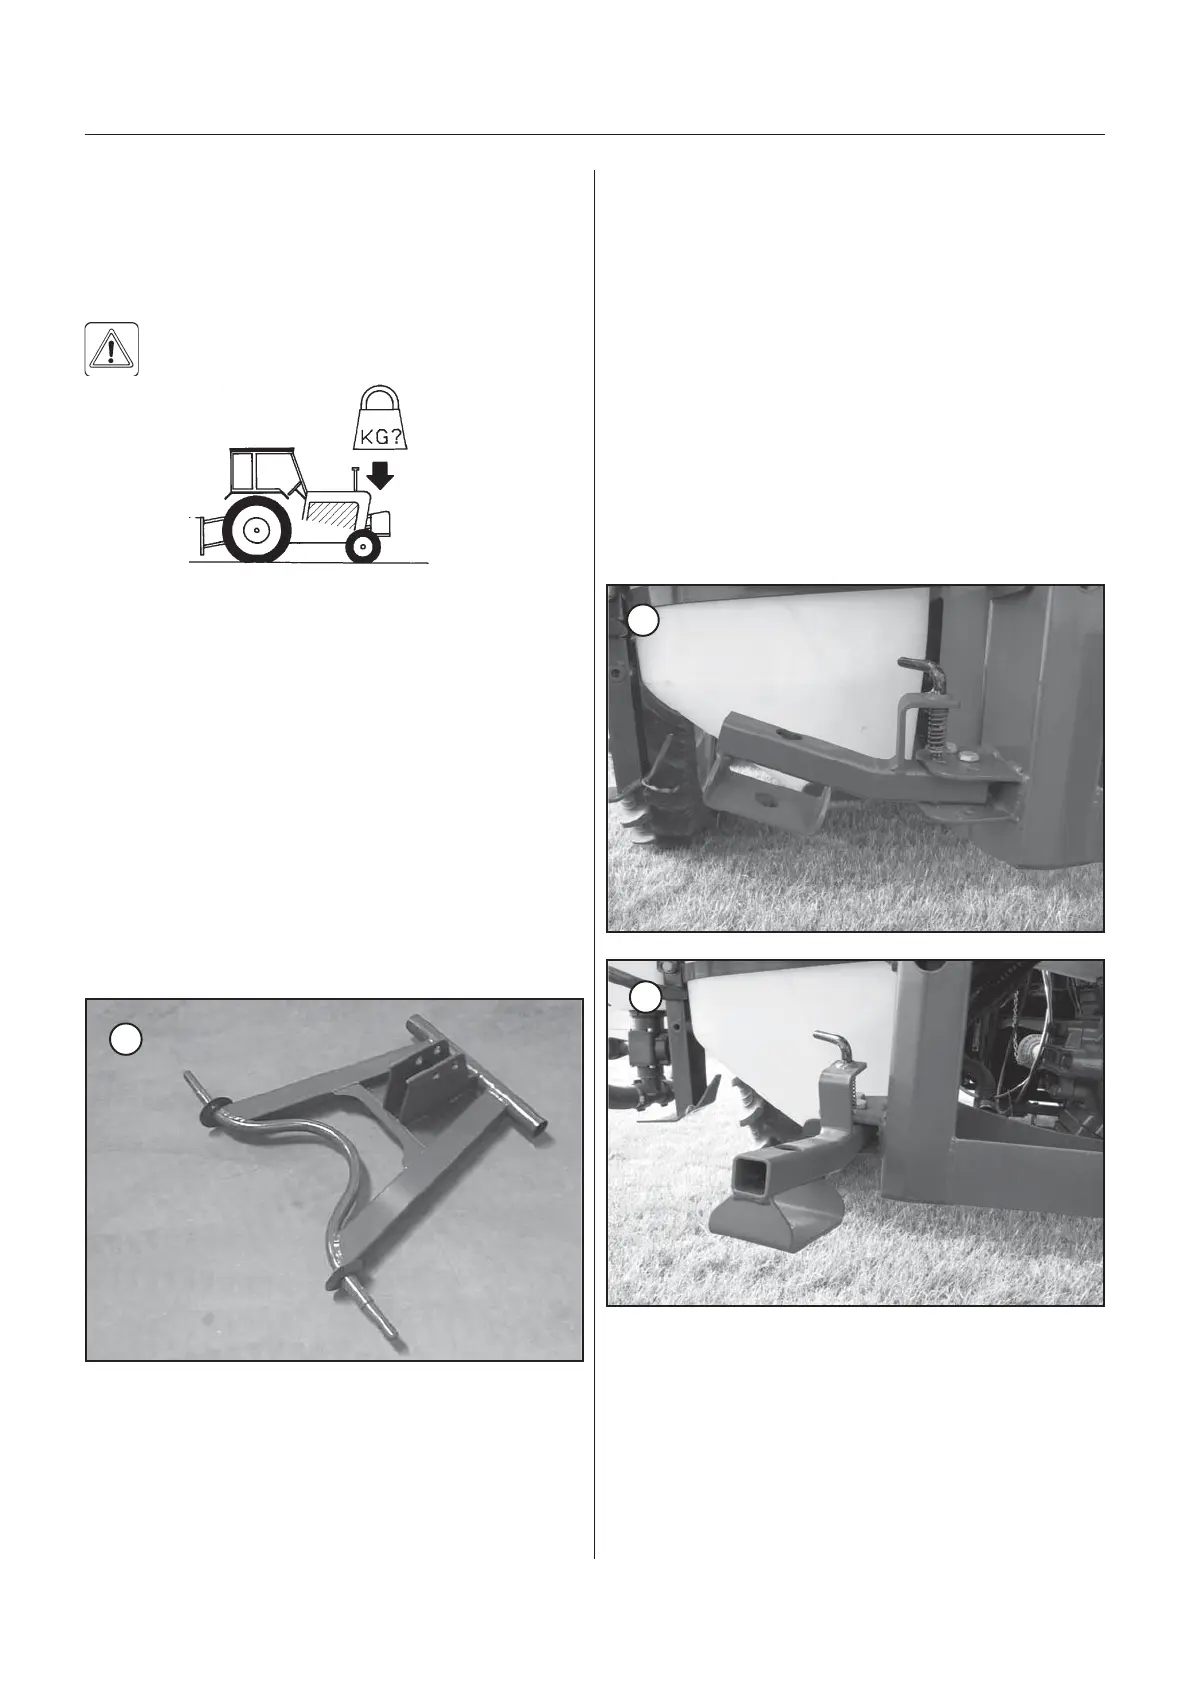
The sprayer is designed for three point suspension
(cat. II). A quick hitch (A) is supplied with the sprayer. Fit
the quick hitch to the tractor for easy hook-up of the
sprayer.
Frontvægt
T102-0019
A
T102-0020
B
T102-0021
C
StorStor
StorStor
Stor
aa
aa
a
gg
gg
g
e wheelse wheels
e wheelse wheels
e wheels
The sprayer can be equipped with nylon tires for support
of the sprayer during storage. Storage wheels are fitted
to the support legs.
NOTE! Tank must be empty when using storage wheels.
Max weight: 250 kg/tyre
SupporSuppor
SupporSuppor
Suppor
t let le
t let le
t le
gsgs
gsgs
gs
The frame has two retractable support legs that can be
turned in to minimise crop damage.
NOTE! The support legs must be unfolded before
lowering and disconnecting the sprayer.
How to unfold support legs
1. Lift spring-loaded catch (B) from the front hole (spray-
ing position).
2. Swing support legs (C) backwards.
3. Fit catch (B) in the back hole (storage position).
Support legs are turned in in reverse order.
Picture B shows support legs in spraying position.
Picture C shows support legs in storage position.