Outside Lifts - Installation & Owner’s Manual 2013
19
Section 2 : inStaller
Installatio n
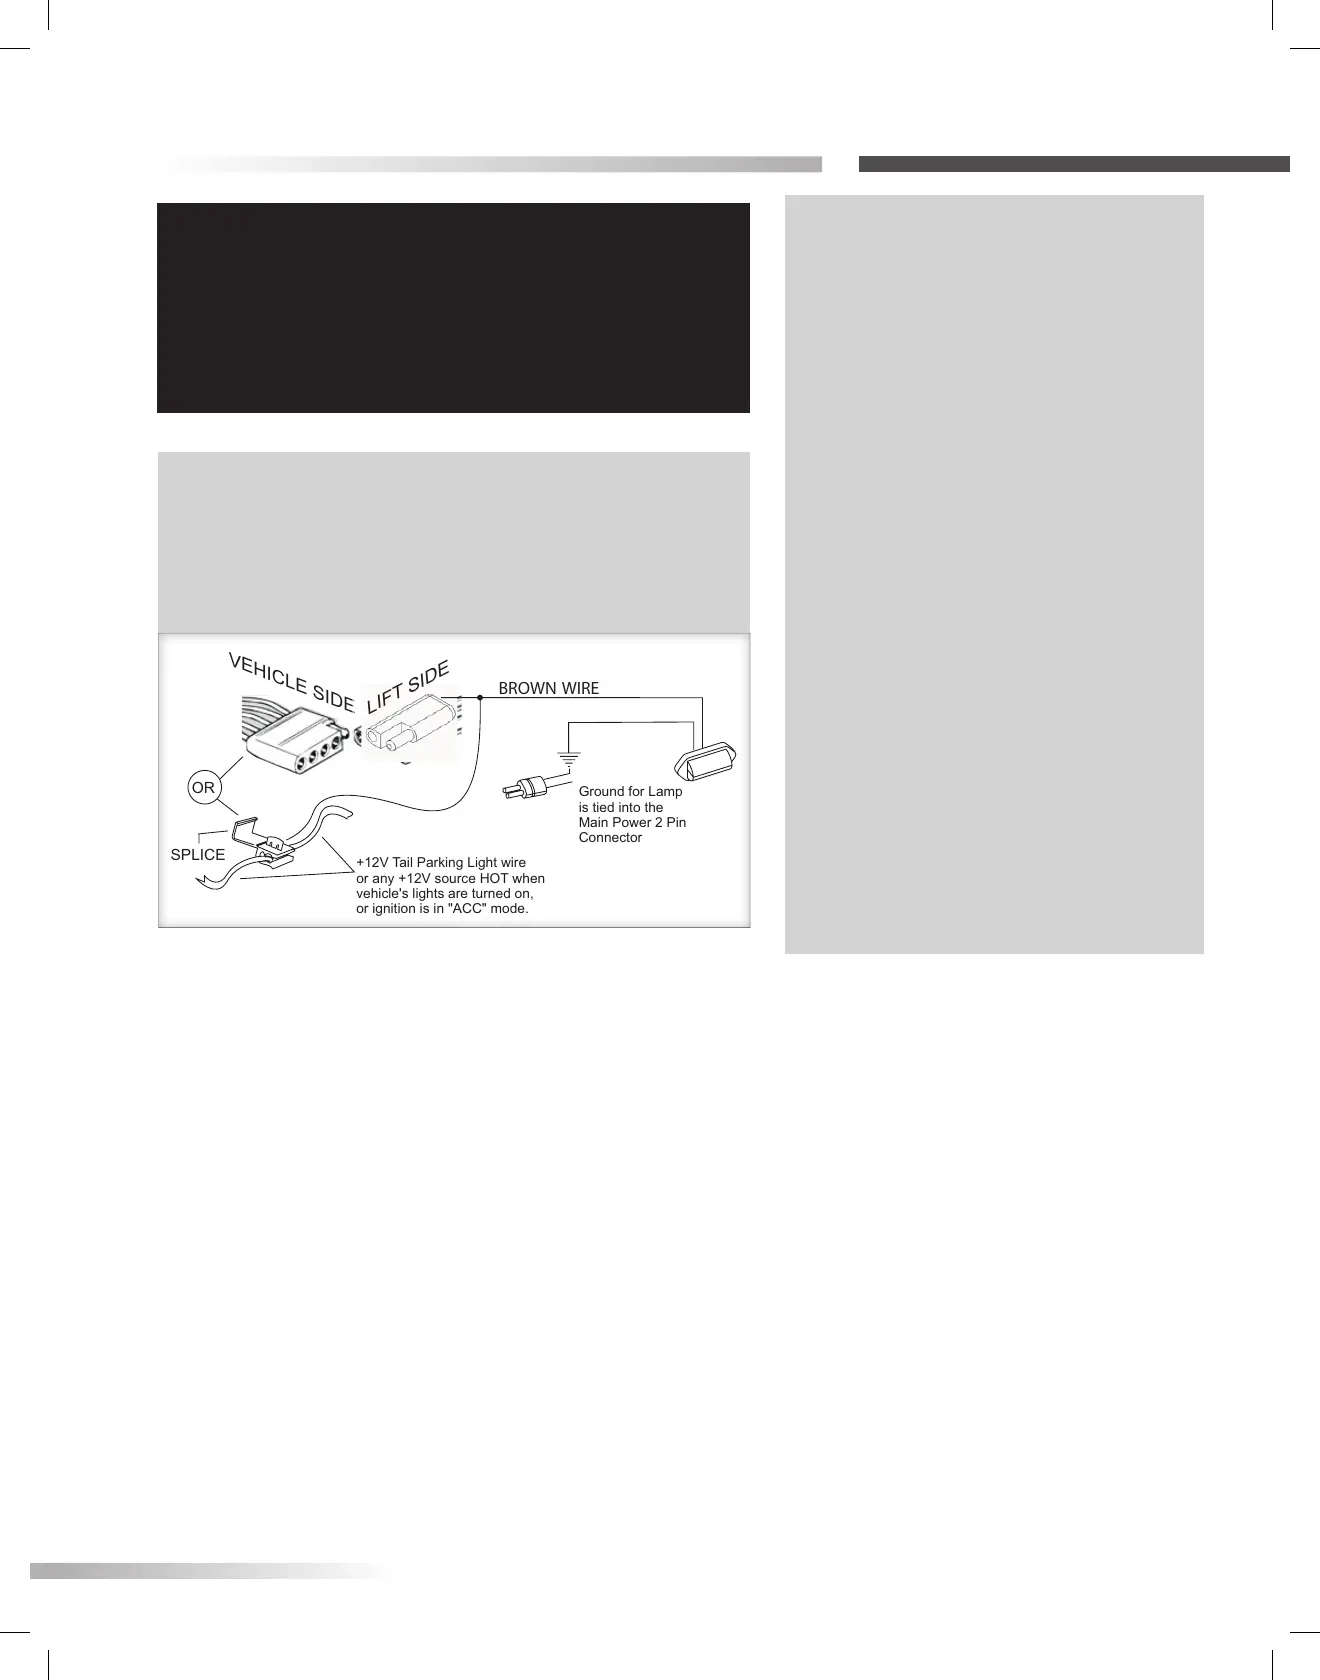
BROWN WIRE
VEHICLE SIDE
OR
SPLICE
+12VTail ParkingLight wire
or any+12V source HOT when
vehicle'slightsare turned on,
or ignitionisin"ACC" mode.
Ground for Lamp
is tied intothe
Main Power 2 Pin
Connector
LIFT SIDE
BROWN WIRE
VEHICLE SIDE
OR
SPLICE
+12VTail ParkingLight wire
or any+12V source HOT when
vehicle'slightsare turned on,
or ignitionisin"ACC" mode.
Ground for Lamp
is tied intothe
Main Power 2 Pin
Connector
LIFT SIDE
IMPORTANT!
If the installation requires the wiring harness to run on
the underside of the vehicle, route the harness away
from the exhaust system, brake lines, fuel lines and gas
tank. Avoid pinch points and sharp edges. Avoid locating
the harness where it can be snagged by road debris.
NOTE: A standard two-contact trailer connector is
included with the lift. This is for the license plate lamp. If
your vehicle is not equipped with the proper connector,
you can use the BROWN WIRE to make a wire splice and
achieve the same result. [Figure 19-3]
TECH NOTE: MOTOR TESTING
Troubleshooting with a test light
or voltage meter may give a false
indication.
When you probe for 12 volts, the
reading may indicate a connection,
even if the connection is not
necessarily sufficient. The lift’s motor
can draw up to 20 amps at some
points, requiring all of the available
wire to flow proper current. Poor
connections are the #1 problem
associated with a slow, intermittent,
warm, poorly performing motor which
will also deteriorate prematurely.
If a single strand of a multi-strand wire
is making contact, 12V will appear on
a meter or test light, but it will not
allow the motor to operate. It is always
best to test both current and voltage,
or run the motor with known good
shop battery or power source when
troubleshooting.
Figure 19-3