Revision C • 10/07
HARRIS CORPORATION
3-7
3 Operation
MONITOR CONTROL PANEL QUICK GUIDE,
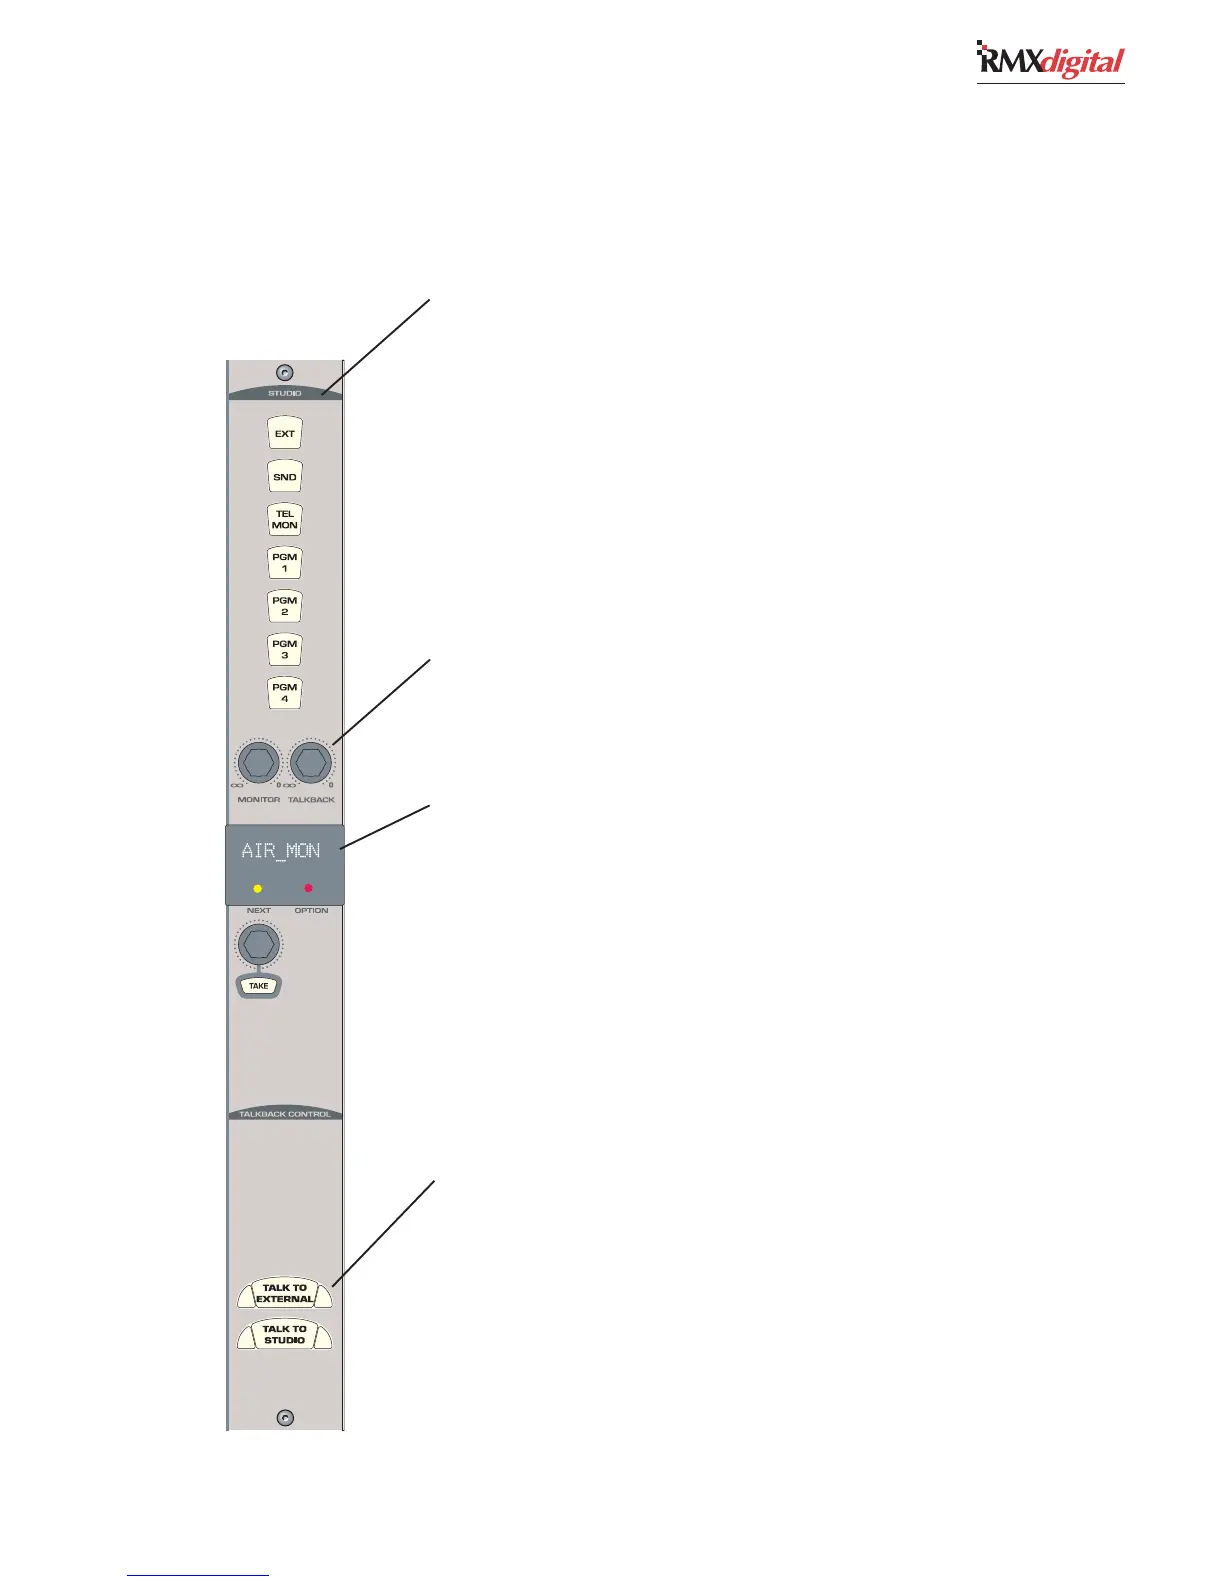
RIGHT COLUMN CONTROLS
STUDIO
All Studio outputs use the same monitor source. The selected source is usually indicated by a lit
button but, if Auto Mic Switching is enabled (to switch between the Real Air source (typically EXT)
and a Synthetic Air source while a Studio mic is active), then the Real Air button (typically EXT)
flashes to indicate the Synthetic Air is the source. Alternate monitor sources are selected using the
Studio Monitor Source Selector and Take button. Its name is then shown in the Studio Monitor
Name Display, which turns off all selector button lights.
Buttons in this section have removable lenses for custom labels (the sources associated with each
button are set during console setup). The assigned signals, as shipped from the factory, are:
EXEX
EXEX
EX
T — T —
T — T —
T — When lit, typically assigns the Real Air audio to the Studio monitor outputs.
SEND — SEND —
SEND — SEND —
SEND — When lit, assigns the Send bus to the Studio monitor outputs.
TEL MON — TEL MON —
TEL MON — TEL MON —
TEL MON — When lit, assigns the Telco channels to the Studio monitor outputs.
PGM 1-4 — PGM 1-4 —
PGM 1-4 — PGM 1-4 —
PGM 1-4 — When lit, assigns the selected Program bus to the Studio monitor outputs.
LEVEL CONTROLS
MM
MM
M
onitonit
onitonit
onit
or — or —
or — or —
or — Adjusts the output level of the stereo Studio Monitor (MON) output.
TT
TT
T
alkalk
alkalk
alk
back — back —
back — back —
back — Adjusts the output level of the dedicated Talk to Studio (TLK STU) output.
STUDIO MONITOR SOURCE
SS
SS
S
tudio Mtudio M
tudio Mtudio M
tudio M
onitonit
onitonit
onit
or Sor S
or Sor S
or S
ourour
ourour
our
cc
cc
c
e Ne N
e Ne N
e N
ame Dame D
ame Dame D
ame D
isplaispla
isplaispla
ispla
y — y —
y — y —
y — Shows the selected monitor source name
(selected by the source selector) while the Next LED is off. When the Next LED is lit, it shows an
alternate source name that is being selected using the Source Selector. The alternate source is
selected by pressing TAKE. The display is turned off when a source is selected using the seven
monitor source buttons.
SS
SS
S
ourour
ourour
our
cc
cc
c
e Se S
e Se S
e S
elecelec
elecelec
elec
tt
tt
t
or — or —
or — or —
or — A rotary encoder to alphanumerically show all of the alternate monitor
sources. Turning the selector turns on the Next LED. “No List” is displayed if no alternate sources
were assigned during console setup.
TT
TT
T
AKE — AKE —
AKE — AKE —
AKE — Press to select the alternate monitor source while the Next LED is lit. Has no effect if
pressed while the Next LED is off.
Option LED — Option LED —
Option LED — Option LED —
Option LED — This LED is not used at this time.
TALKBACK CONTROL
These buttons route talkback audio from the talk channels to External or Studio 1 if the talk
channels have a CR mic as their source. If the talk channels are On, they are unassigned from all
buses while either talk button is pressed. Both buttons have removable lenses for custom labeling.
TT
TT
T
ALK ALK
ALK ALK
ALK
TT
TT
T
O EXO EX
O EXO EX
O EX
TERNAL — TERNAL —
TERNAL — TERNAL —
TERNAL — While pressed, routes the control room talk mic(s), pre-switch and
pre-fader, to the TLK TO EXT output.
TT
TT
T
ALK ALK
ALK ALK
ALK
TT
TT
T
O STUDIO 1 — O STUDIO 1 —
O STUDIO 1 — O STUDIO 1 —
O STUDIO 1 — While pressed, routes the control room talk mic(s), pre-switch and
pre-fader, to the TLK TO STU 1 outputs.