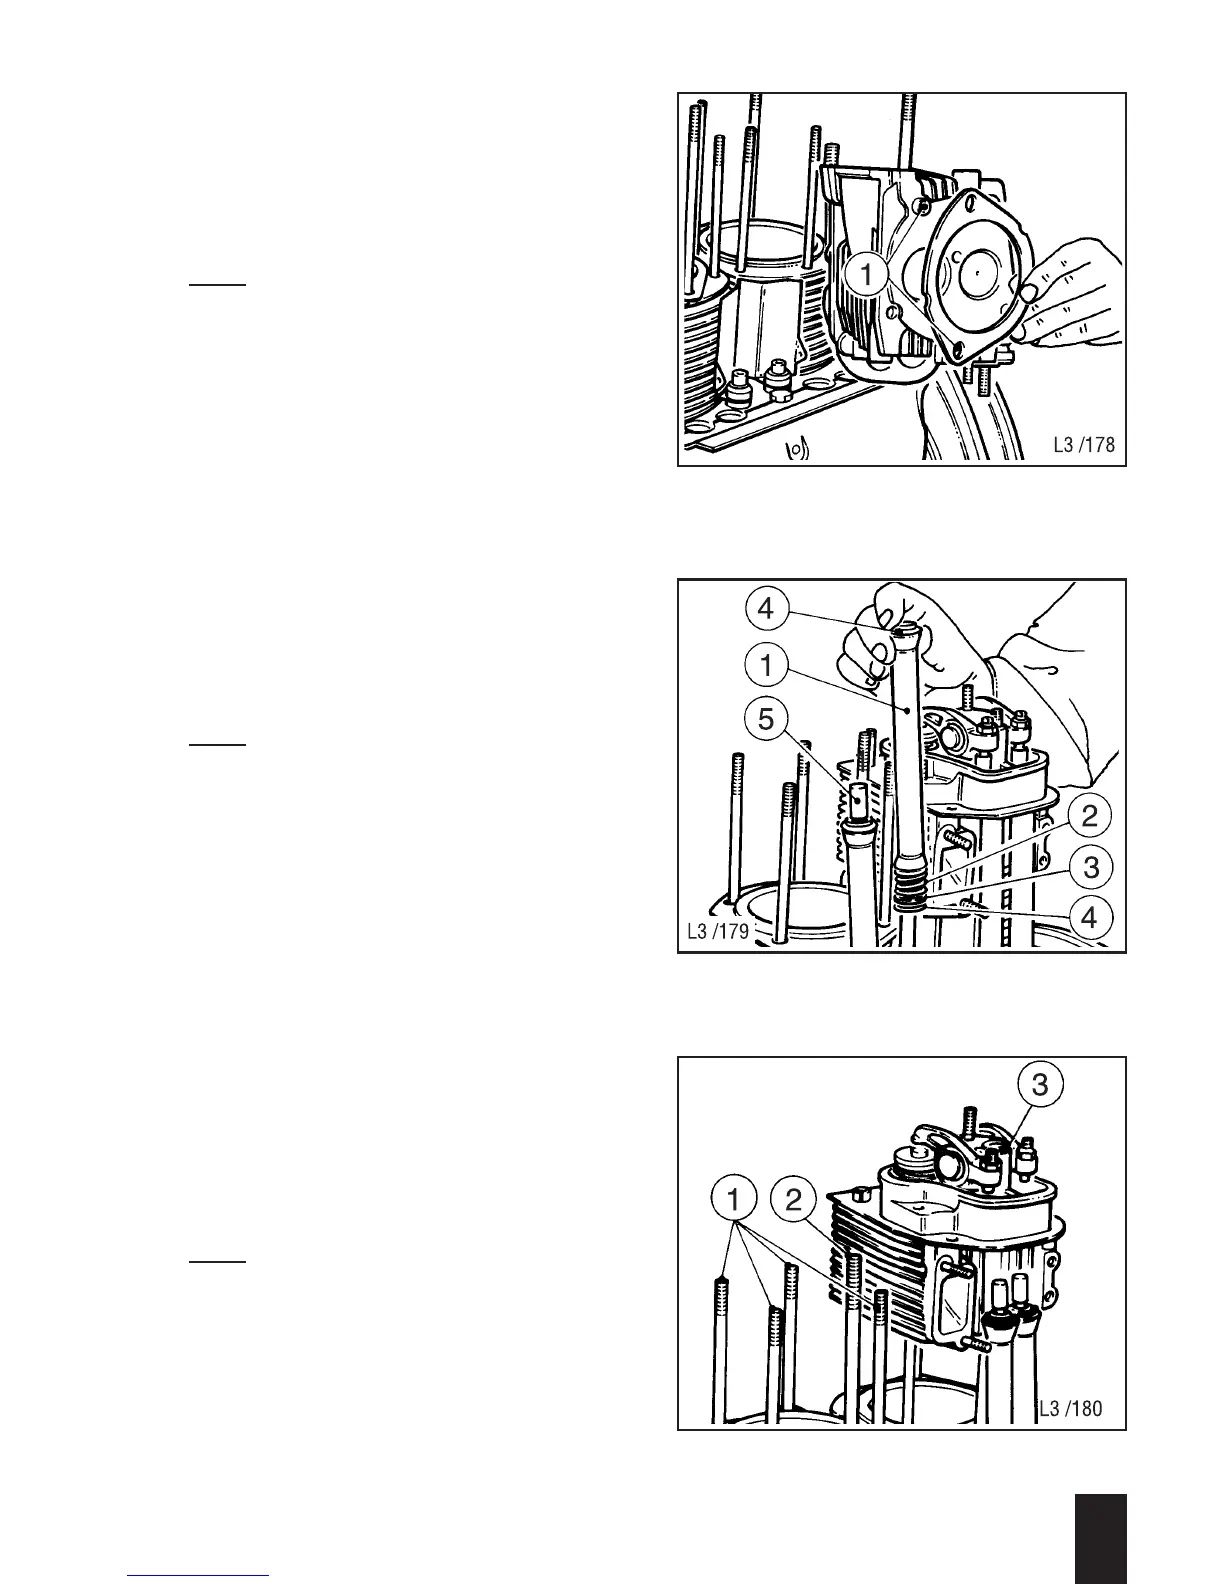
– Having established the correct gasket
thickness, coat it with a little grease on
the cylinder head side, and place it in
the centering collar on the cylinder
head.
Note:
Centering on the L 30 is not by means of
a centering collar but with centering slee-
ves; the gasket has two centering holes;
see Fig. 77.
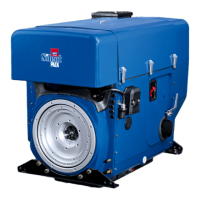
– Insert the protective tubes (78/1) with
spring (78/2), thrust rings (78/3) and
O-ring seals (78/4) into the bore in the
crankcase.
Note:
Always renew the O-ring seals (78/4) du-
ring cylinder or cylinder head repairs.
– Insert the pushrods (78/5).
– Attach the cylinder head, making sure
that the protective tubes with O-ring
seals enter the corresponding holes in
the cylinder head correctly; see Fig. 79.
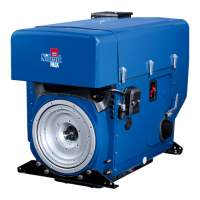
– Oil the stud bolt threads (79/1) and
screw on the shouldered nuts.
Note:
Apply sealant D or a permanently elastic
sealant to the thread of stud bolt (79/2)
and the shouldered nut contact face
(79/3).
3
L / M . . 09.96
77
78
79