Setup
LooseParts
Usethechartbelowtoverifythatallpartshavebeenshipped.
ProcedureDescription
Qty.
Use
Handle1
Bolt(5/16x7/8inch)
2
Bolt(5/16x1-1/2inches)
2
Washer4
Locknut(5/16inch)
4
1
Cabletie
3
Installthehandle.
Self-tappingscrew
2
2
Fueltank1
Installthefueltankandfuelline.
3
Nopartsrequired
–
Fillthecrankcasewithoil.
Note:Determinetheleftandrightsidesofthemachine
fromthenormaloperatingposition.
1
InstallingtheHandle
Partsneededforthisprocedure:
1Handle
2
Bolt(5/16x7/8inch)
2
Bolt(5/16x1-1/2inches)
4Washer
4
Locknut(5/16inch)
3
Cabletie
Procedure
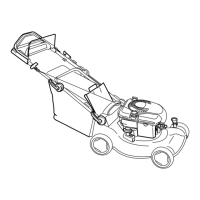
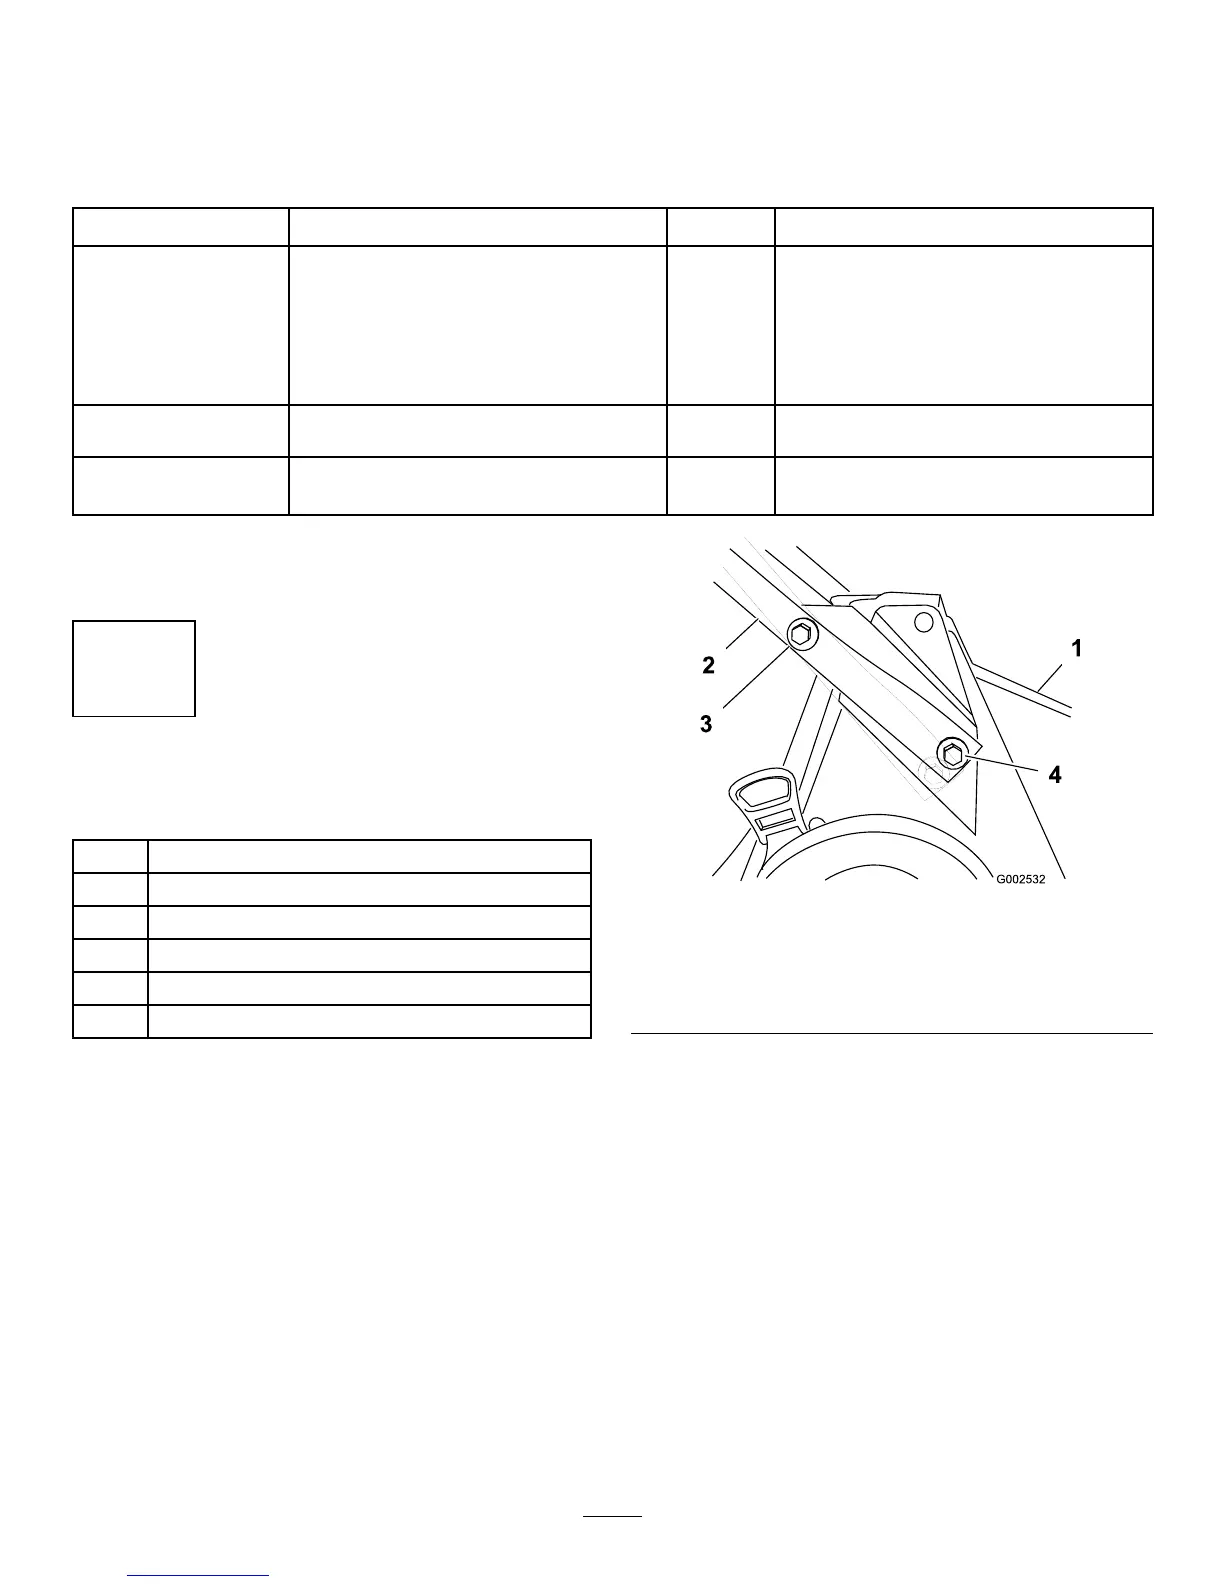
1.Mountthehandletothemowerhousingwith2bolts
(5/16x7/8inch),2bolts(5/16x1-1/2inches),4
washers,and4locknuts(Figure3).
Figure3
1.Housing
3.Bolt(5/16x1-1/2inches),
washer,andlocknut
2.Handle
4.Bolt(5/16x7/8inch),
washer,andlocknut
Note:Installthewasherswiththecupsidefacing
thehandle.
Note:Youcanadjustthehandleheightformore
comfortableoperation.Securingthelowerhandle
endintheupperholelowersthehandle;securingthe
lowerhandleendinthelowerholeraisesthehandle.
2.Usethecabletiesprovidedtosecurethecontrol
cablestothehandle.
7