BladeMaintenance
MaintainingtheCuttingBlade
Alwaysmowwithasharpblade.Asharpbladecuts
cleanlyandwithouttearingorshreddingthegrassblades.
Completethefollowingprocedurebefore
inspecting,removing,orinstallingtheblade:
1.Stoptheengineandwaitforallmovingpartstostop.
2.Disconnectthewirefromthesparkplug(Figure12).
3.Drainthepetrolfromthefueltank;referto
EmptyingtheFuelTankandCleaningtheFuelFilter.
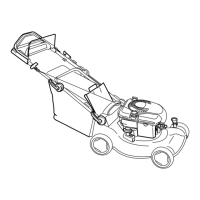
4.Tipthemowerontoitsrightside(Figure35).
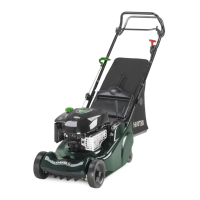
Figure35
1.Blade3.Anti-scalpcup
2.Bladenuts
InspectingtheBlade
ServiceInterval:Beforeeachuseordaily
Carefullyexaminethebladeforsharpnessandwear,
especiallywheretheatandthecurvedpartsmeet
(Figure36A).Becausesandandabrasivematerialcan
wearawaythemetalthatconnectstheatandcurved
partsoftheblade,checkthebladebeforeusingthe
mower.Ifyounoticeaslotorwear(Figure36Band
Figure36C),replacetheblade;refertoRemovingthe
Blade.
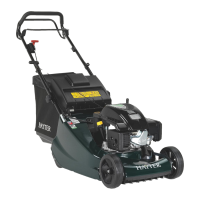
Figure36
1.Sail
3.Wear
2.Flatpartoftheblade4.Slotformed
Note:Forthebestperformance,installanewblade
beforethecuttingseasonbegins.Duringtheyear,le
downanysmallnickstomaintainthecuttingedge.
Awornordamagedbladecanbreak,anda
pieceofthebladecouldbethrownintothe
operator’sorbystander’sarea,resultingin
seriouspersonalinjuryordeath.
•Inspectthebladeperiodicallyforwearor
damage.
•Replaceawornordamagedblade.
RemovingtheBlade
Grasptheendofthebladeusingaragorathickly
paddedglove.Removethebladenuts,theanti-scalpcup,
andtheblade(Figure35).
SharpeningtheBlade
Filethetopsideofthebladetomaintainitsoriginal
cuttingangle(Figure37A)andinnercuttingedgeradius
(Figure37B).Thebladewillremainbalancedifyou
removethesameamountofmaterialfrombothcutting
edges.
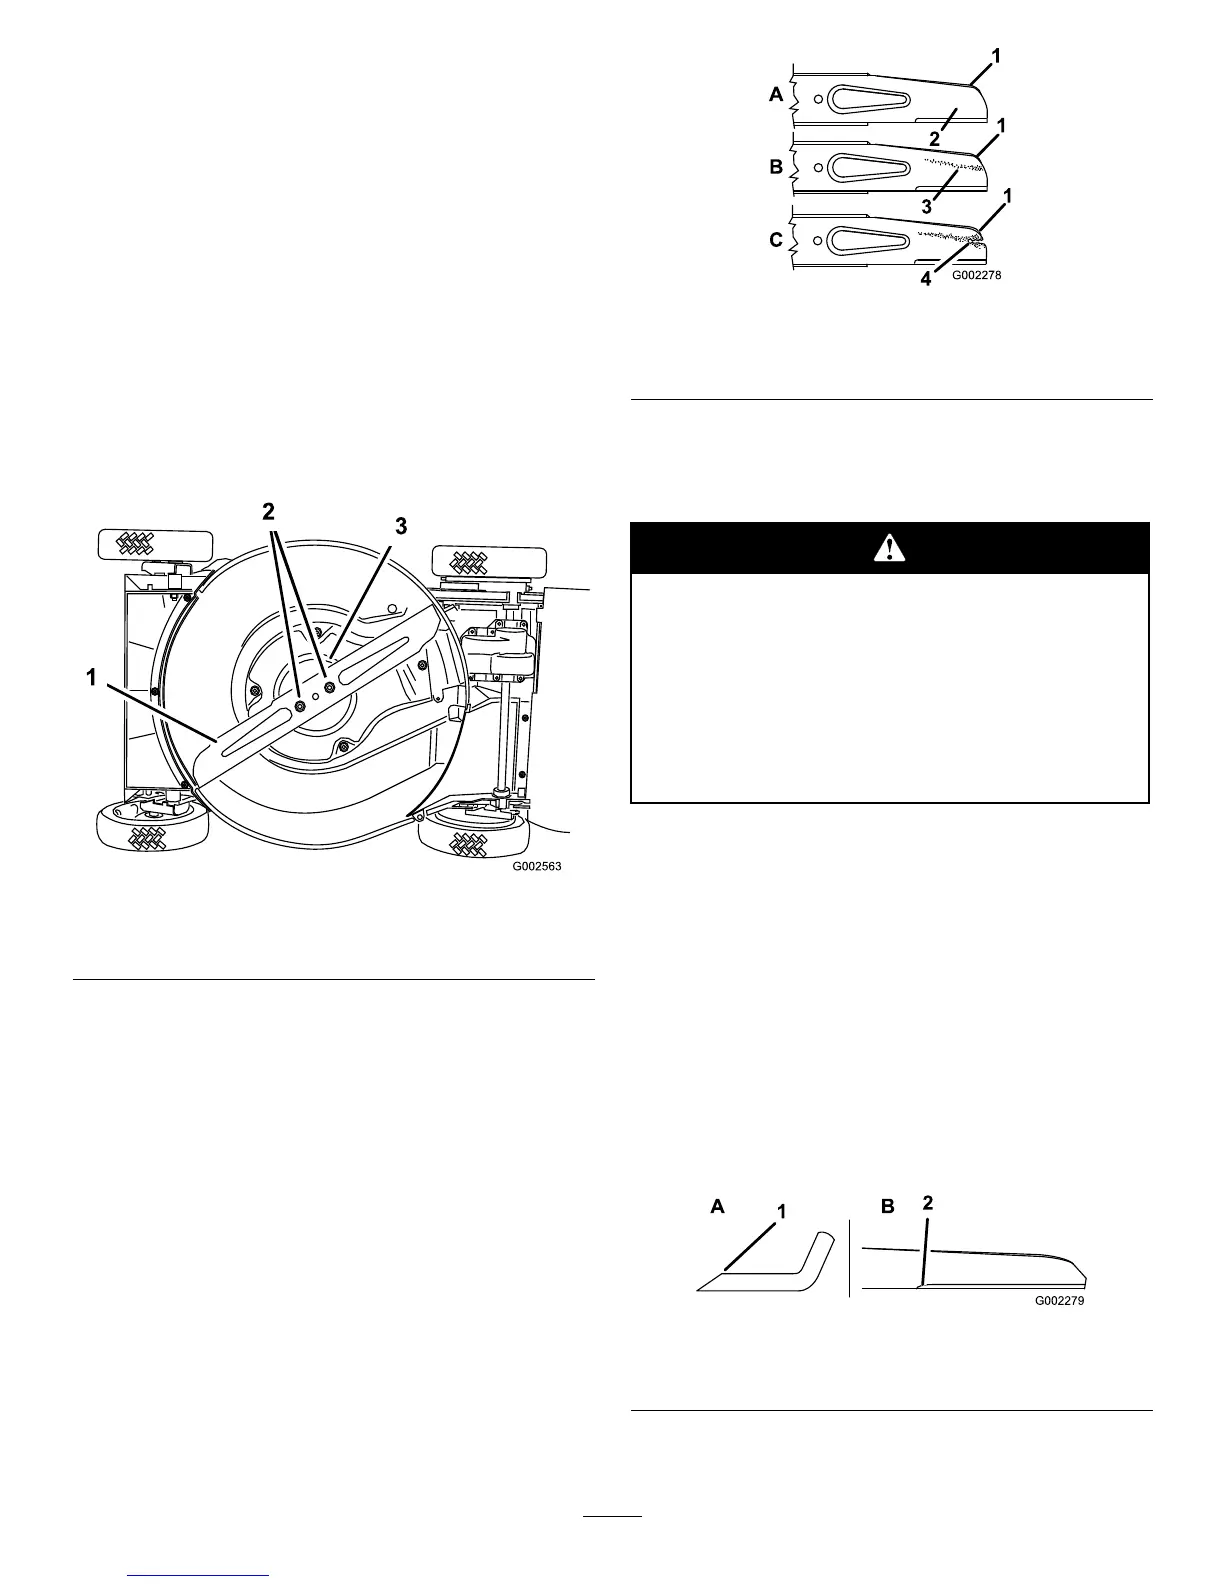
Figure37
1.Sharpenatthisangleonly.
2.Maintaintheoriginalradius
here.
25