Do you have a question about the Hayward Super Pump VS 700 and is the answer not in the manual?
Overview of the manual's content for Super Pump VS 700 installation and operation.
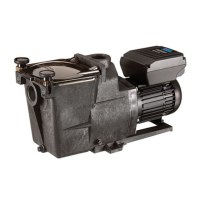
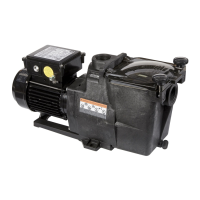
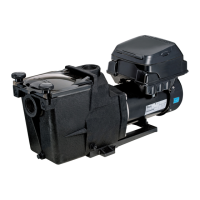
Highlights key features: enclosed motor, advanced hydraulics, programmability, and digital control interface.
Presents detailed physical dimensions and measurements of the pump.
Recommends optimal pump placement considering suction, drainage, and ventilation.
Guides secure installation on a level base for stability and maintenance access.
Chart for recommended system flow rates based on pipe size and required straight pipe length.
Instructions for plumbing connections, PTFE tape use, and avoiding air traps.
Essential electrical safety warnings and wiring code compliance for pump installation.
Lists pump electrical specifications: voltage, amperage, and speed range.
Advises on acceptable voltage ranges to prevent overheating and ensure component longevity.
Details critical steps for grounding and bonding to prevent electrical shock hazards.
Instructions for permanent circuit connection and bypassing time clocks.
Explains control methods: stand-alone, third-party, and Hayward automation integration.
Describes how to adjust the position of the digital control interface for optimal viewing.
Provides procedure for mounting the digital control interface to a wall using an optional kit.
Comprehensive steps for installing the pump and control interface, referencing prior sections.
Illustrates high voltage connections for supplying power to the pump drive.
Shows low voltage wiring for wall-mounting the digital control interface.
Details wiring for remote speed selection using relay contacts from external controls.
Explains wiring for connecting the pump to compatible Hayward automation systems.
Illustrates wiring for a remote stop switch to control pump operation.
Outlines essential checks and warnings before initiating the pump's startup sequence.
Step-by-step instructions for filling the strainer housing and starting the pump to achieve prime.
Explains the function of each button, LED, and display element on the pump's control interface.
Provides a hierarchical overview of the pump's configuration, timer, preset speed, and diagnostic menus.
Describes initial power-up screens and first steps for pump configuration.
Details access and adjustment of settings like time, speed, prime duration, and remote control mode.
Explains programming timer functions, setting speeds, start/stop times, and day selection.
Guides naming, duration, and speed configuration for preset operational modes.
Shows how to access diagnostic info: firmware versions, serial numbers, and operating status.
Explains how to temporarily stop and resume pump operation, typically for maintenance.
Describes 'Quick Clean' mode: runs pump at max speed for a set duration.
Informs when a remote stop switch is activated and the pump is stopped.
Step-by-step guide on how to detach the motor assembly from the pump housing.
Instructions for preventing motor shaft rotation and removing the impeller.
Details on removing the ceramic seat and associated parts from the seal plate.
Guidance on cleaning, lubricating, and installing shaft seal components correctly.
Instructions for reinstalling the impeller, diffuser, and securing the motor assembly.
Details on sliding the motor assembly back into the housing and fastening it securely.
A visual representation of pump components with numbered parts.
Detailed list of replacement parts: reference, part number, description, and quantity.
Addresses common issues: motor not starting, shutting off, humming, or not priming.
Discusses causes for low flow: blockages, undersized piping, and impeller issues.
Covers causes of pump noise: air leaks, vibration, foreign matter, or bearing issues.
Offers solutions for electrical interference with home automation systems.
Lists system error codes and troubleshooting steps for diagnosing pump issues.
| Brand | Hayward |
|---|---|
| Model | Super Pump VS 700 |
| Category | Water Pump |
| Language | English |