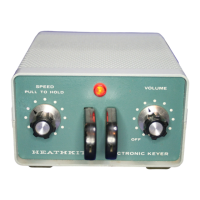
PARTS MOUNTING-CABINET TOP
Refer to Pictorial 4 for the following steps.
Position a soft cloth on your working area. This
will help prevent scratching the cabinet top in the
following steps.
/'
( )
Locate the cabinet top, and bend the two
spade bolts as shown in the inset drawing
on Pictorial 4. Start 6-32 nuts on the spade
bolts before bending them, to prevent dam-
age to the threads.
(
3.
Install a 3/8" rubber grommet in hole
B.
NOTE: Lockwashers and nuts will be used with
all screws when mounting parts, unless stated
otherwise in the assembly steps. Consequently,
the following steps will call out only the size and
type of the hardware to be used. For example,
the phrase "Use 6-32
x
1/4" hardware" means
to use 6-32
x
1/4" screws, #6 lockwashers, and
6-32 nuts. Refer to the Details for the proper
installation of hardware.
(
),
Referring to Detail 4A, install the 8-screw
terminal board at
C.
Use 6-32
x
5/8"hard-
ware, #6 solder lugs, and 6-32 thumbnuts.
The terminal board must be mounted onthe
outside of the cabinet top. Position the ter-
minal board and the
#6
solder lugs as shown.
r"'
(
v[~eferring to Detail 4B, install the phone
jack at
A.
Use a control lockwasher, con-
trol flat washer, and a control nut. Posi-
tion the phone jack and bend all three lugs
inward as shown.
I
P
(8)
Referring to Detail
4C,
install a 1000
1;1
control (#lo-100) at
E.
Use a control lock-
washer, a control flat washer, and a control
nut. Position the control as shown.
C''
)
In
a like manner, install a 100
KfZ
dual
control (#12-59) at
F.
Position the control
as shown.
6-32
THUMBNUT
\
6-32
NUT
=
#6
LOCKWA
Detail
4A
CONTROL NUT
....
OCKWASHER
FLAT WASHER
:..
'.
INSIDE OF
CABINET TOP
Detail
48
,h?,cONTROL LOCKWASHER
g.::::..:,
::.-:...
,..
INSIDE OF
<~~~~<:/
C
A B I N E T
T
0
p
@
CONTROL NUT
Detail
4C
.