Page
23
LE***-.r***~*&
i
\
CABLE
ASSEMBLY
PER
WIRES
PHONES
@
,-SCREWDRIVER ADJUST
Refer to Detail 10D for the following steps.
(
)
Connect a wire between the DASHmdDASH
ARM screws.
Connect the leads at the end of the shielded cable
with the spade lugs, to the 8-screw terminal
(
)
Connect a wire between the RCVR AUDIO
board as follows.
and
GND
screws,
(
)
Inner lead to
KEYED
LINE screw.
(
)
F~rn
the SPEED controlf~lly counterc1oc:c-
wise, and with a screwdriver, adjust the
(
)
Shield lead to
GND
screw,
Dot-Space control (in the center ofthe Speed
control knob) fully counterclockwise, This
Make the following connections on the 8-screw makes the dot-space ratio approximately
terminal board. Use cut-off capacitor leads, or
equal.
the wire removed from the 4-wire cable.
INITIAL TEST AND ADJUSTMENT
INITIAL TEST
NOTE:
If
the unit does not perform properly in
any
of the following checks, unplug the line cord
and refer to the
In
Case Of Difficulty section of
the manual.
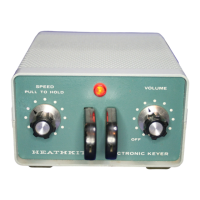
For the following steps, position the Electronic
Keyer as shown in Pictorial
11
on Page 25.
Clear the work area of any wire clippings to
guard against any short circuits in the unit.
(
)
With the slide switch in the OFF position,
measure the resistance between each of
the
A.C.
plug terminals and the chassis.
An infinite reading should be obtained in
both instances.
(
)
The resistance between the A.C. plug ter-
minals with the slide switch in the OFFpo-
sition should be infinite. A reading of 1200
ohms shouldbe obtained with the slide switch
in the OPR or HOLD positions of the slide
switch.
(
)
Advance the VOLUME control to the
12
(
)
With the slide switch in the Off position,
o'clock position. plug the cord into a
117
V AC outlet.