28466 Rev H 20 01-02
NOVUS B-VENT INSTALLATION INSTRUCTIONS
3. VENTING SYSTEM INSPECTION
The appliance and venting system should be
inspected before use, and at least annually, by a
qualified field service person, to ensure that the flow
of combustion and ventilation air is not obstructed.
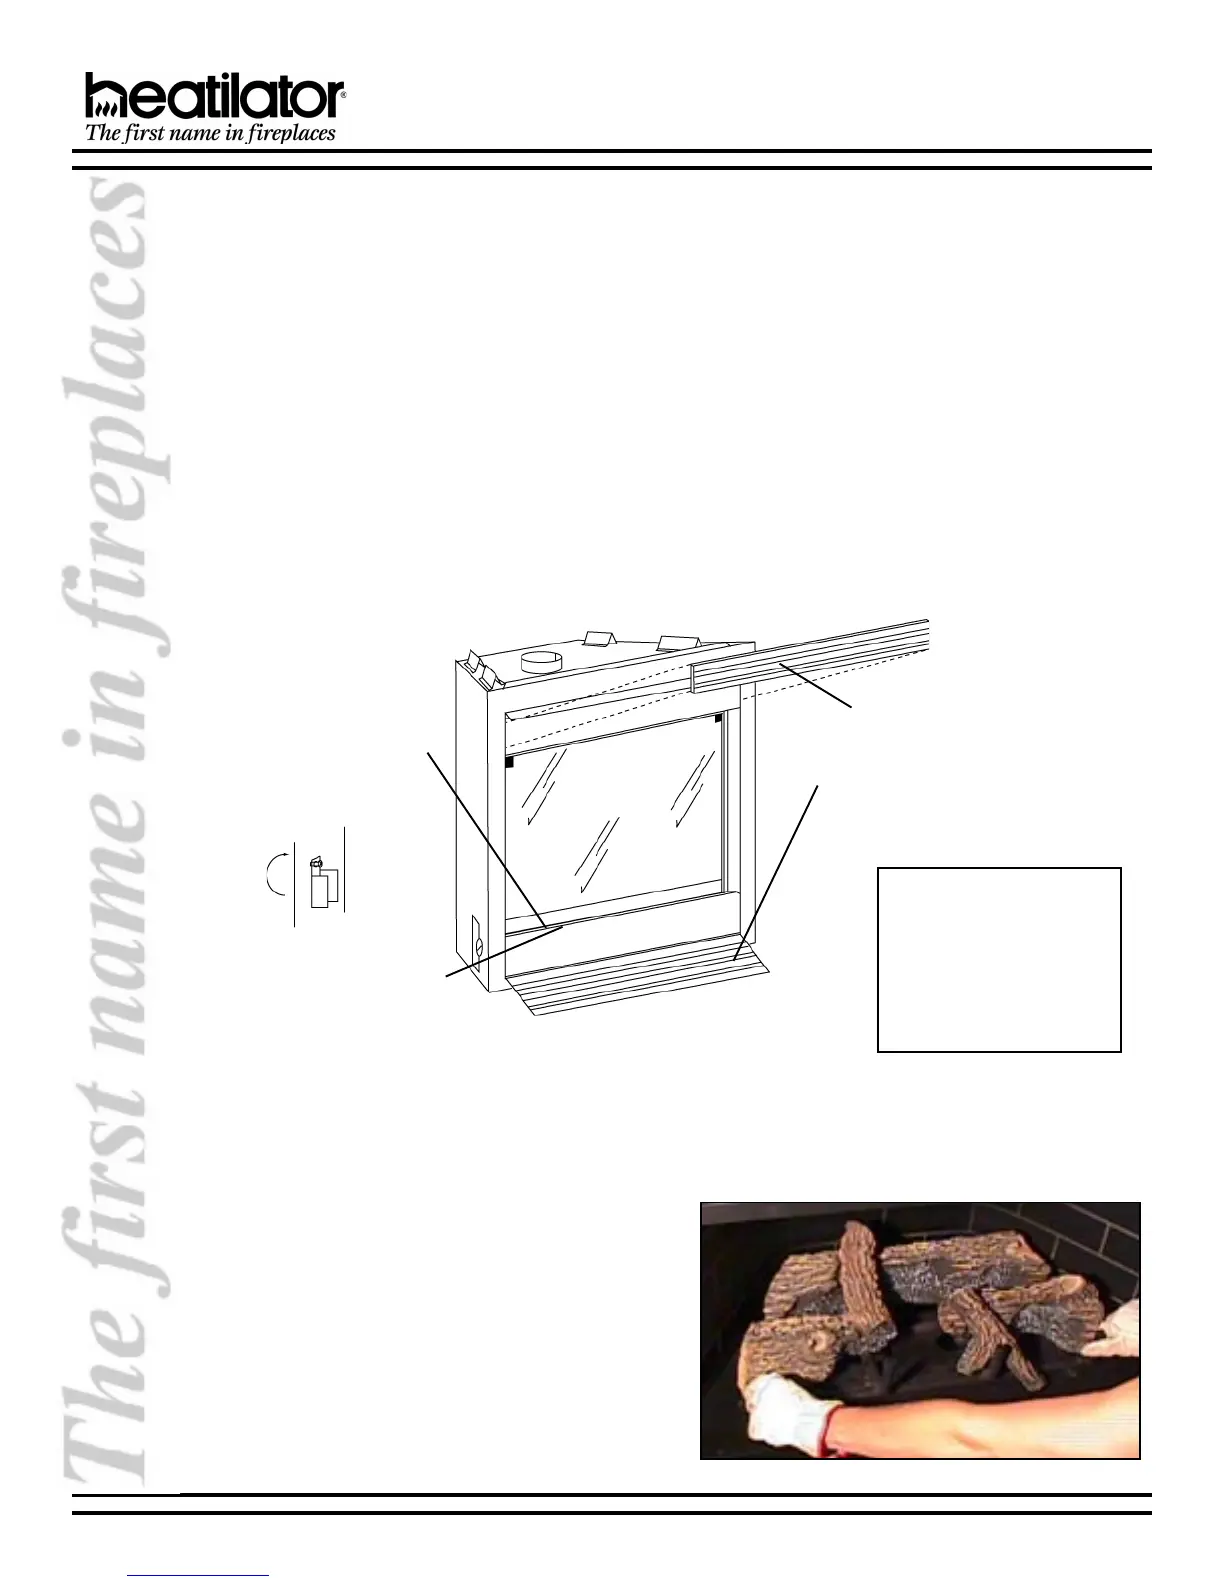
4. CLEANING THE GLASS
See Figure 31.
Never operate this appliance without the glass
properly secured in place or if the glass is broken.
In the event of glass breakage, carefully remove the
glass frame. This will allow the removal of all glass
fragments and sheet metal edge protection strips.
Vacuum all remaining glass pieces with a shop vac.
DO NOT VACUUM IF PIECES ARE HOT! Replace
glass with only a Heatilator glass panel assembly
ordered direct or through your local distributor. Never
use substitute material. Only fully tempered soda lime
safety glass may be used on this appliance.
5. LOG REMOVAL/REPLACEMENT
If removal of the logs becomes necessary, remove
the two screws at the front of the grate. Grasp the two
outside upright grate bars. Pull the log set toward the
front and up, off the burner. See Figure 32.
To replace the log set, grasp the two outside upright
grate bars. Push and lower the log set onto the burner
pan, making sure the back of the left most grate bar
slides through the grate mounting bracket attached
to the hearth pan. Attach the two screws at the front of
the grate.
Figure 31 - Glass Cleaning
Figure 32 - Log Removal (33-36 Log Set Shown)
Safety Note:
Handle glass with care to
avoid striking, scratching or
slamming shut. NEVER
clean glass when hot. Keep
children and pets a safe
distance away
.
6. Set glass on nonabrasive
surface. Clean using a
nonabrasive, mild cleaning
solution (i.e. Brasso).
5. Rotate bottom out and
away from retaining
brackets. Pull down and
remove from top channel.
4. Lift glass straight up above
glass retaining brackets.
1. Lift and pull out upper grille.
2. Control access panel.
3. Lift and pull
out bottom of
screen.
Rotate
screen
brackets
upward as
shown here
before
proceeding.
7. To replace, ensure glass bottom is set completely down in
bottom retainers. Rotate screen brackets down and replace
screen.
 Loading...