Range
Floor Area
Info
20 fps
R color HMI rec
A
A
ID: 7711
Height: 183
Age: 5051
Class:1
WbD: 0
ID: 7713
Height: 178
Age: 4368
Class:1
WbD: 0
1
2
3
4
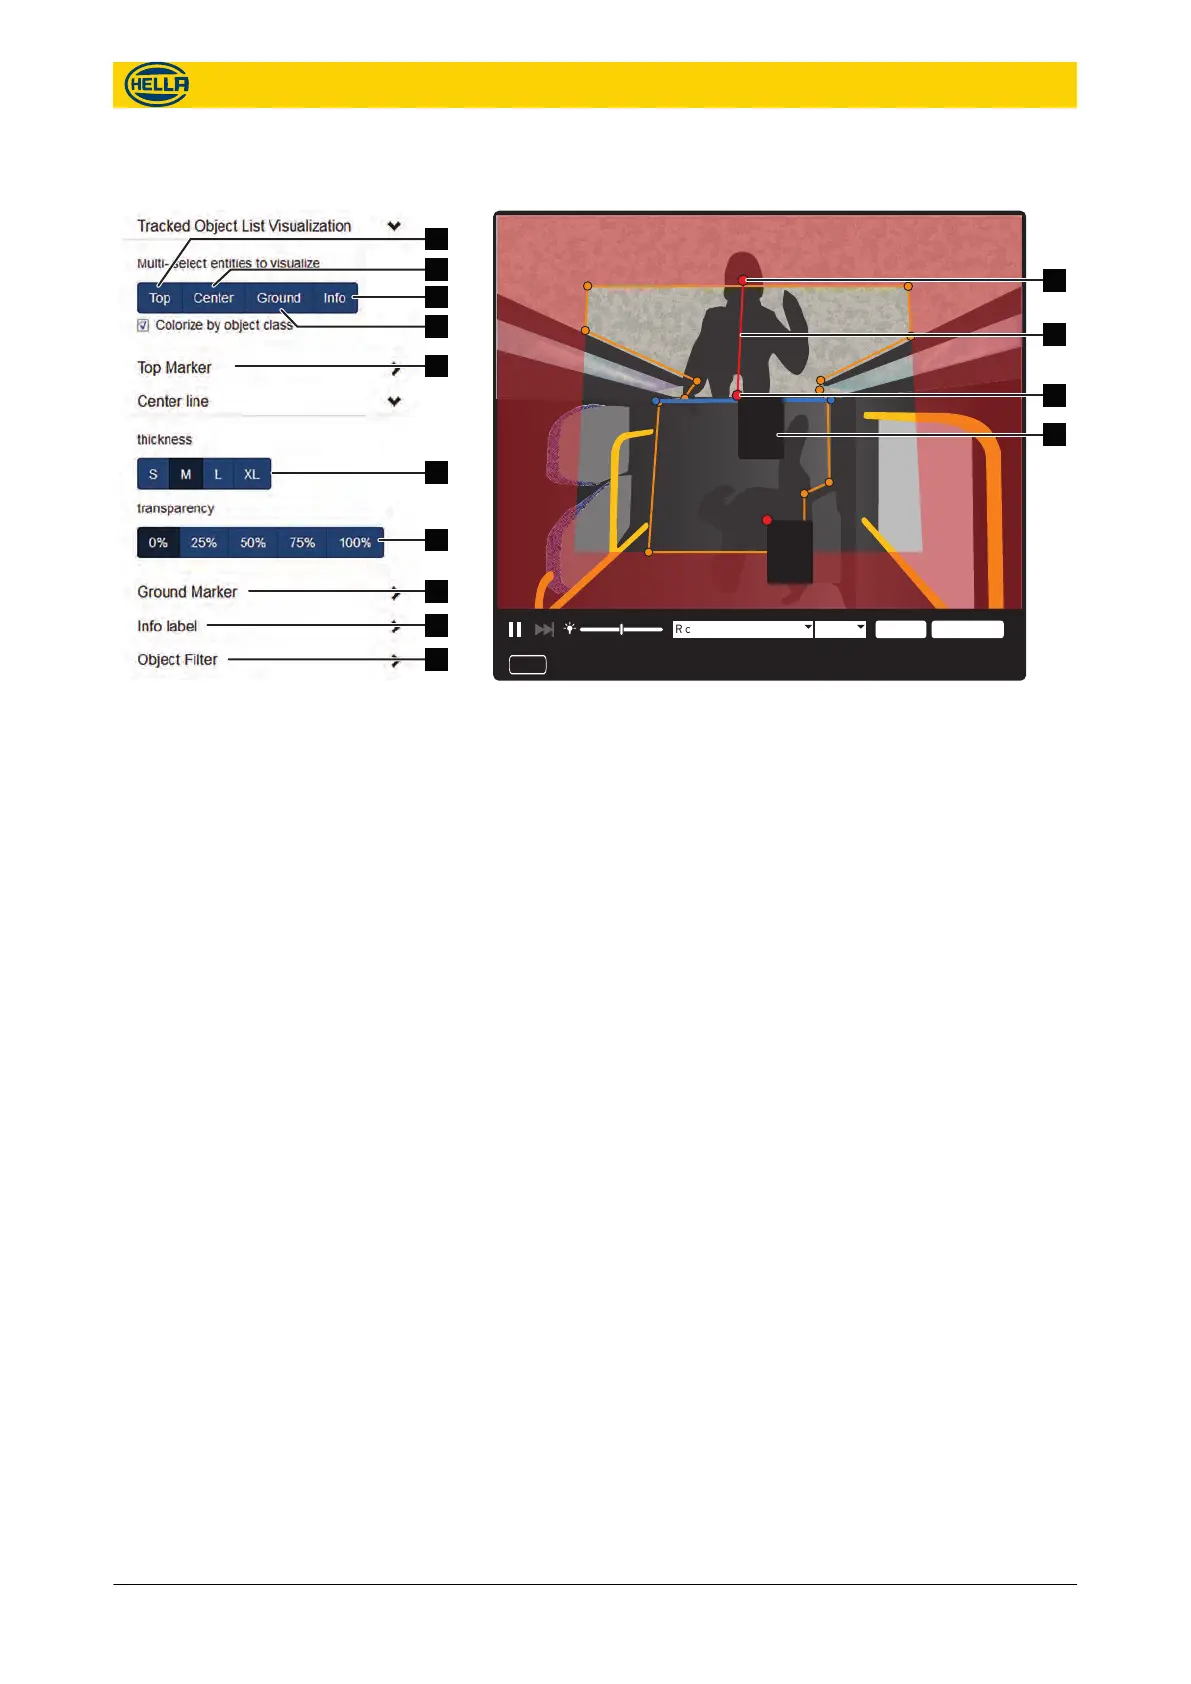
Fig. 70: Diagnostics Live View
Select the type of information to be shown at the camera view:
n Click “Top” (
Fig. 69/1) to see a point at the detected head
( Fig. 70/1) of a person.
n Click “Center” ( Fig. 69/2) to see a line ( Fig. 70/2) between top
and ground point.
n Click “Ground” ( Fig. 69/4) to see the point of an object/person
at the floor ( Fig. 70/3).
n Click “Info” ( Fig. 69/3) to see a box with text information
( Fig. 70/4) of the detected object/ person.
n Choose the size, content and transparency for the “Top
Marker” ( Fig. 69/5) or the “Ground Marker” ( Fig. 69/8).
n Choose the thickness ( Fig. 69/6) and transparency ( Fig. 69/7)
for the “Center line” .
n Choose the Display Position and check the displayed informa-
tion of the “Info label” ( Fig. 69/9).
n Check the objects Child, Adult or Other to show in the live view
on “Object Filter” ( Fig. 69/10)
Track Object Settings
Fig. 69: Settings for Tracked Objects
Configuration
Diagnostics
48 09.06.2017
The reproduction, distribution and utilization of this document as well as the communication of its contents to others
without express authorization is prohibited. Offenders will be held liable for the payment of damages.
All rights reserved in the event of the grant of patent, utility model or design.