17730-241 17 Preventive Maintenance
AR2
™
■
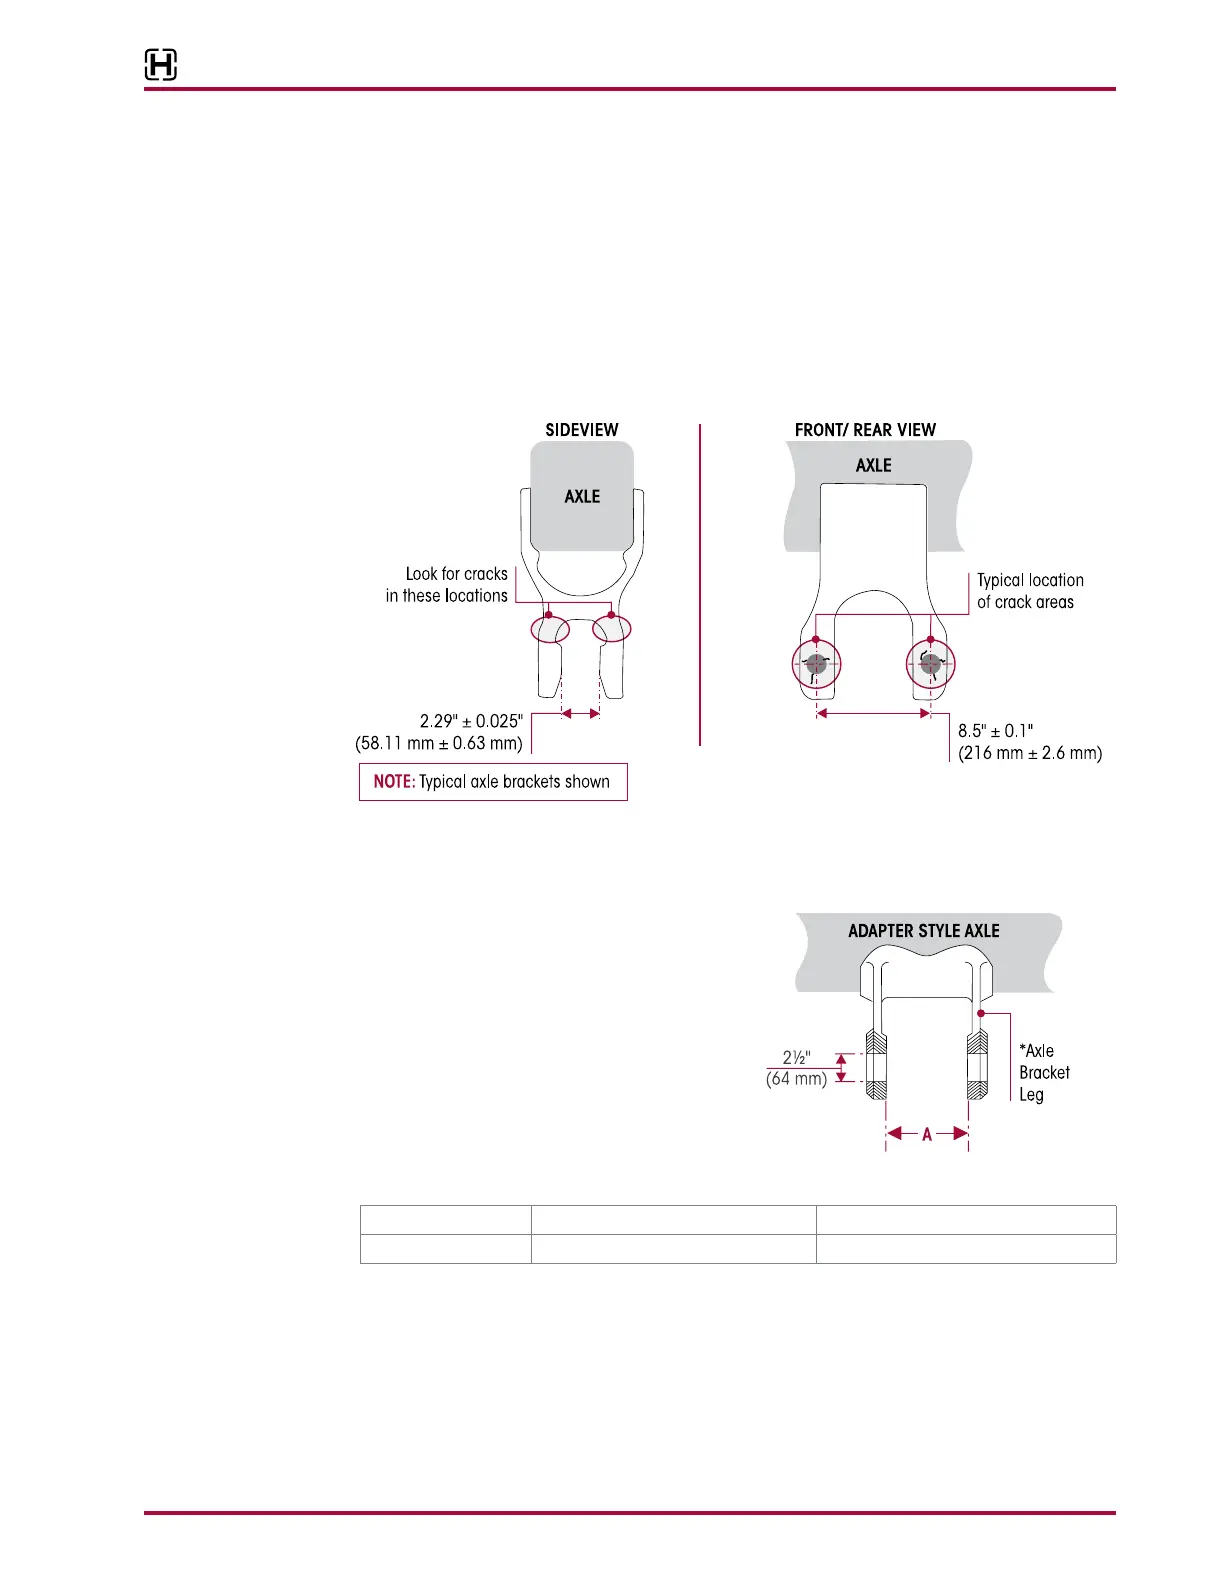
1. Inspect the axle brackets for damage or cracks in the locations shown in Figures6-1 and 6-2.
Any axle bracket that is found damaged or cracked must be repaired or replaced.
2. Measure the distance between the axle bracket legs for correct width, refer to Figures6-1 and
6-2 for measurement location and dimensions. An axle bracket outside of the measurement
range must be repaired or replaced.
3. Consult the vehicle manufacturer for inspection, component repair and replacement
instructions.
■
Adapter Style
1. Inspect the 2½" (64 mm) diameter holes in each of the axle bracket legs as shown in Figure6-3.
2. Remove any burrs or material left there by the
old adapters.
3. Use a new adapter as a gauge for fit, being
sure it enters the holes from the outside of
each bracket leg.
The A dimension between the inside sur-
faces of the axle bracket legs for beam
end adapter style, as shown in Figure 6-3
as dimension, must be as in determined in
Table 6-1.
A
40K • 46K 5¾" 5.765"± 0.005"