Component Replacement 60 17730-241
AR2
™
■
A vertical press with a capacity of at least 10 tons
■
Shop made receiving tool and installation / removal
tool, see the Special Tools section of this publication
for more information
DO NOT USE HEAT OR USE A CUTTING TORCH TO REMOVE
THE BUSHINGS FROM THE TORQUE ROD. THE USE OF HEAT
WILL ADVERSELY AFFECT THE STRENGTH OF THE TORQUE
ROD, HEAT CAN CHANGE THE MATERIAL PROPERTIES. A COMPONENT DAMAGED IN THIS MANNER CAN
RESULT IN ADVERSE VEHICLE HANDLING AND POSSIBLE PERSONAL INJURY OR PROPERTY DAMAGE.
1. Remove the torque rod(s) as detailed in Torque Rod
Disassembly instructions in this section.
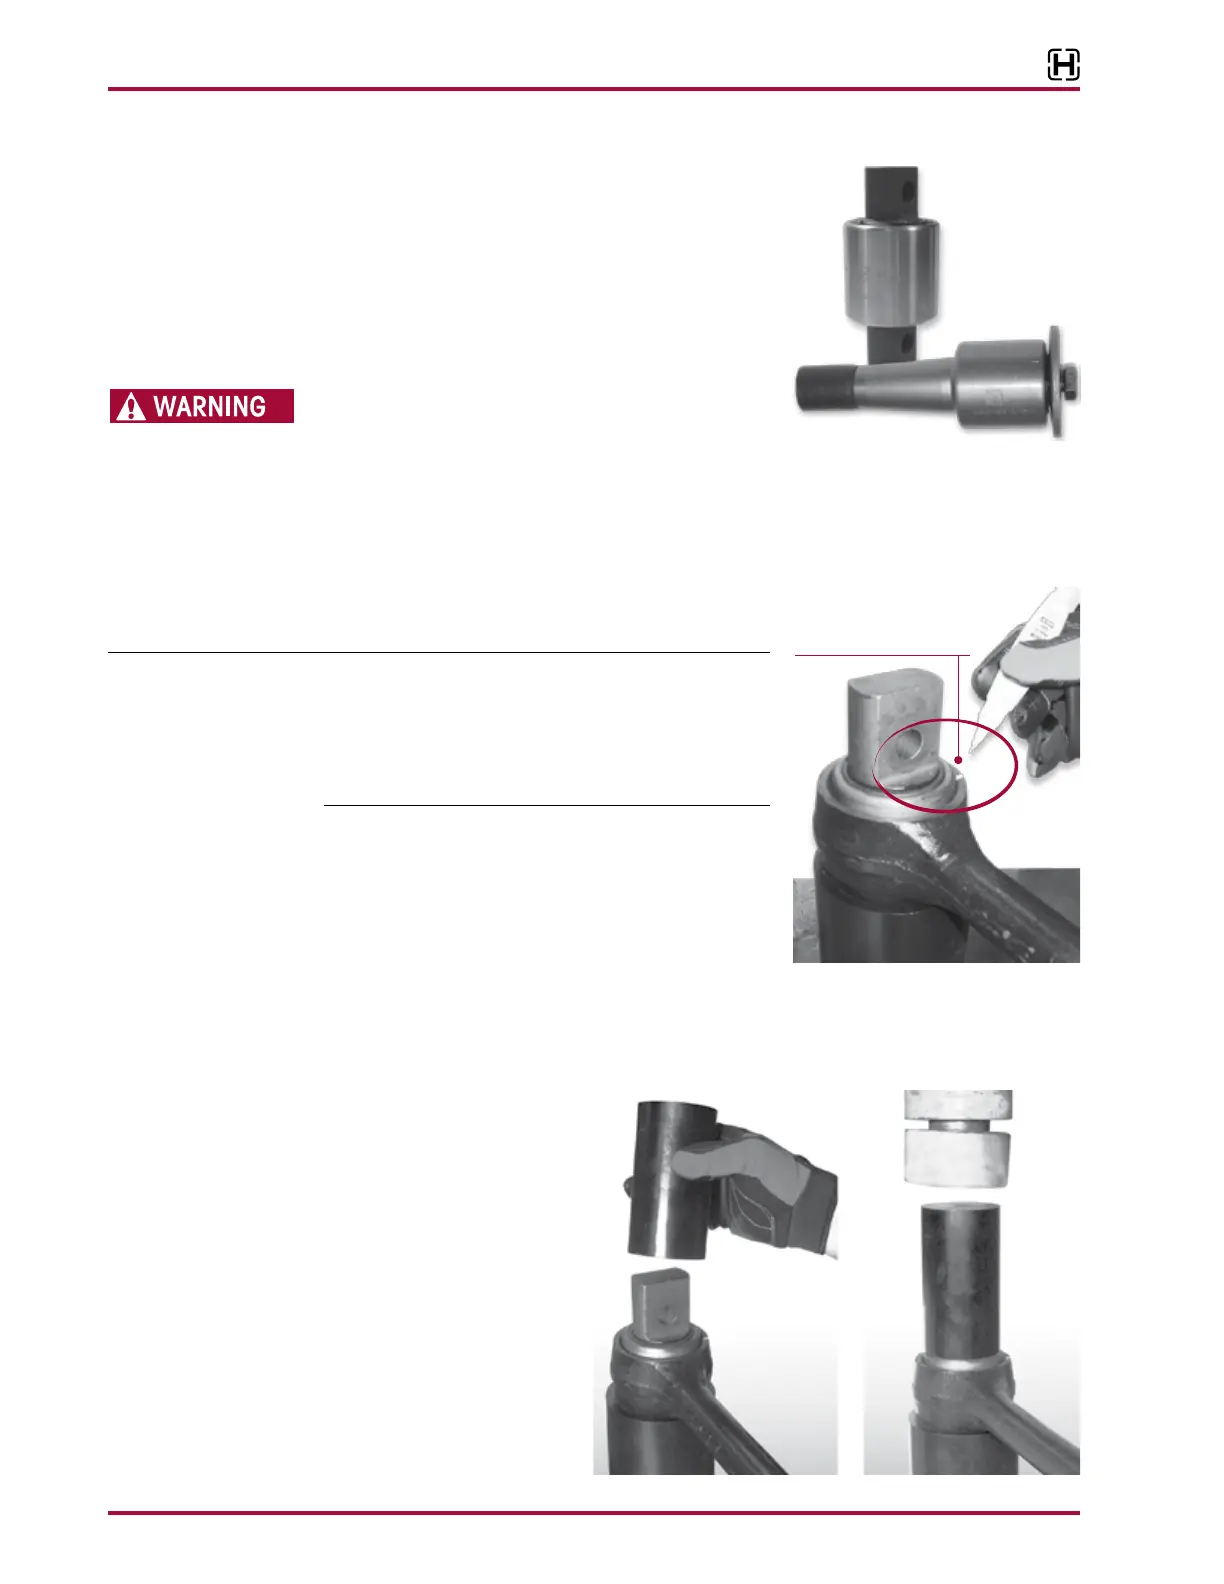
When servicing a straddle mount bar pin bushing assem-
bly, mark the clocking position of the straddle mount bar
pin flats with a paint stick on the torque rod end hub prior
to disassembly, see Figure 8-42. This marking will serve as
a guide when installing the new bushing assembly so the
original clocking position can be retained.
2. Mark the clocking position of the straddle mount bar
pin flats with a paint stick on the torque rod end hub
prior to disassembly, see Figure 8-42.
3. Support the torque rod end hub centered on the receiv-
ing tool. Be sure the torque rod is squarely supported on
the press bed for safe ty.
4. Push directly on the straddle mount bar pin, until the top of the bar pin is level with the top of
torque rod end hub, see Figure8-43.
5. Place the shop made
removal tool on the bar pin
and press until the bushing
clears the torque rod hub,
see Figure 8-44.
6. Remove the fastener from
the tapered bar pin bush-
ing, and support the torque
rod hub on the receiving
tool with the tapered stud
pointing down and the end
hub centered on the tool.
Be sure the torque rod is
squarely supported on the
press bed for safety.
Mark the clocking position of the
bar pin ats with a paint stick
on the torque rod end hub